
Here’s how we got our Canadian Visa! A step-by-step ONLINE application guide with complete list of requirements, biometrics procedure, and other visa tips for tourists.
Applying for a Canadian visa is actually pretty simple and easy. But when I began my application, I found the whole process a bit daunting. The disconnect, I believe, comes from the visa application website. What is supposed to be an easy procedure becomes overwhelming and a bit arduous because the layout of the website and the user journey are complicated and somewhat confusing. I have been living and breathing digital for the past 10 years of my life, yet I still ended up lost and confused a few times along the way.


When I applied for a Canadian visa, I documented every step of the process in order to help guide the readers of this blog. When you break it down to the requirements and basic steps, it really is pretty straightforward. Filipinos can apply for a Canadian Visa in three ways: online, by mail, and in person. This guide focuses on online application, but you may still have to visit the Canada Visa Application Center to submit your biometrics.
CANADIAN VISA REQUIREMENTS
1. Accomplished IMM5257 Form
- This is the Application for Visitor Visa Form
- You can download it from here: Form IMM5257.
- Fill it out digitally. You don’t need to print it out or sign it.
- View the form using Adobe Acrobat. When you view the forms online, sometimes the file won’t load at all, displaying a “Please wait” message instead, especially if you’re using Chrome or Firefox. (Yep, it’s best accessed using IE.) Download it anyway. When you open it using a PDF reader such as Adobe Acrobat Reader DC or Adobe Acrobat 8 Professional, you’ll see that the form is actually there. Fill it out using Acrobat.
- Leave the signature field blank. I struggled so hard finding a way to be able to type on the Signature field, but it turned out that I didn’t have to. You will be providing your electronic signature later in the process (when you’re submitting the form).
2. Accomplished Family Information Form
- Sometimes, it’s the IMM5645E Form. Sometimes, it’s the IMM5707 Form. Both are Family Information Forms. To be safe, submit the form that is indicated in your Document Checklist. In my case, I was asked for the IMM5645E form.
- You can download it from here: IMM5654E.
- Fill it out electronically. Same with the Application Form, if the page doesn’t load, use Acrobat Reader. And don’t sign it. You will be asked for a digital signature later in the application process.
3. Valid Passport
- Scanned copy of the bio page and all pages with visas and stamps.
- Your passport must have at least 6 months validity and signature. If you’re using a new 10-year e-passport, you can find the signature field on Page 3, the page next to the Information Page. If you’re using a 5-year e-passport, the bio page already has a digital signature so NO NEED to sign it again.
4. Digital photo
- Passport-size (35mm x 45mm).
- White background.
- Specs here: Canada Visa Photo
- The website indicated “scanned” when I applied, but I uploaded a soft copy of the photo instead.
5. Proof of Purpose of Travel
Submit proof that you are coming to Canada for a TEMPORARY visit. You can submit any or all of the following:
- flight ticket departing Canada (return or onward ticket)
- your travel itinerary
- hotel booking
You don’t need to submit actual tickets. You can submit flight or hotel reservations, which you can cancel in case your application is denied (so you don’t have to waste money). A few airlines allow flight blocking (although I haven’t tried any of them) and some hotel booking websites have free-cancellation policy. Travel agencies can also issue these reservation documents.
You can find one here: FLIGHT & HOTEL RESERVATIONS
IF YOU’RE INVITED BY A CITIZEN IN CANADA, you will ALSO need to provide the following:
- invitation letter
- a copy of their citizen card
- payslips or tax docs
6. Travel History
Scanned. This can be any or all of the following:
- previous passports used within the last 10 years
- expired and valid visas
- entrance and exit stamps
If you’re living outside your country of citizenship, submit a copy of your immigration status document.
7. Proof of Means of Financial Support
Scanned copies of any or all of the following:
- Bank statement for the past 4 months
- a Certificate of Employment
- Income Tax Returns (ITR)
- proof of assets (land titles, etc.).
If you’re a student: you must also submit proof of payment of tuition and accommodation fees.
If someone else is funding your trip: also submit a letter from the person or institution providing you with money.
8. Business Registration Documents
Only if you’re self-employed or if you’re traveling for business.
You can submit SEC, DTI, or BIR registration documents, as long as it indicates the registered name of the business, the business address, and type of ownership.
9. Letter of explanation
This is optional. It’s not really a requirement, but if you wish to provide more info about the trip, you can submit a letter of explanation.
I wrote a letter explaining why I want to visit Canada and the details of my trip. It’s short and straight to the point.
10. Visa Fee and Biometrics Fee
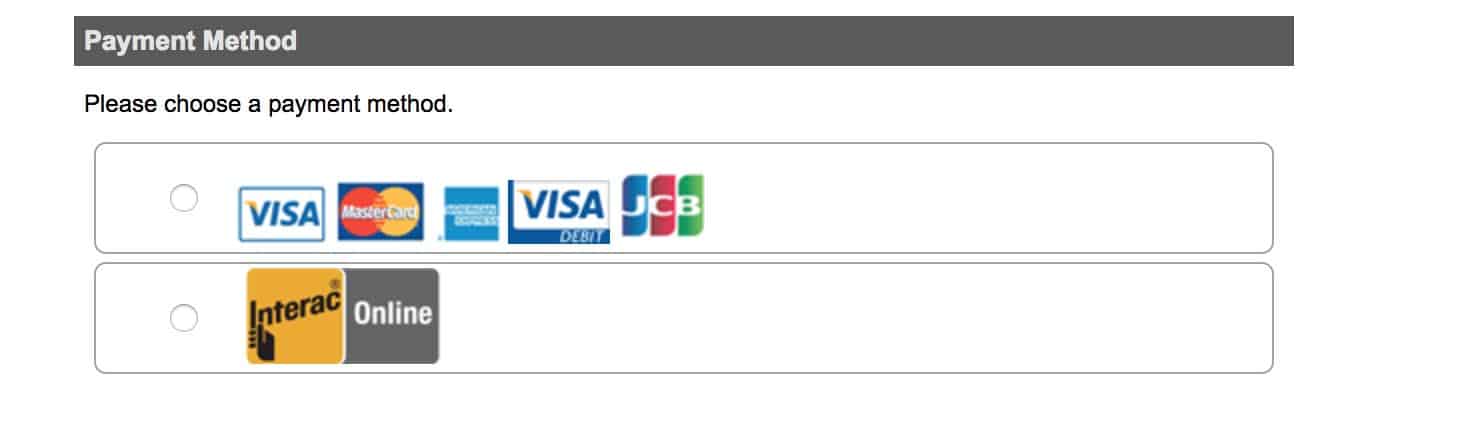
Visa Fee: CAD 100. MasterCard, Visa, and American Express cards are accepted.
Biometrics Fee: CAD 85. MasterCard, Visa, and American Express cards are accepted.
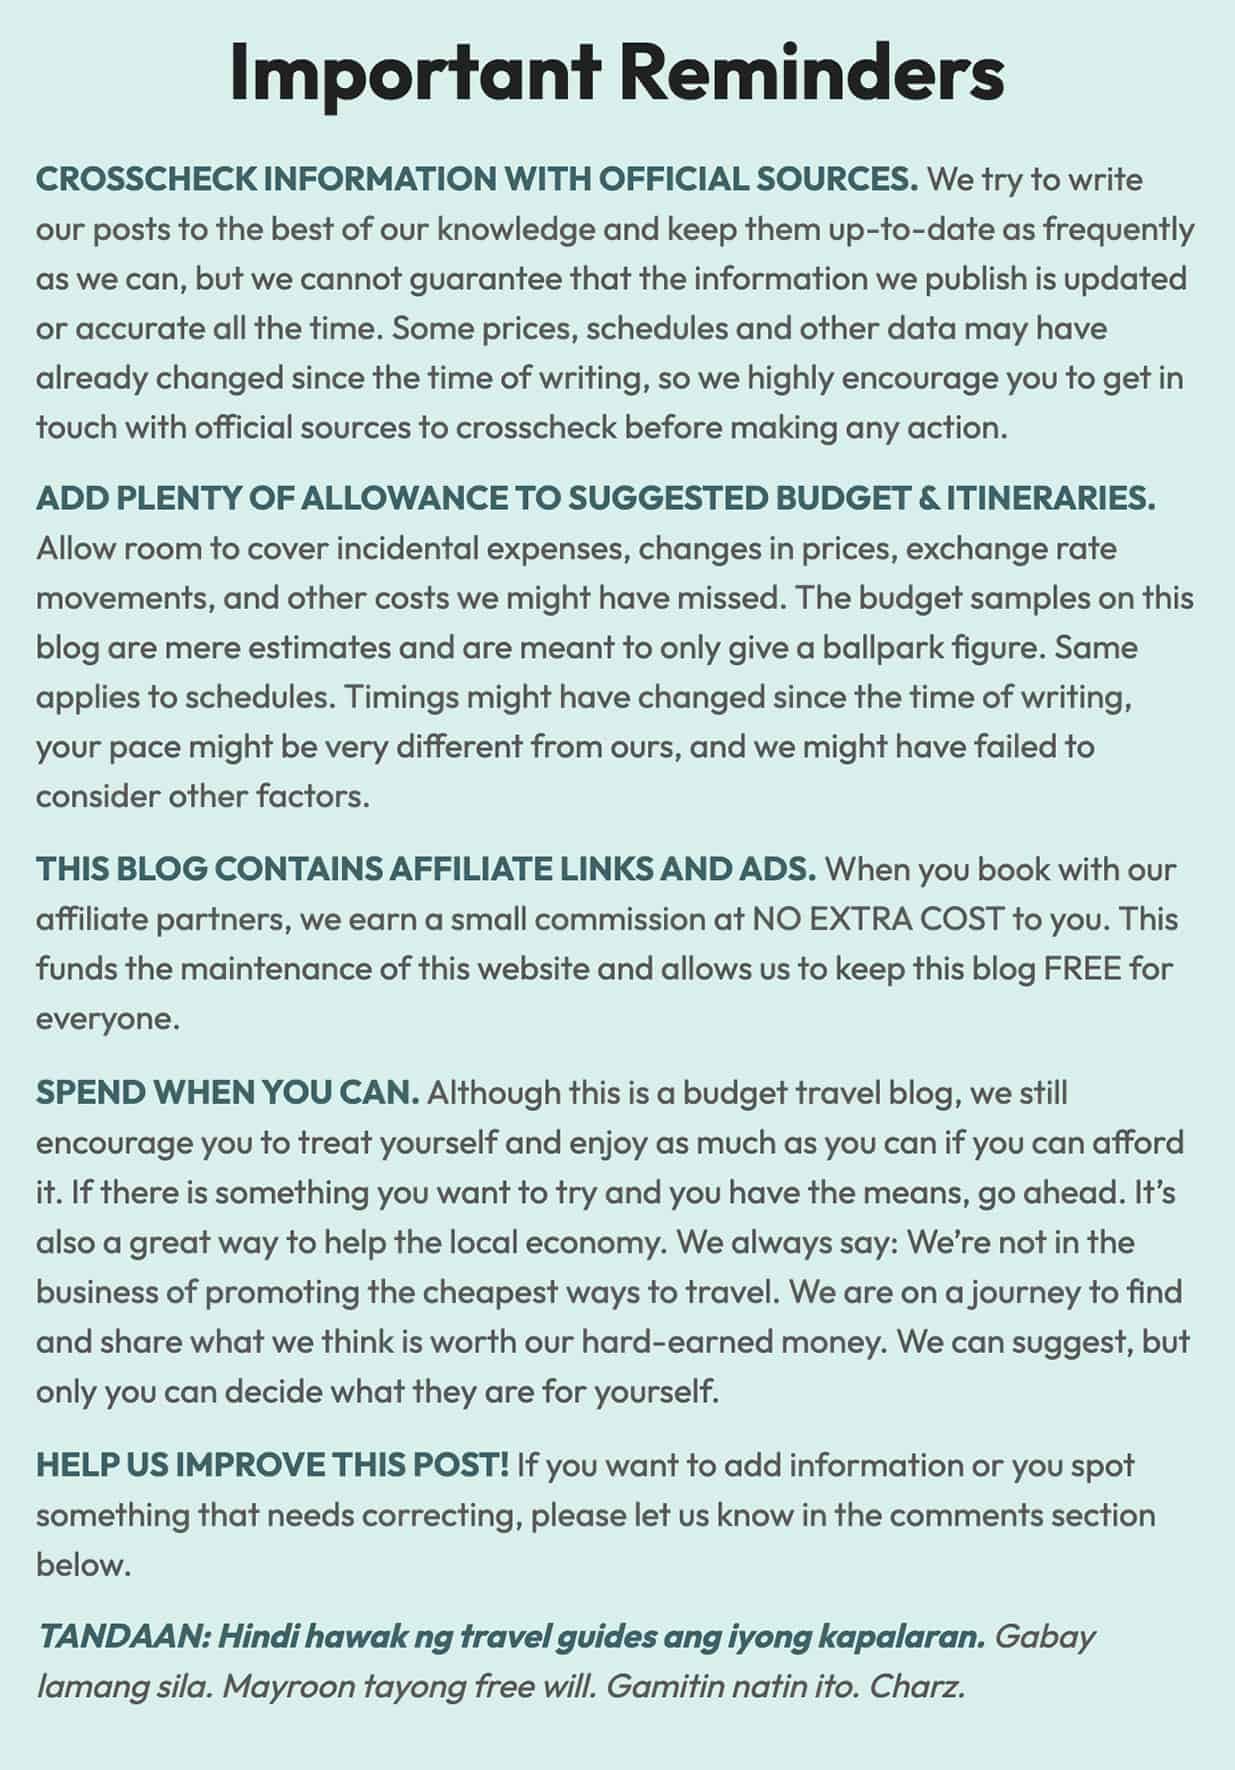
Important Reminders
Here are a few notes that will make your application easier:
- ANY or ALL. You’ll notice that in the list of requirements above, I keep on using the phrase “any or all of these documents.” It’s because in theory, you can submit just one item per document type. However, if you want better chances of approval, we strongly recommend submitting everything that you can provide.
- Only the following file types are accepted: PDF (Portable Document), JPG, TIFF, or PNG (Image), DOC or DOCX (Microsoft Word Document).
- Only one file will be allowed per requirement.
– For example, for proof of means of financial support, if you want to submit a Certificate of Employment, ITR copy, AND proof of assets, make sure they’re in one file. If all your files are in PDF format, you can use apps like Adobe Acrobat to merge all the pages. If they’re image files, you can also insert all of them in a Word document to generate a single file.
– Another example, travel history. If you are want to submit multiple pages of your passport to show the different visas and stamps, you must scan and save all pages as only one file. - The size of each file must NOT exceed 4MB. That’s the maximum size. If your file exceeds, you need to reduce the size. Know that PDF files tend to be smaller in size than Word (doc) files. If your PDF files are still over, recreate your files with Adobe Distiller and set to “lowest file size.” Set it to only 96 DPI (dots per inch).
- Make sure your documents are complete. You won’t be able to submit your application if any of the required files is missing.
HOW TO APPLY FOR A CANADA VISA ONLINE
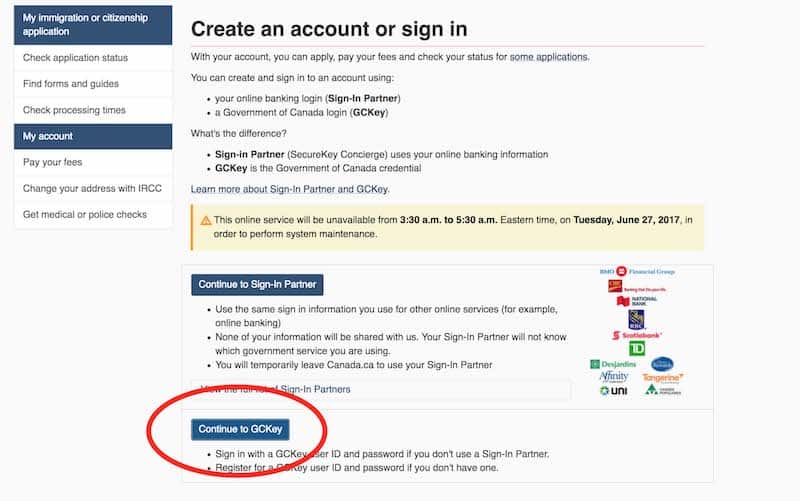
1. Create a GCKey (CIC Account).
What is a GCKey? It’s an account that would let you securely access the online services of the Government of Canada, including the CIC, which stands for Citoyenneté et Immigration Canada (Immigration, Refugees, and Citizenship Canada), the government agency that will be handling your application. You will be asked to create a username, password, and security questions.
Here’s how to create a GCKey/CIC account:
- Visit the registration page of the CIC here: CIC Register. Click on GCKey at the bottom of the screen.

- Click SIGN UP (on the right side of the screen) on the next page.
- Accept the terms and conditions on the next page.
- Create an account. Provide your full name, email address, desired username, password, and security questions and answers. Take note of these details because you will be entering these bits of info many times during the process.
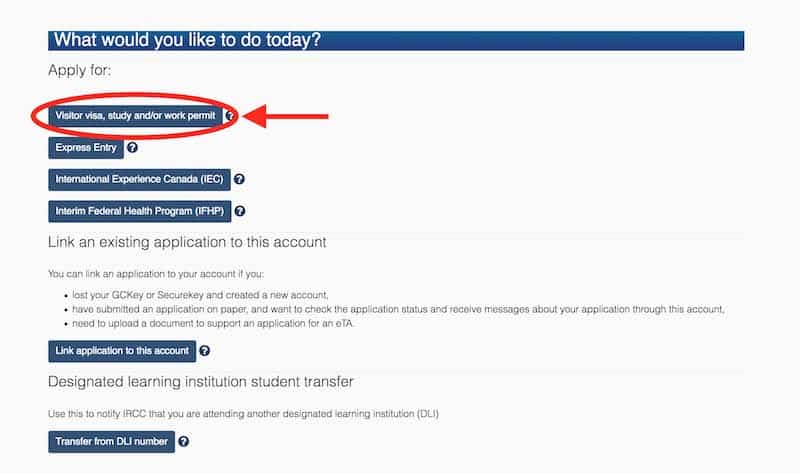
- On the next page, click “VISITOR VISA, STUDY AND/OR WORK PERMIT”. If you are logged out, you will have to log in again. Then, you will be directed to your Accounts Dashboard where you’ll see a list of applications. Since your account is new, the list is empty. Towards the bottom, you’ll find a “START YOUR APPLICATION” section. Click on “APPLY TO COME TO CANADA.”
- On the next page, you will be asked if you have a Personal Reference Code. Under “I do not have a Personal Reference Code,” click “VISITOR VISA, STUDY AND/OR WORK PERMIT”.

- Find out if you’re eligible. You will be asked a series of questions about your trip and your background: how long is your trip, what province will you be visiting, have you been arrested for or convicted of any crime, have you overstayed a visa before? Just answer truthfully. You will also be asked whether or not you have a family member who is a citizen or permanent resident of Canada. If everything is alright, the next page will tell you that you are eligible for a VISITOR VISA. Click CONTINUE. On the next page, click CONTINUE again.
2. Upload your documents.
You will be asked to review all the information you entered in the previous step. Check if things are as they should be, and then click CONTINUE.
You will be presented with a Personal Document Checklist, which displays all the required documents that you need to upload. It looks like this:
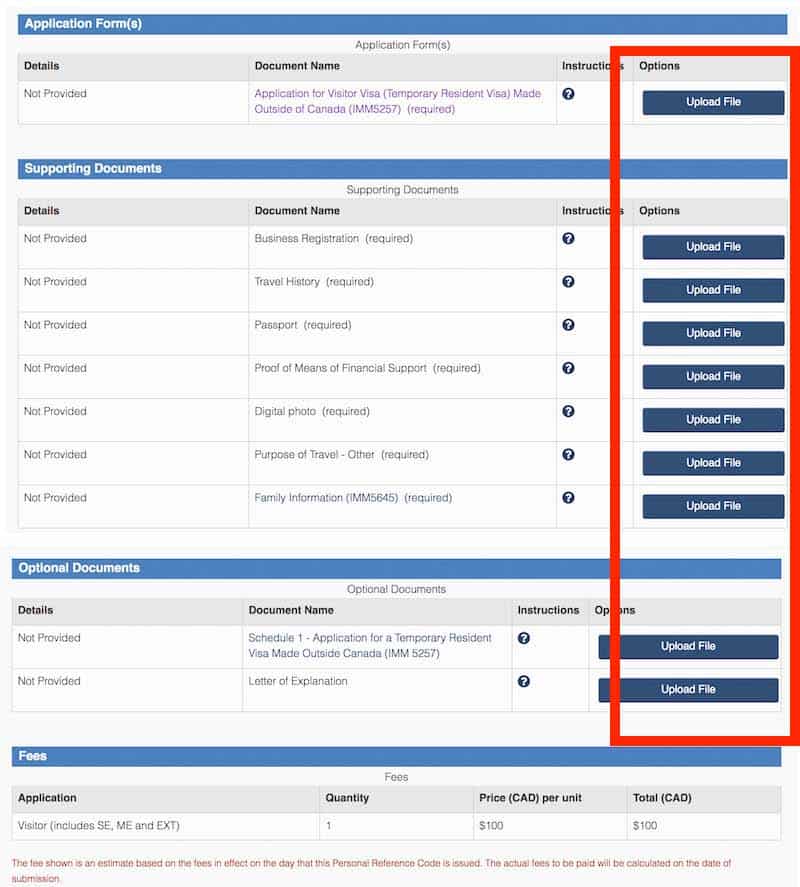
To upload, simply click on the corresponding UPLOAD button on the right side.
You don’t need to upload the documents all at once. If you feel like you can’t complete it today, you can simply log out and log in another day. You have 30 days to complete the requirements.
Again, reminders:
- Only the following file types are accepted: PDF, JPG, TIFF, PNG, DOC, DOCX
- Only one file will be allowed per requirement. If you are want to submit multiple pages of your passport to show the different visas and stamps, you must scan and save all pages as only one file.
- The size of each file must NOT exceed 4MB.
- Make sure your documents are complete. You won’t be able to see the SUBMIT or CONTINUE button if any of the required files is missing.
Once you have completed the requirements and submitted your application, you will be prompted for an electronic signature. You don’t need to scan your signature or anything. You simply have to enter your full name. That’s your electronic signature. Just type your name.
3. Pay the Visa and Biometrics Fee.
Visa, Mastercard, and American Express are all accepted. Again, here are the fees:
- Visa Fee. CAD 100. MasterCard, Visa, and American Express cards are accepted.
- Biometrics Fee. CAD 85. MasterCard, Visa, and American Express cards are accepted.
Just enter your card details and click Process Transaction. It may take a while to process so be patient. Don’t click that button again because you might be double-charged.
Within a few hours, you will receive an email containing your Application Number. It starts with letter V and then a series of numbers.
You will also receive instructions to submit your biometrics.
4. Submit your biometrics.
Effective December 31, 2018, visa applicants from Asia, Asia Pacific and the Americas are now required to submit biometrics. This is a new requirement. When I applied, this was not yet implemented.
But thanks to the members of our Facebook Support Group who recently applied, we have the details and we’re sharing them with you.
Note that if you have submitted your biometrics before and they are still valid, you don’t need to submit biometrics. But if you received a Biometric Instruction Letter (BIL), then you have to visit the Visa Application Centre usually within the next 30 days so they could collect your biometric data. The letter has instructions already, but here it is.
- Set an appointment for biometrics submission. More information on this page.
- Check your email. Once you have secured a schedule, you will receive an Appointment Letter indicating the date and time of your appointment, and the address of the Canada Visa Application Center. It will also tell you if you need to bring anything.
- On your appointment date, show up at the Canada Visa Application Center 15 minutes before your schedule. If you’re asked to bring some documents, don’t forget to have them with you.
Here are the addresses of the Canada Visa Application Centers:
MAKATI CITY
Canada Visa Application Centre
VFS Services Phils. Pvt. Inc.
29th Floor The World Center Bldg
330 Sen. Gil Puyat Avenue, Makati City
Schedule of Biometric Submission: 07:00am – 03:00pm
CEBU CITY
Canada Visa Application Centre
VFS Services Phils. Pvt. Inc.
9F Keppel Center Unit 905 Samar Loop cor Cardinal Rosales Ave,
Cebu Business Park
Cebu City 6000
Schedule of Biometric Submission: 07:00am – 03:00pm
Special thanks to the members of our Facebook Support Group, especially Kate Villanueva and Mary Thrasher, for providing these details.
5. Wait for updates.
From hereon, you will be getting a message each time there is an update to your application. The first few messages will be updates that your application has been received.
To read your messages, follow these steps:
- Visit the CIC Login page and click on GCKey again here.
- Enter your username and password. You will also be asked to answer a security question.
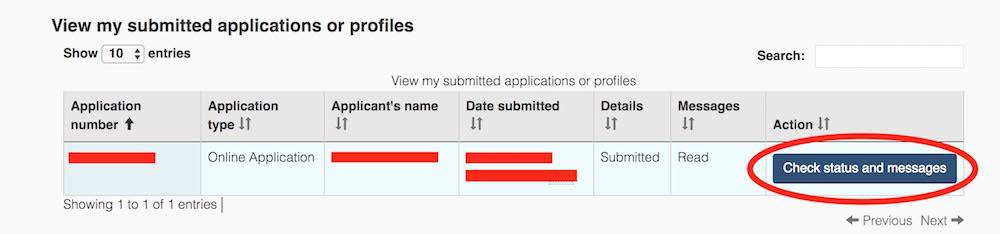
- On the next page is a summary of your application. Scroll down toward the bottom. Under “View My Submitted Application”, click the Check Status and Messages button.

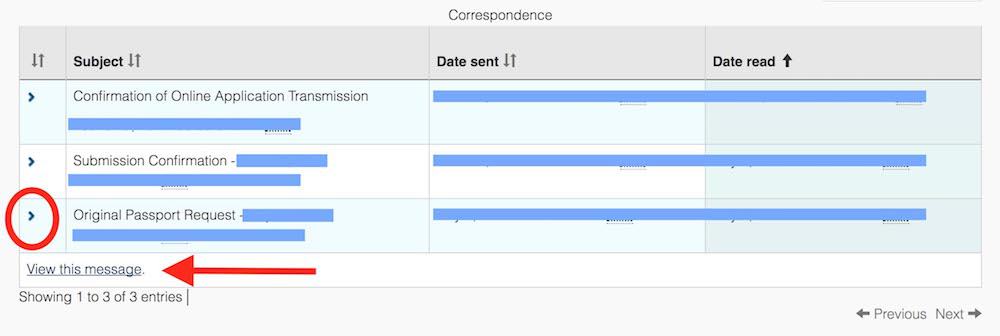
- On the next page, info about the application is displayed. Scroll down to the bottom again. Under Correspondence, you will see the messages. Click on the Expand button and it will reveal a “View this message” link. When you click it, a PDF document will be automatically downloaded.

6. Submit your passport.
If your application is denied, you will receive an email telling you just that.
If your application is approved, you will receive a message that they have come to a decision regarding your application and they are requesting that you submit your passport.
You have two options: by mail of in person.
If in person
- Print out the passport request letter you received from IRCC/CIC. Make sure that the barcodes and application number are clear. You will bring this and your passport to the VFS Office/ Canada Visa Application Centre (CVAC).
- Go to Canada Visa Application Centre (address below). At the CVAC Office, the guard will give you a number and 2 forms: a personal info form and a VAC Consent Form. While waiting for your number to be called, fill out the forms.
- When your number is called submit all the requirements:
– Passport
– Request Letter from IRCC/CIC
– Personal info form
– VAC Consent Form. You can also download here - Pay the CVAC handling fee. P543.15 according to the website. But in reality, I was charged P905 (cash), perhaps including the courier charges. Check out the list of fees and service charges here
If by mail
It’s a bit more complicated. here’s the complete step-by-step guide: Submission by Mail
According to the staff I talked to, the passport will be ready in 2 weeks, but she also said that it usually takes much shorter than that.
Below are the addresses of the visa centers for Canada:
MANILA
Canada Visa Application Centre
29F The World Center
350 Senator Gil Puyat Avenue
Makati City, Philippines
Operating Hours
Passport Submission: 7am – 3pm
Passport Collection: 7am – 3pm
CEBU
Canada Visa Application Centre
VFS Services Phils. Pvt. Inc.
9F Keppel Center Unit 905 Samar Loop cor Cardinal Rosales Ave,
Cebu Business Park
Cebu City 6000
Philippines
Operating Hours
Passport Submission: 7am – 3pm
Passport Collection: 7am – 3pm
That’s it! Once it has your visa, you may receive your passport by mail or collect it at the CVAC office, depending on what you paid for.
Enjoy Canada!
Search for Hotels: Canada Hotels

CANADIAN VISA FREQUENTLY ASKED QUESTIONS
How long does the whole Canada Visa process take?
It varies. Case-by-case basis. It can take as short as two weeks or as long as months. In my case, the entire process from the moment I submitted my application to the moment I received my passport spanned 16 days. Here’s my timeline:
- June 27: I created a CIC account and submitted my application online.
- June 28: I received an update that my application has been received/read.
- July 5: I received an update that they have made a decision and that I should submit my passport.
- July 6: I went to VFS to submit my passport in person.
- July 11: I received an SMS from VFS that my passport with the visa is ready and to be delivered.
- July 12: I received my passport with a multiple-entry visa.
How early should I apply for a Canadian visa?
3 months in advance, to be safe.
Although mine took only 2 weeks, I know people whose waiting game lasted for over a month! So to be safe, I would say 3 months in advance is ideal.
How long is the validity of Canada visa?
I’m not sure if this is standard, but I was given a multiple-entry Canada visa that is valid for until the end of my passport’s validity. In my case, 2 years.
Any recommendations on how to save up for a trip to Canada?
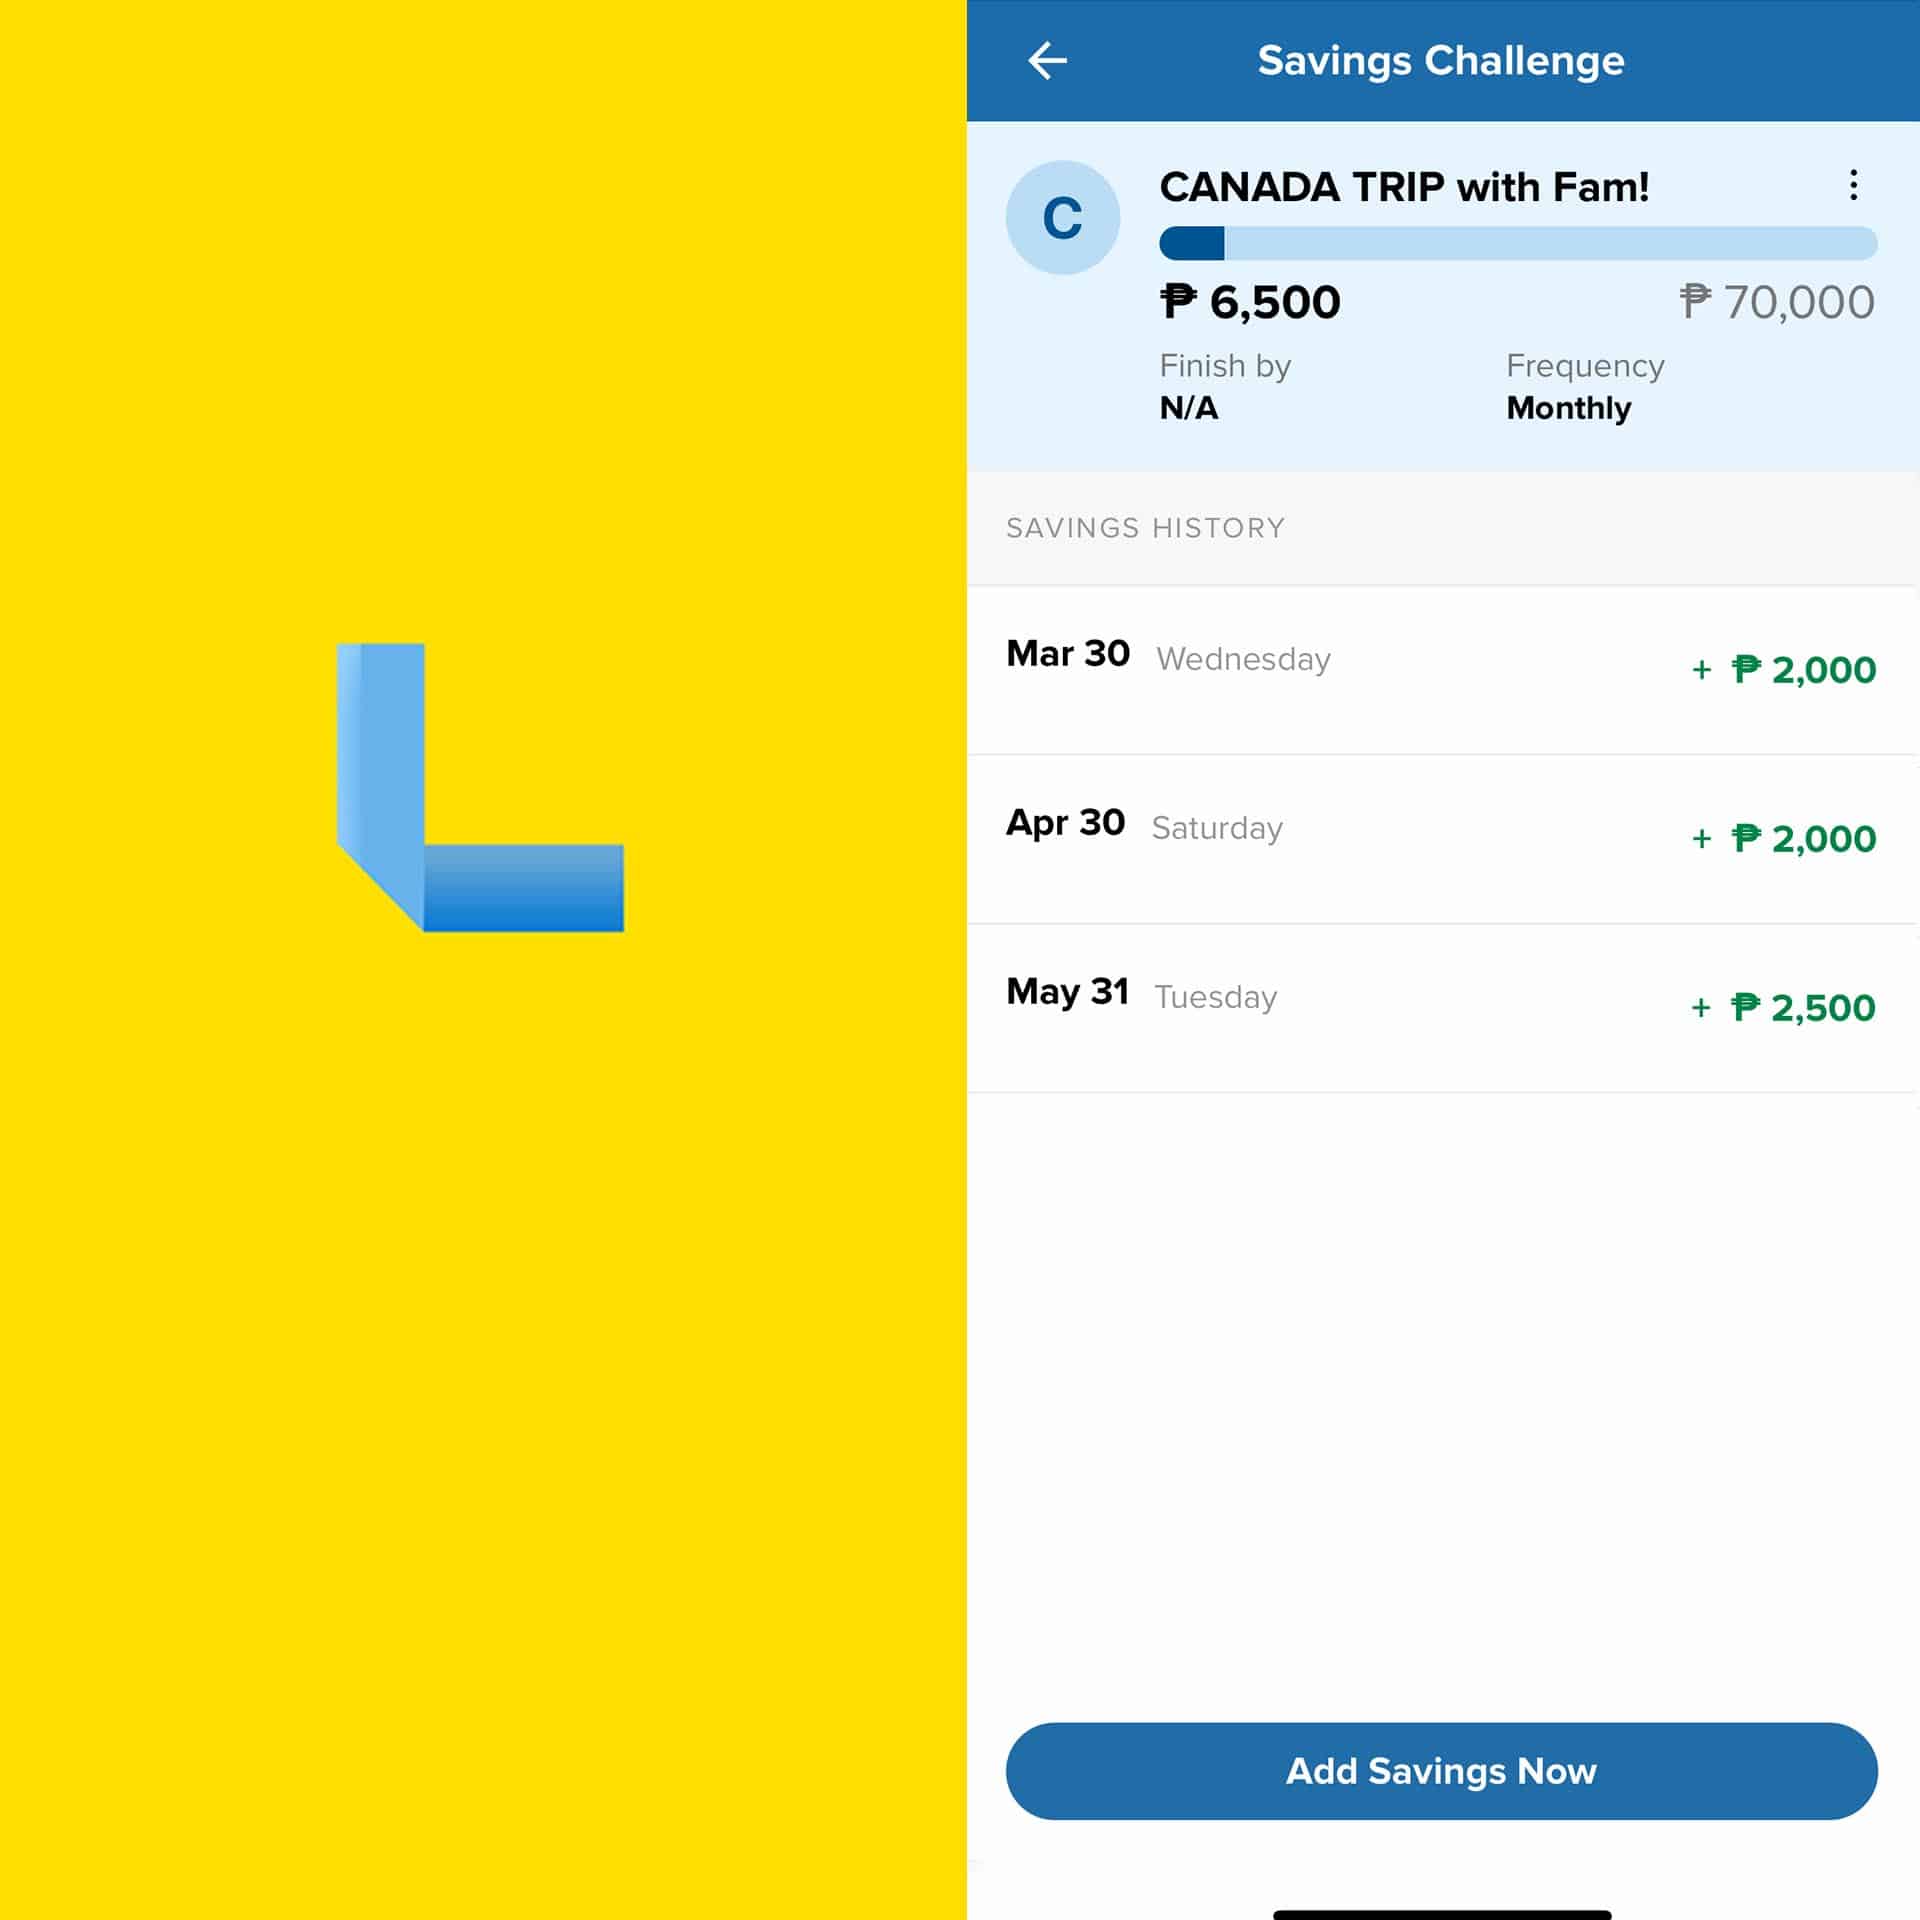
Use LISTA, a mobile app that will help you watch your spending before and during the trip.
Although it was originally created for tracking expenses, it has a SAVINGS CHALLENGE feature. To use it, you need to enter the target amount that you need to have for the trip. You’ll be asked to choose the saving frequency that you’re most comfortable with. Think of it as a saving buddy that will remind you how close you are to your travel goal! Not only will it motivate you to save, it will also get you excited about your trip.
To be honest, we didn’t know about LISTA until they approached and partnered with us to give it a try and see for ourselves. And we were hooked. We have been using it to track our spending and savings!
To be clear, this is NOT a requirement when applying for a Canadian visa. But it could help you watch your finances especially if you have yet to take care of your funds for this trip.
May next trip ka na ba? I-LISTA mo na!
I keep on getting “Please wait” when I open the form. What can I do?
Regarding IMM5257 and IMM5645E Forms: When you view the forms online, sometimes the file won’t load at all, displaying a “Please wait” message instead, especially if you’re using Chrome or Firefox. (Yep, it’s best accessed using IE.) Download it anyway here:
- Form IMM5257: Download here.
- Form IMM5645E: Download here.
HOW TO DOWNLOAD
- If you’re using Chrome, right click on the page and choose SAVE AS. Save the document as PDF.
- If you’re using Firefox, the link will automatically prompt a download window. Choose SAVE FILE and click OK.
After downloading, open it using a PDF reader such as Adobe Acrobat Reader DC or Adobe Acrobat 8 Professional. You’ll see that the form is actually there. It’s just not compatible with other programs.
How do I add my signature to the form? Do I need to print out the form?
Ha! Not reading well. I explained it twice above. But okay, I’ll explain it again.
Leave the signature field blank. You don’t need to print out or sign the form by hand. You don’t need to type anything in the signature field.
Upload the form with the signature field blank. You will be providing your electronic signature later in the process. After you have completed the requirements and submitted your application, you will be prompted for an electronic signature.
Once prompted, you simply have to enter your full name. That’s your electronic signature. Just type your name. No need to actually sign anything.
I struggled so hard finding a way to be able to type on the Signature field, but it turned out that I didn’t have to.
Can I use just 1 GCKey for my family members who are traveling with me?
According to some of our readers who have tried it, you can.
When you start your application, you will be asked if you are also applying for a family member. They say that if you answer yes, your checklist will include requirements for them too.
I haven’t tried this personally so I’m not really sure, but that’s what they say.
What is UCI number? What do I write in the UCI field on the application form?
UCI stands for Universal Client Identification number, an 8-digit or 10-digit number given to anyone who has made a transaction with Canada Immigration/CIC. Every individual gets their own unique number.
If it’s your first time to apply for a Canadian visa or anything issued by CIC, you don’t have a UCI number yet, so you can write NOT APPLICABLE or N/A in the UCI field. If the form doesn’t accept N/A or NOT APPLICABLE, you can leave it blank. I left mine blank.
If you have been issued a Canadian visa before, you have your own UCI number. Check your account to see it.
What is Form IMM 5257 Schedule 1? Do I have to submit it?
When you reach the UPLOADING stage of the application, you’ll find under the Optional Documents an item called Schedule 1 – Application for a Temporary Resident Visa Made Outside Canada (IMM 5257).
We get a lot of questions about whether or not it is the same as the actual application form 5257. The answer is NO. Schedule 1 of IMM5257 is different from the actual Form IMM 5257. It’s a supplementary form that asks for military and government service history that you need to fill out ONLY IF you answer YES to any of the questions under the BACKGROUND INFORMATION SECTION of the actual IMM 5257 form (pages 3-4). You don’t need to fill it out if it doesn’t apply to you. (I didn’t submit that form.)
What’s the difference between Family Information Form IMM5645E and IMM5707? Which should I submit?
Both are Family Information Forms. Some applicants are required to submit IMM5645E. Some are asked for an IMM5707 Form. Who needs to submit what is not clear. But the right form is whatever is written on your Documents Checklist.
In my case, my checklist included the IMM5645E Form, so that’s what I submitted. On the other hand, I have friends that were asked to submit the IMM5707 Form. It varies. Just submit whatever is written in your checklist.
I received a message asking me to submit my passport. Does that mean my application is approved?
Most probably. According to the VFS person I talked to, it’s almost always the case. If you’re refused a visa, you will simply receive an email saying that your application has been denied.
How much money should I have in the bank to get approved?
Hmmm, I don’t know for sure. But like I said in my previous visa posts for other countries, the rule of thumb is to always add the cost of the flights, cost of hotel accommodations, and an allowance of probably USD70 per day.
Every country has its own daily allowance requirement. Most Schengen countries require around EUR60 per day, so we can assume that Canada’s is probably around that figure too. Add all those and that should be the minimum amount in your bank. Minimum, because of course, that can’t be the only amount in your account. You can’t be broke after your trip and expect the embassy to approve your application.
Because of this, my personal rule is P10,000 per day of stay + cost of hotel + airfare.
What does a Canada Visa look like?
Like this:

Do I really need plane tickets before applying? What if I get denied? Sayang the moolah.
As mentioned above, you don’t need plane tickets. You can submit just an itinerary or a cover letter, if you think you have a strong reason to visit. Again, it’s ANY or ALL of the items in the list.
HOWEVER, if you want better chances of getting approved, you can submit flight and hotel reservations. These are different from actual tickets or bookings. “Reservations” are just proof that you have blocked these plane seats or rooms, and you can cancel these in case your application is denied (so you don’t have to waste money). A few airlines allow flight blocking (although I haven’t tried any of them) and some hotel booking websites have free-cancellation policy.
Travel agencies can also issue these reservation documents. If you don’t have time to go to a travel agency, you can have it reserved online. When we apply for hard-to-get visas like Canada and Schengen, we hire Gazelle Travel and Tours, a DTI-registered and DOT-accredited agency. We created a form here so you can contact them completely ONLINE:
✅ GET FLIGHT RESERVATIONS HERE
✅ GET FLIGHT RESERVATIONS HERE
What are the reasons why my application would be denied?
This applies not just to Canada Visa but also other developed countries. The reason is often any of the following:
- You can’t prove that you can financially support yourself on this trip. You probably have insufficient funds or your sponsor is not in a good financial standing.
- You can’t prove that you intend to return to your home country (rootedness). You probably don’t have a stable job at this point, newly employed, or newly resigned, and it’s giving the impression that you intend to work there.
- Your intention/purpose in Canada is unclear. This is why it is best to be specific when you’re detailing the reasons for your visit.
More info here: Reasons Why Visa Applications are Denied
My monthly salary is this much, my money in the bank is this much, and I will be submitting these documents. What are my chances of visa approval?
It is incredibly difficult to say, especially with very limited information. And even if you give me more details, it will still be tough. There are way too many factors at play here.
The truth is, no one and nothing can guarantee approval. The only person who can answer this question is the visa officer evaluating your application.
Sometimes, no matter how qualified you think you are, you can still end up denied getting refused.
![]()
2️⃣0️⃣2️⃣0️⃣ • 1️⃣ • 1️⃣7️⃣ (Last updated)


Hi. Thanks for sharing your visa application experience! Big help. :) One question though, how long did it take for your visa to get approved?
Hi, I submit and pay the application online. I didn’t received any email. Then few hours later may application is appearing in my online account under continue application? What does it mean? The payment didn’t push throuh?
What’s the difference between the Application Form in the first upload to that Schedule 1 second to the last upload? Same ba? I tried to upload the same validated application IMM5257
but error! thanks
Hi Meligrer. Schedule 1 of IMM5257 is different from the actual Form IMM 5257. It’s a supplementary form that you need to fill out ONLY IF you answer YES to any of the questions under the BACKGROUND INFORMATION SECTION of the IMM 5257 form (pages 3-4). You don’t need to fill it out if it doesn’t apply to you. (I didn’t submit that form.)
Thanks for this question though. I’ll include this in the FAQs above.
Based on what I read from the list of requirements needed to upload, you need to have a business registration, what if you dont have?
Thank you in advance for any clarification or infos you can share with me.
I was reading your blog about Canadian application visa.. I wanted to ask if you could help me how to make itineraries .. I’m planning to apply tourist visa this week.. and for the bank statement , is there any specific amount on your bank? Your respondents is highly appreciated. Thank you in advance.
Hi, how much did you have in your bank? Was your visa application approved?
Hi Sir,
i would like to ask im currently working in kuwait and applying in canada but now im on vacation and them my biometric schedule is come can i take this in philippines because the deadline im still in philippines. If i take here is there any future problem when requesting the visa stamp where i will send in place where my biometric done or i can send in kuwait VFS thanks hope to hear you soon.
Hi Allice, di ko po alam kapag ganyang case. Best to call na lang po VFS para sure.
Hi Yoshke,
Thank you for your guide in applying candian tourist visa, actually i red it first before i submit my application online, but up until now after im done with the biometrics i have no updated status of my application, i applied last may 16, done biometrics may 24 and no decision yet. I tried to email vfc to follow up they told me that if i applied online just wait for notice thru my email and reminded me to check my email from time to time. You think theres a way i can follow up direct to the embassy?
Hi Nina,
Till now wala pa din. Ako din plan ko august 5.
Hi Khaye,
Did you get your approval already or any kind of update on your application? I applied June 19 and gave my biometrics last June 24 but no update yet until now. I’m renewing my expired tourist visa (valid May 5, 2019). I’m planning to go by Aug 3 and I’m worried now that I won’t make it.
Thanks!
Nina
Have you checked your cic Canada account. Sometimes they don’t send emails, they just update your status through your account
Hi Khaye, naku, I’m not aware of any way to follow them up. I just waited kasi for updates sa dashboard. :S
Hi Yoshke 00
I just wanted to say how very useful your visa guides are! i often travel, but often check your guides to see if i am doing the right thing. Thank you so much!
Hello,
I got refused on my student visa. I want to re apply again thru online but i dont know how. As of now i have complete documents. Do i need to re upload again all the files?? Thank you
Thank you for taking the time to write this! :)
The answer is there in his story, almost 16 days, refer to the timeline
I’m preparing for my Canadian visa application and i’m having the same confusion as what you mentioned at the start of this article. I’m actually considering asking assistance from a travel agency. Good thing my brother shared this to me. It has answered a lot of my questions. Thank you soooo much for sharing this! :-)
Good luck to you and your adventures! :-)
Hi, Im currently applying for a Canadian tourist visa. However, when I start uploading the filled up forms, preview of the document being uploaded says “Please wait…” Have you encountered this? What did you do?
namaskar sir my Canada Jana Chahta Hoon tournament
Thanks for this article! I learned a lot!
About the validity of the visa, I was advised to have my passport renewed first before I apply because they would base your visas validity on your passport validity. So if your passport has only two years left before it expires, you will be given two years multiple entry.
Is this so in your case?
Hi Uma Arte!
Were you able to get confirmation or at least more information on this? My passport will expire in February 2019 and I’m planning to go to Canada around September 2018 so I was initially planning to apply in June 2018 (3 months before departure date). Would you recommend for me to just renew my passport by the end of this year, even if it’ll expire Feb 2019 pa? Thank you!!
You can renew your passports even a year earlier… that’s what i’ve been doing , no questions asked..
can i renew my passport even if it will expire on Sept 2020?
Yes. We have a valid passport until next year (2020) of Sept. and we renewed ours last April.
Thanks for sharing it helps me alot…
My brother is in Canada. I also have one cousin there. Will having a family-relative in Canada be a pro or con when applying for a tourist VISA?
it is an advantage in my experience.
how to apply if you have a family member who is a canadian resident
Hi! Thanks for this very informative blog. Anyway, I would like to ask if how soon should I send my passport to the embassy when I they notify me to send my passport? Hope you have an idea! Thanks!
Within 30 days of notice date.
you will be given 30 days to submit your passport from the day you received the notice.
thanks much for your help. See you Toronto in September!
Enjoy! :)
hello. the IMM5257 Form asked me the name of person or institution to visit. pro wala akong kakilaa sa canada. purely tourism lang talaga sadya ko dun. ano gagawin ko? hindi mavalidate yung form pag hindi ko nilagyan ang portion na yun. thanks
Write down your hotel name.
Hi Yoshke, kelangan ko po ba talaga ilagay sa person or institution to visit yung hotel namin? Thanks po!
That’s what I did.
just put the hotel name @ contacts info
hi, is it okay to submit target bookings only (not reserved but just chosen, will pay after grated a visa)? I don’t want to pay the airfare, accommodations and transportation tickets until granted my visa.
Hi Lyz, you don’t need to book the tickets yet but you can submit flight and hotel reservations. RESERVATIONS only, not actual booking, that you can cancel if you get denied. More info here: http://www.thepoortraveler.net/2017/06/flight-hotel-reservations-visa-application/
Hi! This flight reservation, since hindi pa sya paid, hindi kami hihingan ng official receipt or proof of payment ng immigration right? Are they aware about this method and understand that this is the best we can do to at least prove na may return date talaga to come back to the Philippines without wasting money in case madeny? Will they not see this as cheating? Hope to hear from you. Thanks so much!
Hi Jennifer,
Nope, it isn’t cheating. For visa application, flight reservations are generally accepted worldwide. In fact, even Schengen countries, the strictest of them all, discourage applicants from purchasing tickets kasi alam nila na pwedeng masayang. They actually encourage to reserve flights lang and not buy.
I tried communicating with them asking how much it will cost if I decide to continue with my reservation and get the ticket from them but they didn’t reply.
Thanks so much for your reply. That’s good to know. If I may ask another question, if we decide to get the reservation for immigration purpose from Gazelle, do we have a choice ba with them when the visa gets approved whether to continue buying the reserved ticket from them or buy it somewhere else? Lastly, kung may reservation kami sa Gazelle, pag nagcheck ba ang immigration sa airline na nakalagay sa reservation namin lalabas ba sa record nung airline na may reservation talaga? Coz I heard minsan tinatawagan daw nila to check if true yung reservation. Sensya na sa daming tanong ha. Thanks so much!
Hi Jennifer,
The reservation with Gazelle will be automatically cancelled unless you ask them to continue the booking.
And yep, legit reservation of flights ang ginagawa nila. Meron ka talagang booking code. But these days, airlines allow a few days na lang talaga to hold the flights. The actual duration nung paghold depends sa kung anong airline. But alam naman ng mga embassies yun.
Hi..
This is a very informative blog. Ask ko lang po, anong ilalagay ko sa item:
1.Name,address and relationshiop of any person(s) or institution I will visit?
2.Relationship to me
Walang ako kakilala po dun. I am traveling alone.
Ano po dapat ilagay dto?
Thanks in Advance.
Hi Roy! I just entered the name of the hotel where I would be staying and their address. Dun sa Relationship to Me, I don’t remember if I left it blank or I put N/A.
hi sir yoshke thanks for this blogs.. very informative..u think, 1000cad is enough funds for just three weeks for visit? am i convince the immigration officer for that funds that i have? tia
Hello, where could i get the personal info form and the vac cnsent form?
If you’re submitting the passport in person, you can get one sa VFS office. The guard will give you these forms upon entry.
If you’re submitting by mail, there will be a link on the website where you can download the forms.
Hi Yoshke!
i am one of the many who got help from this blog, thanks to you VFS just sent a message that we can submit our passprts for our approved visa. now my question is, can i just submit my child’s passport? may pasok kc school and i dont want her to be absent. we’re planning to submit kc personally (with my hubby). i dont know if my idea ka about this, she’s still a minor though, di nga sya pinabiometrics eh.
hope to hear from you soon.
God bless you :)
Hi Janet, thank you!
Pero wala po ako idea. :( Call VFS na lang po to be sure.
Hi Yoshke,
Do I need to have notarized the documents to be uploaded? Thank you!
I didn’t have any of my documents notarized. Tourist stream ung inapplyan ko.
Hello good afternoon hindi po ba mali yong nilagat namin sa privious occupation niya ay nag serve siya as barangay official for 3year, then sinunud namin ang pagiging volunter niya sa kalahi cids Dswd program as Barangay Bspmc at ang current occupation niya present ay ang pagiging member of barangay justice system or lupon ng tagapamayapa hanggang ngayon…. at sa national identity documents hindi namin ni Yes kasi yung i.d cards niya ay walang expiration date… hindi naman pwedi ulit ilagay ang passport kasi na ilagay na siya.. .. hindi bayun makaapekto sa application … or desicion making nakatanggap na kmi ng correspondence letter ng biometric noong tuesday but until now wala kaming narerecieve na enotification or new mesage from online accout . Paper application po yun nilink lang namin sa online account
Thank you so much
good afternoon . i would like to know how much to i pay for (PH or USD for a temporary visitor. i am planning for a 1 and half stay with my nieces in Toronto Canada. thank you
Hi,
I was denied with Canadian Tourist Visa last year, would that lessen my chance to get approved when i apply again next year?
Hello po.. me and my boyfrend from canada plan to get me a tourist visa what do i need to do po?
I have been planning to apply for Canadian Tourist Visa for almost 5 years now…but due to the complicated instructions on their website, hindi ko tinutuloy as I’m afraid to get denied. When I saw this blog, I immediately submitted my application and just yesterday, I got a message requesting for me to submit my passport. OMG. Eto na ba yun? This blog is just soooooooo helpful. Thank you so much!!!
Please update us. Sana nakatulong ng sobra ang blog namin.
hello po I am trying to download the forms but I kept on getting the please wait notification’
Would appreciate a help .
Please read item #4 sa FAQs sa post sa taas po. Na-explain naman po namin in detail.
I just received my passport from CVAC…and yes, it has the Canada Visa on it na. Sobrang nakatulong po. I actually have this saved on my bookmarks. Palagi ko binabalik balikan during the time na nagaapply pa lang ako.
Thank you again!!!
Hi Justine,
ano po travel history nyo bago kayo nagrant ng visa? thank you! :)
HI justine, just want to ask kung may relatives ka doon sa canada or wala?
Im planning to apply kasi maybe june or july and I have a sister their but ufortunately she cant help me about it.
Congrats, Justine! :)
Thank you! My friend is applying for Australian visa so I referred your blog to him. :)
Hi po! kapag freelance civil engineer po work, ano po document needed?
Hi! Are you registered with BIR as a professional? You can submit your ITR and registration docs.
hindi po ako registered kasi former OFW po ako from 2006 to 2015.. i have my previous n po kaya lang expired na ngayon…
Hi! Thank you for this post. I would like to ask if the request letter require you to submit your passport within a certain period after receipt of decision? I’m planning to apply both UK and Canada Visa next month and I’m considering overlapping applications because of time constraint. I’m thinking about the possibility of receiving a decision from the Canadian embassy while my passport is with UK embassy. Can I still submit my passport let’s say a week after I received the decision? Thank you very much.
Hi Khaye, you have 30 days to submit your passport after you’re asked to do so. :)
ano po mas require na submit bank cert or bank statement?
If you’re in a good financial standing, I would say bank statement. But if you decide to submit bank cert, make sure it covers the past 4 months or longer.
How long did it take until you got your visa?
16 days :)
i cant find the personal info form. where can i download that?
If you’re submitting the passport in person at the VFS office, the guard will give you a copy upon entering the room.
Do they have some sort of family application, just like in US visa? Where all of you can submit as one? Thank you.
Hi. Thanks so much for your blog. I will be preparing to apply soon for.me and my 2 children. Were you required to do biometrics? Will I need to bring my children with me, if and when I receive a message to submit oir passports?
Hi,
Can i save the scanned photo in pdf format or strictly in jpeg/tiff?
Thanks.
Hello ask ko lang po pano kung wala po akong work . Then sabi nila i need a job para maaprove yung tourist visa. Ano pong pwedeng alternative way dun. Salamat
Mahirap po talaga maapprove pag unemployed. Di po namin alam ano alternative.
Hi Sir,
Please i need your assistance. Pag aapply na po sana ako this MOnth (Septemeber2018) ng application kaya lang po suddenly nilipat ako ng company. Pwede ko po ba ilagay both company and iexplain ko nalang sa cover letter ko yung reason? Im currently working here in SIngapore.
Hi Rish, sorry, medyo di ko gets, saan mo ilalagay yung both companies? Sa application form?
Sa application form po yung current company ko na ilalagay ko. Yung mga documents po? Like contract? IC, wala pa po kasi ako payslip na matatanggap pa sa pinaglipatan na company ko ngayon kaya yung previous company po which is from mar to august ang binigay nila na payslip copy sakin. and yung for september ibang company na ang magbibigay kaya lang po kasi ngayong month na ako mag submit ng visa application ko. Biglaan po kasi sila nag decide na ilipat ako ng supplier company parang agency po dito sa SG. Man power supplier.
Hi Rish, naku, magulo nga yan. Naging complicated lalo. Pero pwede mo itry na iexplain sa letter na lang na you have just moved
I think sa COE or contract, dapat yung current company lang.
Pero dahil hindi ideal yung situation, may chance talaga na madeny.
Thank you the poor traveler. Going to Toronto this April. You are a big help for my visa application and approval.
No prob, Grace! Enjoy Toronto! :) And visit Niagar-on-the-Lake too!
Yes, I would be going to Niagara Falls and Hamilton also. My first application was denied, but I reapplied after 5 days bcoz based on what I’ve read on other blogs, mas mabuti daw mag reapply kaagad and explain mo lang sa cover letter mo to refute their visa denial. Kaya ayun, inaprove nila, multiple entry pa. hehe
Hi Ms. Grace,
ano pong travel history nyo bago kayo ma approve ng visa? thank you :)
Hi Ma’am,
Pwede niyo po ba kami mahelp sa cover letter niyo or pwede po ba makahinging assistnace sa pag apply? PLease? Pwede po makuha ang email address niyo? Thank you so much po for your help!God bless you po!
hello po,, pwede mo po b mashare yung cover letter mo sa 2nd application mo po?? thank u :)
Yay! Enjoy Canada! ❤️
Hi! Just want to ask about the 5257 form 2nd page #8 Immigration status of applicant in country where applying. Do I have to choose Temporary Resident? How about the validity? or do I have to choose the fifth box? Thanx
Hello Yoshke, I’ve been following your blog for a long time now and been reading your articles especially on VISA application. In fact, I followed your Indian Visa application and was granted with eVISA just yesterday : ) my 12th Asian Country to visit to date. Applying for Canadian Visa is taking it to the next level of travel and this article will definitely helps a lot! Question though, since I don’t have a plane ticket reservation (DIY trip) would you recommend I produce an invitation letter instead? I plan to visit my Aunt in Vancouver and I can request her to produce this letter. Also, do you have an idea if I have to notarized it? I plan to cover Vancouver- Edmonton (Banff) – Toronto. Thanks a lot! and really helpful blog.
Hi Jeffrey, if the purpose of your trip is to visit your aunt, then yes, a letter from her will be very helpful. Not sure if this has to be notarized though. But just make sure your aunt’s full name and contact details are there.
Hello Yoshke and Vins, as of writing this reply, I am now granted with multiple entry visa to Canada and coming to visit this October 2018, Yey!!! childhood dream fulfilled! what I initially thought is taxing, stressful and scary process eh madali lang pala! simply follow your instructions (no help needed fromtravel agency – which was my original plan). Heartfelt thank you : ) and please continue writing it really helps a lot! : )
Thanks, Jeffry! Saan sa Canada ka punta? Enjooooy! :)
This reminds us that we need to write na rin pala our Canada travel guides. :)
Actually, aside from Visa Application I was wondering if you have Canada guide(s) as well? I plan to visit Toronto – Edmonton (Banff) – Vancouver, will visit friends and family but definitely solo trip for me : ) at saka depende sa airfare sale hahaha (expensive ticket) any DIY tips are highly appreciated.
Hi Jeffrey, we’ve been planning to but could not find time to write our Canada guides. haha.
Hi, TPT/. I am going to need Canadian visas for myself, my wife and 2 kids. We are going to an Alaskan cruise, and it covers a stop in British Columbia. We are well traveled, having been to the US multiple times, Europe multiple times, and all over southeast asia, both individually and as a family. . So I think we will probably be granted visas. My problem is that my children are already in the US ahead of us. One is studying in New York, and the other is vacationing in California. Would it be possible to apply together, or do we do it individually.
Thank you.
Hi Donn, as far as I know Canada doesn’t allow group applications online. It has to be done individually. http://www.cic.gc.ca/english/helpcentre/answer.asp?qnum=425&top=16
Hi. I had an early retirement from work and I have been leasing out my condo unit for a couple of years now, mostly to expats, as a source of income. I’m almost 50 and I want to start traveling. I’ve been to most of Asia and Australia. I want to visit Canada next as I have a friend there. My concern is, I don’t have a tax return for the rental as it is only 1 unit. I do have my property tax, dues, title for it though. I also have the lease contracts and tenant info. Would it be a problem if I don’t have the tax return? I don’t see it as a business but more of a passive source of income. Thanks in advance for your insight.
Hi Pat, the ITR isn’t required. It would be helpful, but not required. You can submit other proof of income like those you mentioned (lease contracts, etc.).
Thank you very much!
Hi,
May I know how you were able to open the Form IMM5257? It always goes directly to the Please Wait page.. Please help! :) Thanks!
Use Adobe Acrobat Reader DC or Adobe Acrobat 8 Professional
Thanks for your reply! I’m actually already filling up the form at the moment. There’s this portion where you write the Name, address and relationship of any person(s) or institutions you want to visit. Did you just write your hotel name here? Or just N/A since I’m not visiting anyone there? :)
Thank you so much for your help! :)
Hi! I answered this a couple times already. (See other comments.) Just write down your hotel name.
Hi! I am currently working in Qatar and been thinking of applying a Canada tourist visa in the Philippines. As you know, the country im working in doesn’t collect any taxes from its workers. I just don’t know how to process my ITR as past of their requirements. Can you help with this please? Cheers!
ITR is optional. Their website says ANY or all, so if you don’t have ITR, you can skip that. But it would really help if you can provide other proof of employment and financial means.
Also, should i scan my passport size photo or just send them the soft copy? I got lost with your “digital/scanned” part. Haha
Re photo, upload the soft copy.
Thanks for responding to this. Do you also know if i can send a screenshot of my bank statement from BDO online banking or do i really have to get it from the bank? Thanks!
Best to get it from the bank.
Thanks for this article! Got my visa (multiple entry rin :)) last Sunday. Kung hindi ko siguro nakita tong blog niyo nahirapan ako magcomplete ng requirements, pati yung sa signature ng forms :)))
Hi Jade! Thanks for returning to our blog to share this! We’re always happy to be of help. Congrats on your visa!!! Enjoy Canada. :)
Hi i am inviting my parents and sister for a tourist visa here in Canada and i am planning to apply it online, do i need to submit also my requirements with them like my T4, notice of assessment etc. or they only ask for their requirements? Thank you!
Hi. I have a sister in Canada and my parents who are both senior citizens and I am planning to visit her and her Canadian Family. I am single, government employee and a post graduate student. But in assets, I dont think I will be able to satisfy that. Can business be inclded as assets? Thanks
Yes, pwede. Basta nakapangalan sayo.
Hello Sir, tanong ko lang po kung hand written po ba dapat sa forms nai-fillup? or i need a PDF editor po?
PDF editor. :)
Hi again Sir,
Dun po sa Signature, kapag tinatype ko na yung name ko ayaw po mag respond. Parang hindi ko po pwede lagyan ng name pero sa date okay naman po.
Hi Rish, please read Frequently Asked Question #5 above.
Thank you so much Sir sa mga promp replies niyo! =) God bless!
Hello po, panu po pag ung bank stmt ko is png allowance nalang? Naka booked na po kasi ko return tix (manila-windsor ca) and accommodation (airbnb)… malaki po ba chance na ma qpproved ako, since nameet ko naman po ung requirements except sa bank stmt which is allowance nalang pero naka set naman sya 100usd/day may17-28, 2018 ung flight date
Student/self employed din po ako, day trading crypto currency pero walang itr, pero may proof naman po ako na babalik ng ph kasi student pa, may school cert naman then booked ticket din po ako mnla-bali, may impact po kaya un para ma approve ako? Thank you po
Hi, how about if will just go there for studying, a sandwhich program for only a year…student visa ba? what’s the requirements po.. . Thank you..
Do I need to submit summary report of my travel history? Or I just need to scan all the stamps and visas?
If you can submit a summary report, that would make their jobs easier. I submitted a summary report too. Naka-table. :P
Hi Sir,
Sorry po sa napaka daming tanong, sa travel history po ano ano po mga pwede ko ilagay dun? Pwede niyo po ba iemail sakin yung lahat ng documents na sinubmit niyo Sir? Para may guide lang po ako. PLease? =( nag tanong na po kasi ako sa Gazelle which is recommended niyo for flight blocking. Nag avail ako sakanila. Pero ang sabi po sakin sa visa assistance hindi nila ko ma accomodate dahil working po ako dito sa SG. Diff countries diff req’s daw po kasi. PLease Sir =(
Sa Travel History, I submitted:
– copy of info page of previous passports used within the last 10 years
– copy of all expired and valid visas
– copy of all entrance and exit stamps
Hi question lang po, I have my salary certificate dated March 18, 2018 from my employer and til now hindi pa ako nakakapagsubmit ng application ko online. Will it affect my application or should I request my employer for a new one but it would take 2 weeks. Thank you.
I think pwede pa, pero syempre, mas better chances pag mas bago.
Hi! Ask ko Lang Kung renewal need pa bang mag present Ng requirements, since I already used my visa twice, multiple 3 yrs , and if will expire on aug 2018. Am planning to pay a visit to my brother who died in 2015 in Canada , nagiisa lang siya doon , since divorce siya at ang nagasikaso lang yung “ common wife” base sa death certificate. Do you think I have a chance to have visa , if COE is the only documents to be presented? . Currently have US visa & Japan visa . Thank you.
Hi Connie, I’m not sure sa process kapag renewal or if same process lang din. :(
Do we need to submit 4 months of Bank Statement? or Bank Certificate is enough? Is it okay to submit 3 months Bank Statement only? The bank told me that it will take 2-3 weeks to get the bank statement 4 months ago.
Hi Lea, as explained in the article, you can submit “any or all” of the listed requirements. The more supporting docs you submit though, the better your chances.
Hello Yoshke!
I am planning to leave for Canada on June 13-18 for a business trip. However, I have another trip on US on May 15- June 1 2018. Travel agencies can no longer commit that they can have my passport back in time for the schedule. It seems like Online application is the best options left for me.
Id like to ask, after you were approved and were required to surrender the passport for stamping, what is the maximum grace period/timeline set by the embassy to surrender my passport? Planning to upload all documents while in the US, and God-willing once approved, Ill surrender my passport for stamping by the time I get back on June 1.
thanks!
30 days.
Hi Yoshke,
Thank you sa vlog mo sobrang nakakatulong. Naguluhan lang ako pag mag papasa sa vfs ng mga docs meaning yung mga application form walang hand signature? Sorry naguluhan ako. Saka same ba yung family information na imm5645 and imm5707??? Sa site kasi ng cic.gc.ca ang nakita ko na form imm5707 ito naba ang bago? Naguluhan talaga ako. Thank you
Pag mag papasa sa vfs ng mga docs meaning yung mga application form walang hand signature?
—– yung application form, di isusubmit sa VFS. It will be accomplished and submitted online (if online application, which is yung topic ng post na ‘to). If online application, as mentioned in the post, you will be asked for an electronic signature upon submission of your application. (Although it’s called an electronic signature, you won’t be signing anything. You will just be prompted to enter your name.)
Saka same ba yung family information na imm5645 and imm5707???
—- I didn’t submit imm5707. Yung 5645 lang.
Hi there, Thank you for this helpful guide. I am working for the application of my sisters and brother and their child. They have new passports with no travel history yet as they have not left the country. Do you have an idea what I can do for this. Thank you
In this case, just upload a copy of their passports.
Hi Sir,
I hope makapag reply po kayo sa mga questions ko.
I have a sister living in Canada na po and plan to visit her this year. Im single currently working here in Singapore as an admin executive (engineering Company). If papalarin po na ma grant ako ng tourist visa okay lang po kaya na magtravel ako lets say nag end na yung contract ko dito sa work? HIndi po kaya ako mahaharang nun?Thank you po.
Hi Rish, in theory, okay lang. But it’s hard to say how the immigration screening will go through, if mahaharang ka or hindi. Depende yan sa maraming factors.
Thank you so much for posting this article. I applied for a tourist visa together with my mom, dad, and husband. We got approved! I tried several times applying for a tourist visa when i was single and i was denied twice. But when i read this article, i was encouraged to try again and luckily i got it this time. Your website have been really helpful. The way you describe the procedures and steps to follow were clearly explained.Also, instead of availing the services of tourist agency in filing our visa it was timely that i have read your article and guess what i have saved almost 40k since the agency is charging 15k per applicant. I filed our applications myself and I just followed the steps that you have enumerated. Hence, from the bottom of my heart, thank you and more power to you and your team! :)
Hi Kat/Yoshke Dimen,
Please advise i am planning to apply TR multiple visa with help of this article for me and my Wife.
Can i upload both Visa applications/family information forms online together in 1 file using my GC key?
can i upload both passports detail together?
Hi Rizwan, unfortunately I haven’t tried applying for a Canadian Visa as part of a group so I don’t have answers to your questions. :(
Yes….Agree. Thank you Yoshke Dimen so much for your blog site. very informative and helpful
—————-
Hi Kat,
Question…just curious when you got denied, did you receive the same email as “Decision has been made etc…..” and requested for your passport? How did they inform you of your Visa Denial?
Thank you.
Hi Kat! Thanks din for sharing your experience! And congrats! Enjoy Canada! :)
Bat ng eeror ako sa pagupload nung unang form plang -gusto ko online na kasi pra mas mabilis
This blog post is very helpful. Thank you :)
I would just like to ask if the Statutory Declaration of Common-Law Union (IMM 5409) should be filled out even though I’m not married or anything?
Thaaank you
Ah, kami po, we didn’t fill it out. We only submitted IMM5257 and IMM5654E.
Hi! Thank you so much for this. Their website’s really confusing. I’m applying my grandparents (grandma and her sister) a tourist visa. And already have their requirements. Their leaving for US in June and planning to take a tour in Canasa as well. Do I need to create a 2 seperate accounts for them? Or can i just upload it altogether in one account? I’m using my email for them both.
Hi Elle, as far as I know Canada doesn’t allow group applications online. It has to be done individually. http://www.cic.gc.ca/english/helpcentre/answer.asp?qnum=425&top=16
Hi! It was mentioned above that if i want to submit my requirements in person i will need to get a passport request letter that is from CIC? Please, how can i get a copy? Thank you in advance for the help. :)
No, the “passport request letter” is for those who finished submitting the requirements online. It’s sent by CIC via email and via your CIC account’s mail.
If you’re planning on doing the entire application in person, I don’t know what the process is. Contact VFS na lang.
Hi! For the Visitor Visa Application Form, should it be validated first (for the bar code) before uploading? Thank you.
Hi,
Does this type of visa allow you to work in Canada? Do you know if you need to obtain employment before applying for a VISA or after?
Kind Regards
Taylor
Hi Taylor, we have no idea about anything about working in Canada. We focus on tourism only.
Hi! should the visa application form be validated first (for the bar code) before uploading? Thank you.
Hi! Thank you so much for posting this as things seem to be confusing on their website. I will be visiting Canada as I was invited to attend a training as part of my work here in the Philippines. The company sending the invite will be paying for everything, and they have sent a letter stating this with the note where we will be billeted and the length of the training. Part of the costs will also be shouldered by my company. If my company can give financial documents, should I ask for the Canadian company to send the same or should their letter of invitation stating their support of transfers and lodging suffice? Should I also submit my own bank statements or hindi na necessary yun? I will attach my CoE and ITR of course. Thanks!
Hi Jojee, it’s best if you can send as many relevant supporting docs as you can. The letter from the Canadian company will help a lot.
Not sure about the personal financial docs. If it has sufficient funds, I would submit that too, if that were me.
Thanks much! Will keep that in mind! Thank you!
Hi! I would like to ask in what part should i need to upload the ticket and hotel confirmation?
For the employment status i am currently employed but the form is asking for TO-FROM how will i answer it? putting N/A is not applicable.
thank you
You can include the ticket and hotel reservation in the Purpose of Travel file.
I’m not sure I understand your 2nd question. I think it’s asking for the inclusive dates of your employment, is it not?
Thank you for this detailed guide. God Bless!
No prob!
hi! Is the process same as the visa renewal?
Thanks so Much!
God bless!!!
Hi Ghia, I dunno. :( I’m not familiar with the renewal process. :(
Hi! I applied online but I got denied, the reasons are my travel history ( isang beses pa lang ako nakalabas ng bansa) and the purpose of visit (family visit nilagay ko since nasa canada naman brothers at parents ko)..ano kaya pwde ko pang iattach or gawin para maapporve ako? thank you so much…
I am employed for 10 years and single..
hi at what part ba dapat mag upload ng birthcertificate or marriage contract. is it needed? di ko makita eh.
If I remember correctly, di kailangan.
Hi.. Im travelling with my 79 year old mom. Can I use the same GCKey account and upload all her requirements along with mine? Thanks :)
As far as I know Canada doesn’t allow group applications online. It has to be done individually. http://www.cic.gc.ca/english/helpcentre/answer.asp?qnum=425&top=16
I have created 1 GCKey account and have filed applications for myself and other 2 family members.
You should be able to do this by properly answering the questions at the start of your application. There’s a question if you are also applying for a family member – if you answered yes, then your checklist would reflect requirements for your family member too.
Hope this helps.
Hi Camille, My husband and I along with our 4 adult children plan to apply for Canadian Visas. Where will I attach the requirements for myself and for our children(Bank Certs, ITRs, old passports for the travel history, etc) since only requirements for the principal applicant are provided with the 4MG file requirement? For the family members only current passport and IMM5257 and 5645 were asked to be uploaded. Hope you can help. Thanks!
Hello Ms. Eileen,
I have the same question po. I’m wondering if you were already able to apply gor Visas through 1 main applicant? As there isn’t an option to upload the other requirements of the family members other than then2 forms, digital photo and passport, did you still have to upload them (ITR, COE, Travel history, etc) po? Hoping for your response. Thank you.
Hi Ms. Eileen
Did you manage to solve your problem? My family and I are planning to apply for a tourist visa. I will be the primary applicant. Where should I attach the travel history and stamp/visa from another country of my family members?
Hi!
Ask ko lang I already created 1GCkey account for myself and 2 family members can I still use the same GCKey for my mom?
Sa glossary kasi
“Family Member –
An applicant’s closest relatives, in the context of an application to IRCC. It is defined as a spouse or common-law partner, dependent children, and their dependent children” Thanks,
Woot! Thanks for sharing, Camille! This clears things up. Will add this to the FAQs above. :)
Hello Good day! I just want to ask if you experience invalid username and password pag nagsign up, kasi gumawa po ako ng account, nag log out ako and now hindi ko siya mabuksan kasi invalid daw pero tama naman yung username and password ko po :( Thank you!
I’m not sure kung meron pero have you checked if my “Forgot my Password” feature? Baka pwede mo pa maretrieve.
Hi Good day, I just want to ask about the process of going to Canada via relatives sponsorship. My wife aunt is a Canadian residence and they want to sponsor my wife to come to Canada. What are the things and procedure we need to do? She also advised us to go to Agency to have an inquiry. Please help us with this. Thank you
Hi Clem, nag-apply naman itong post na ‘to sa case mo. Pa-read na lang.
Hi, we applied TRV here in Bangkok as we are based here since 2003. We applied June 3, 2018. According to processing time based on CIC website, Bangkok Thailand processing time is 7 days. Its been 9 days as of the writing of this message. Any case there in The Philippines that you have heard that took longer than the expected processing period?
Hello, I just want to ask if you have an idea of the amount of money in your bank account needed for a 2 wk vacation in Ottawa? What if I haven’t tried to go to other countries and my passport has no travel history yet? Would that affect my application? Thanks in advance!
Hi!
Did you have to upload “Optional Documents”? I have completed uploading all my “required” documents, but don’t see the Continue or Submit button to proceed to payment.
Appreciate your response.
Thank you.
Hi Camille, can you email us a screenshot of the Upload Documents page so we can check?
Hello, sorry, I wasn’t able to see your reply here right away. I was able to Continue by submitting the “Optional Documents” too. The optional documents in my checklist were Schedule 1 (form) and Client Information. For Schedule 1, I answered the form and uploaded it; for Client Information, I just placed a blank PDF form to be able to proceed.
Still waiting for updates though.
Hi, hoping you could help me, we will be going to New York this December and we’re planning to cross in the border of US and Canada just for a day trip, is it we need to be done the procedure of tourist visa application and pay the visa fee?
Thank you in advance.
I think you still need a Canadian visa for that.
where can i view imm5257 ?
Hi Dann! I updated the links in the post above. Apparently, they moved the files to another URL. But updated na. Please check
Hi. nag applied po ako ng visa twice. 1st nung may, then ngayong july both application have been denied. reason po ay yung travel history ko and financial status at asset. KL, bangkok, cambodia at vietnam pa lang po napupuntahan ko. regarding sa financial status naman meron po ako 230k at nakalagay din dun yung 3 credit cards ko. nilagay ko din po sa asset yung certificate of ownership nung condo na kinuha namin pero denied parin. paadvise naman po kung ano yung kulang. sinunod ko din po yung lahat nung steps na nasa blog. anyway, may sister po ako sa canada and sya po nag sponsor sakin. 1 month po plaa ako plano mag stay sa canada.
HI Lia.. Nag apply kaba ulit?
Diskartehan mo sa cover letter, explain mo lahat dun. Nadenied ako, after 5 days nagreapply kasi yan ang nabasa ko sa ibang blogs, mag apply ulit kaagad pag nadenied and u refute all their reasons why u had been denied. So approve ako pag apply ko ulit.
Hi, my mom’s CIC account got locked and she’s on the process of submitting her passport. We already have the letter printed out by the way, will she be abke to retrieve her account? Thanks for the reply
Hi Lia, dun sa bank statement, regular ung transactions? Hindi siya biglaang may 230K?
If travel history talaga ang issue, then build it first. Try applying for other visa countries first like Japan and Korea.
Hi sir. Ask ko lang, pwede na po kaya magaplay ng canadian visa once nakakuha na ng japan visa kahit di pa nagagamit ang japan visa? Isasabay ko na rin po ang question kung pwede magaplay ng US Visa habang di pa nagagamit ang Japan visa. Pinagiisipan ko po kaso kung alin sa Canadian at US Visa ang sunod kong aaplayan e. para lang alam ko po options ko. Salamat po
Hi! It is stated above that if you’re a student you should submit proof of payment of tuition but what if enrollment haven’t started yet po? Thank you!
Write a cover letter and mention that. :)
But submit other proof like school ID or a letter from someone from school.
Thank you this is very helpful. I should have read this before I applied for a Canadian Visa for me and my family! Our application took 13 days (including online submission) to get an approval. I had to do a follow-up (online) because my family is already leaving on 13 July for the US. Tomorrow, we’ll submit our passports. Hopefully they will release them asap … crossing our fingers!
Hi MG,
Where did you follow up your application? we filed our online applications last July 2 but no update until this time. Thanks
Hi MG, ours took only 3 working days. Hope you receive yours in time for your trip! Good luck and enjoy Canada! :)
hi! i have applied for a tourist visa and i have been requested to send my passport already. however, i have mistakenly sent my passport to the embassy of canada in Makati instead of sending it to the address of the VAC. do you have any idea how can i retrieve my passport and how long does it take to get it back?
and also, how long does it take to have the visa stamped in your passport once submitted?
thanks.
No idea on how to retrieve your passport from the embassy.
Regarding your other question, once VFS received my passport, it took only 3 working days before it was ready for pick up/delivery. Good luck and enjoy Canada! :)
Thank you for this very helpful and informative site, this is such a big help for people like me who want to visit Canada, but at the same time also wanted to save some bucks for paying travel agencies on Visa application assistance. The guidelines are very clear and detailed, and it offers every information you needed for Canada Tourist Visa application so you won’t get lost in the process. . By the way, I just got my Visa approved yesterday, so I really took time to say Thank you and more power to the Blogger! Kudos!
Thanks, Jigs, for taking the time to return to our blog to leave a positive feedback. We really appreciate it.
Congrats on the visa!!! Enjoy Canada!
Hello,please I was refused a visa this june and I was told I can reapply if I can justify the reasons for refusal.please when can I reapply because my program starts in September
if someone in Canada and that person work there 1 year and that person can give me invitation for visa and thar person pay my all visa fees and flight tickt…..then what documents need to apply to tourists visa for philippine person and how i do help me.
Hi! If I remember correctly, the requirements remain the same. But you need to add invitation letter, inviter’s citizen ID, etc.
Not sure if only citizens are allowed to invite.
Hi Poor Traveler! Just wanted to say that this blog post was a HUGE help while I was applying for a tourist visa for my mom and I. And luckily, our visa got approved last Friday!! :)
Thank you guys for your efforts in giving assistance with the best that you can to your readers. :)
More powers to you!!
Hi Jows,
Is okay to ask how many days did your visa processed? when did you file your application?
Our were submitted July 2 but no feedback as of this time. Medyo nakaka kaba lang.
Thanks.
July 7- We submitted our application online.
July 14- We received a request to submit our original passports
July 17- Went to VFS and submitted our passports
July 23- We received a text from the office that our passports are ready and available for pick-up.
the process took 16 days all in all.
Hope you receive a feedback soon Bajoanne!
Thanks, Jow! We’re always happy to be of help! Enjoy Canada!!!
Hi Yoshke,
Is it possible to apply for a tourist visa pero invited by someone not blood related? Parang invitation visa sa other country?
Thank you.. =*
Hi K, if tama pagka-alala ko, pwede. Kasi wala namang “Tourist Visa” ang Canada. Ang meron sila ay umbrella na “Visitor Visa,” na pwede for tourists and for those visiting friends/family. Yun ang pagkakaalala ko.
hi! may C.I or home visit pa ba sa applicant ng visa? pinupuntahan pa ba or may background checking pa ba sa applicant ng canadian visitor’s visa?
Hi! Wala namang home visit. Pero I’m not sure if binabackground check nila.
SEC, DTI or BIR docs… so kahit DTI certificate lang ok lang bah?
Yes, but again, like said in the article, the more docs you provide, the better your chances.
Hi! I will be applying for Canada Tourist Visa soon. I have few questions regarding the application.
Regarding sa bank statement, can I submit my Savings account bank statement?
Currently, I am based outside the Philippines, Sa Current country or territory of residence, they have a start and end date. Dun sa end date, can I leave it blank or should I put the end date of my work contract?
Regarding sa National Identity Document, since I am working outside the Philippines, should I just put my PHL passport here or yung Identity card ko dito sa country where I am working?
Lastly, Sa employment record. Sa current employer, sa start and end date, can I leave the end date blank?
Hi M,
Re Bank statement, yep, okay lang. Savings din sinubmit ko, naapprove naman.
Re National Identity Document, if that were me, yung passport and/or other PH IDs na lang ilagay ko.
Re end dates, naku, hindi ko na maalala ung ganyan ka-specific na detail. May option ba na hindi date? Di ko na rin matandaan nilagay ko, huhu, sorry.
HI I CAME ACROSS YOUR BLOG SINCE NAG SESEARCH TALAGA AKO ABOUT SA PROCESS AND TIPS FOR VISITOR VISA APPLICATION, I HAVE THE SAME QUESTION – MAY END DATE UNG SA CURRENT COUNTRY OF RESIDENCE. CAN I LEAVE IT BLANK? KASI DI PWEDI E TYPE UNG “PRESENT”
ALSO SA SIGNATURE AS PER UR ADVISE JUST LEAVE IT BLANK, HOWEVER I ASSUME WE STILL HAVE TO PUT THE DATE NO? UNG DATE KATABI NG SIGNATURE.
Hi,
I submitted tourist visa application for my aunt(50 years old) 2 weeks ago. Unfortunately she got denied.
Reasons for denials are, hindi sila satisfied sa:
1. Family ties nya in Canada and Philippines
2. Travel History
3. Personal Assets and financial status
A. I really do not understand the reasons for her denial because, actually she has 2 sisters in canada who are already citizens there.
B. Meron shang 900kphp on her bank account (i put 7k CAD as her budget in her application)
C. She is a taxi operator, and shes in a retail business (going back after a month for she will be busy again sa business nya)
D. In her invitation letter, aside from purpose of visiting her sister in Canada, It was also stated that if she got approved, she will accompanying my Grandmother as well (71 years old who got her multi- entry visa last year) who wished to visit our relatives in canada,because grandma cant read, write, and understand English at all.
The invitation was provided by one of her sister who only send her scanned Canadian Passport as a proof of relationship. No payslips, bank statement provided.
My aunt plans to re-apply, just wanna ask what further documents should we provide?
Hi Melvin,
How long would the trip be? How many days did your aunt say she wanted to stay in Canada?
Regarding ties/rootedness in PH, what did she submit?
All the assets and businesses she submitted, they’re all under her name?
How’s her travel history?
Hello Yoshke,
She would like stay for 1 month, should it be lesser?
She submitted a business permit ,DTI, copy of franchise certificates all under her name.
I just remembered she told me she got denied for a London tourist visa 10 years ago, I talk to her about it and told me not to include it for because she forgot the exact date anyway.
She traveled to Hong Kong for 2 weeks holliday
Hi Melvin, I dunno, maybe 1 month is too long for someone na wala pa masyado travel history and wala pang other visas.
Hello, thanks so much for your blog – super helpful. Question lang is it normal
kaya na beyond 13 days ang processing nila? we submitted online our applications (5 family ) last July 2 kasi unril now wala pa decision.
Nakakakaba tuloy.
Hello! My mom, sister and I are planning to apply for canadian visa by the end of august. I read all the comments in this blog na if I register for one GCkey account pwede na din iupload ung application ng kapatid at mama ko? I hope you’ll answer. Thank you in advance :)
Hi Bajo, according to the CIC website, the average processing time for Philippines is 13 days, so normal pa rin naman ‘yung sayo. You can wait a few more days before panicking hehe.
Hello, would like to ask if there is a personal interview for a visitor visa? Kase parang d kopo nabasa above, and is there any possibility that they’ll approved when i apply for a visitor visa, im a student po and will be visiting my boyfriend were in a relationship for 3 years and he visited me 4 times. Hope you can answer my questions. Thanks in advance ☺️
Hi Je, often, walang personal interview. Unless mag-ask sila talaga.
Approval/denial is based on many, many, many factors. It’s hard to say without much info. But the short of it is, you need clear purpose of travel, strong ties in PH, financial stability, and travel history.
What if po ma denied, ilang months po pwedi mag apply ulit?
According to their website, “If we refuse your application to come to Canada, you can apply again at any time, unless your decision letter says you can’t. You should only apply again if you can include information that you didn’t include before.”
I hope meron po kayong alan na agency to recommend us for applying it . Or if we use po pa agency if ever mas easy po ba ang process?
We haven’t tried hiring an agency for Canadian visa processing. Our go-to agency is Gazelle Travel and Tours pero we tap their services only for flight reservation (for visa) and insurance. We also enlisted their help with our Schengen visa application before, but not for Canadian visa.
Easier or faster ba pag may agency? Hindi. Same lang. But they can guide you kung complicated ang case and they can provide other docs nga like flight reservation.
Awwww, Thank you so much , your reply is very helpful po, God Bless you po.
Hi,
Your blog really helped me in applying for Canada Visa. Very detailed and informative and easy to follow. Mga questions ko, dito sa blog mo nasagot.
I was granted 10 year ME VISA (til passport expiry).
Thank you again!
WOW!!! Congrats! We’re always happy to help! :D
Hi,
Yung 3-5 days po ba na processing time for VISA stamping is working days or including weekend?
I submitted my passport July 30th, then validated na the next day. I was hoping na ready for pick up na sya by Thursday or Friday.
May travel po kasi ako ng August 4.
Hi, ang alam ko, working days. Pero di ko sure kasi I got mine after 3 working days (5 including weekend), so hindi ko malaman kung paano nila kinount.
HI Yoske,
im so nervous right now haha.
Submitted all my docs including DTI for my business, Bank Cert, Car ORCR, Employment Cert, invitation letter from my 1st cousin working for Scotiabank and staying in Vancouver since 1997 saying she will be shouldering accommodation and living expenses .
A few more days before i get the decision. What do you think are my chances of getting approved?
PS your blog is very helpful. Thanks :)
Thanks, Kris! Hirap masabi. Depende kasi yan sa napakaraming factors. But good luck!!! Sana maapprove!
Hi,
Question, would you see it in your account if the process has already started? Like makikita ko ba kung nagstart na yung Review of Eligibility? Kasi it’s been 16 days and Submitted pa rin yung nakalagay na status sa CIC account ko. :(
Hi Jen, if I remember correctly, yes, mag-uupdate ung CIC account mo kapag may progress. You’ll also get email notifications pag may update or may message sa CIC account mo.
Hi! Planning to go to Canada by January 2019. My Brod invited me to visit them and he will shoulder all the expenses. I’ll will apply by sept-oct for the visa. How abt the flight tickets do I need to reserve it? Or will buy once visa is approve. Upon checking tickets reservations is only 24hrs.
Hi Mikae, if you choose to submit flight booking, you can submit flight RESERVATION, not the actual ticket. You can get this from travel agencies. More info here: https://www.thepoortraveler.net/2017/06/flight-hotel-reservations-visa-application/
Hi Yoshke,
Change plan- I’ll be applying with my 2 siblings. Applying in person meaning no need to apply online? We will go and submit all docs to VAC office? Is it OK to collate all our docs and submit as one application?
Hi Mikae, I have no idea about applying in person. :(
hi! really thanks to this blog..for how many times ko read tong blog mo sir, i applied online and finally we got our multiple visa :) we’ll be leaving next mo. :)
yayyy! thank you for using our blog as reference! Congrats and enjoy Canada! :)
Hello,
My Canada tourist visa will expire on October 2018. Please assist on how to renew the said visa. I have read I need to apply as I’m doing it the first time. Is it true?
That’s what I know too.
Hi. Ur info helps a lot but may i ask u any about my situation. I am to apply a visa to canada to file an insurance claim of a dead person we r not related by blood she us my Godmother by heart we r for us two we r like a mother and daughter she made me her benificiary what documents should i hav to submit then aside from the death cert and th docs from insurance company. In more details i am a single parent and just a part time worker..no any high value assets to present.. How possibly i can v given a visit visa
Hi Nora, I have no idea, sorry. :( It would be best to consult a travel agency for they might have had a similar case.
Thanks so mich ivreally appreciate ur quick reply..but may i ask f u can suggest any agency mahirap kz mafake. I hope u undestand..thanks God bless
Hi Nora, we rarely consult agencies for visa eh (unless mandatory). We once asked for help from Gazelle Travel and Tours for our Schengen visa. (Schengen yun, hindi Canada.) Okay naman ang experience namin sa kanila, naging go-to agency na namin sila pag may kelangan kami from an agency (like flight reservation, etc.). They’re registered and DOT-accredited.
Hello, would like to ask if what document to submit ba? I’m still a student planning to visit Canada in December. My boyfriend will be the one to cover my expenses. Do I still need to submit a bank statement or certificate? And does the school needs to write a letter for me too?
Hope you can answer my questions. Thanks in advance ☺️
Hi Jes, it will increase your chances of approval if you could provide bank cert and statement with sufficient funds, even if sponsored yung trip.
– If you’re a student: you must also submit proof of payment of tuition and accommodation fees.
– If someone else is funding your trip: also submit a letter from the person or institution providing you with money.
Hello po! Kailangan pa po bang mag fingerprints and photo (biometrics) in person o pwd po ba ang online? Salamat po.
Depending on your nationality, you may already need to give your biometrics.
Since July 31, 2018 – applicants from Europe, Middle East and Africa
Starting December 31, 2018 – applicants from Asia, Asia Pacific and the Americas
https://www.canada.ca/en/immigration-refugees-citizenship/campaigns/biometrics/facts.html#alien
– so ithink kailangan na ng BIOMETRICS for PHILIPPINE PASSPORT HOLDER
Hi Igie, hindi naman ako kinunan ng biometrics at any time during the application.
hi po! tanong ko lang sana pano kung wala kang itr..hindi kasi kalakihan ung business na pinapasukan ko….ok lang bah kung certificate employee lang ipapasa?
Hi Mervic, yes, like we said in the article above, it’s ANY or ALL. in theory, you can submit just one item per document type. However, if you want better chances of approval, we strongly recommend submitting everything that you can provide.
Hello po, tanong ko lang paano kung may friend ako dun sa Canada tho canadian na po sya pero currently wala po syang work kasi katatapos lang nya sa course nya last week pero willing syang gumawa ng invitation letter. Pwede po bang instead na mag book ako ng hotel pwede ko bang ilagay yung adress nya? kasi dun din naman ako magsstay. First time ko magtravel overseas. malaki po ba chance na ma grant kahit wala pa syang work dun pero may sarili naman syang apartment? Thank you po
Yes, pwede sya gumawa ng invitation letter if dun sya nakatira. Pwede ka rin magstay sa kanya. You will need to submit a copy of their citizen card.
Pero note na mahihirapan ma-approve if first time mo magtravel abroad kasi travel history is part of the requirements.
Hi! Question lang po, if my husband is working overseas (SG) and me and my son here in the philippines pano kayo application process since sya ang principal na mgaapply?
And may nwala ako isang passport which is madami din stamps, pwde ko kaya skip na ung passport na un or need kpa ipatrace sa DFA since they have a copy of my old passport and stamps.
Thank you in advance!
Hi Cherish, naku, di ko alam if makakaapekto ung magkaiba kayo ng country of residence. Pero I think pwede naman since pare-pareho naman kayo ng nationality. I think same pa rin ang process.
If kaya mo makuha yung past copies ng stamps mo, okay yun. If wala, pwede mong iexplain un sa isang letter and samahan mo ng Affidavit of Loss, if may kopya ka pa nun.
Hi! question po may nabasa po ako sa taas na may question sila kung meron family member sa Canada. Meron po akong Uncle dun nagwowork kapatid ng Mother ko pero hindi ko siya sponsor sa trip or hindi ako hihingi ng invitation letter sa kanya kasi ang plan ko sarili kung expense yung trip ko. Kelangan pa bang ilagay siya sa form or any ?
Thank you in advance!
Hi Bea, hindi ko na matandaan lahat ng fields sa form, pero if merong field na nag-aask if meron kang non-immediate family member sa Canada, kelangan mo ilagay. if wala naman, wag mo ilagay.
If hindi naman sya yung inviter, hindi sya sponsor, and hindi ka naman sa kanya magse-stay, di naman kailangang ilagay sa contact person mo in canada.
Thanks for the very informative writeup here. You are correct with the dates, usually its just 11 days to process. My husband applied 2 years ago and it took him 2 weeks to get his passport with the Canada Visa already. Just last August 8 I applied for our family (with a toddler), but I only saw that our visa was approved yesterday! And I had to check the online status daily because they wont email you the status.
Wow, that’s 26 days! I gave our passports today at VFS, and if I follow your processing time, I would get my passports by Sept 10 (+6 days). So in total that’s 31 days! And our flight is Sept 16! That’s double the time of 14 days.
So you are correct to apply at least 3 months before to save you the worry of delays.
Thanks for sharing, Chris! Yeah, best is 3 months in advance. I know someone who waited for over a month too!
Hi There’ just want to ask if i already have an account with the GCkey but i did not remember since it’s been 2 months already when i created., Do i need to create another one? im planning to continue my requirements.
Hi! i’ll be applying through online but medyo nalilito po ako dun sa mga instructions. Regarding po dun sa mga Forms, need kasi ng mga signature. Ano po yung ginawa nyo dun? Did you print it out then signed and scanned it? or hindi nyo na nilagay yung signature nyo or kahit name nyo? Thank you po.
Hi Leen naka pag apply kana? Any update? Kung pwede mo ako help sa ginawa mong step by step hehe First time ko kasi mag apply ng Visa. Can i have your email?
Thank you so much!
Hi Leen can i have your email address? Im also planning to apply din kasi. If pwede magtulungan tayo sa application process.. Hahaha This is my first time to apply a visa since I only travelled asian countries without necessary visa.. Nalilito din kasi talaga ako. =(
hello po..ano po form na gagamitin for family information..imm5707 o imm 5645..thank you
Hi Leen,
You don’t need to print it out or sign it. Fill out the forms electronically and leave the signature field blank. You will be providing your electronic signature later in the process.
Once you have completed the requirements and submitted your application, you will be prompted for an electronic signature. You don’t need to scan your signature or anything. You simply have to enter your full name. That’s your electronic signature. Just type your name.
Hi Again Sir,
Everyday ko po bini-VIsit tong site niyo. Sobrang naguguluhan po kasi ako dahil nandito ako ngayon sa Singapore na nag wowork. Iba po ang mga magiging requirements ko dahil ang system ang employment ko dito is very different diyan sa PInas. And nag try nadin po kasi ako sa Gazelle if they can assist me, unfortunately they told me na they can’t because im living outside the Philippines. So ngayon po, if you can help me.. Please… to send me the type of documents na naisend niyo po kahit samples lang po hindi yung actual documents kasi alam ko na thats private. Let’s sa travel history ano ano documents na dapat nandun sa file na yun, tsaka mga ibang documents ano ano ang magkakasama sa isang file. Please sir, I need assistance. =( Thank you in advance sana po mabasa niyo to Sir! God bless you always Sir!
Hi Rish, di ko actually gets kung saan ka naguguluhan sa requirements kasi straightforward naman sya. Yung mga sinubmit ko na docs, basically lahat nung nilista ko sa taas na for employed.
Sa Proof of Purpose of Travel, I submitted all of these:
– flight reservation departing Canada (return or onward ticket)
– your travel itinerary
– hotel booking
Sa Travel History, I submitted:
– copy of info page of previous passports used within the last 10 years
– copy of all expired and valid visas
– copy of all entrance and exit stamps
Sa Proof of Means of Financial Support, I submitted:
– Bank statement for the past 4 months
– a Certificate of Employment
– Income Tax Returns (ITR)
– land titles
Basically, yan din yung mga nilista ko sa taas. Bawat isang category, isang file.
I have a feeling na hindi mo sya nabasa kasi you also missed yung tungkol sa signature field kahit na 3x ko sya minention sa post sa taas, in boldface pa. :P
Sir, one more thing, nag book po kasi ako ng japan trip after po sana ng canada trip ko sa january. Pero po kasi hindi pa ko nag apply ng Visa ko for japan because sabi po 3 months lang ang validity upon approval so balak ko palang po mag apply ng japan visa mga bandang november. inuuna ko lang po muna tong sa Canada visa ko. Is it okay po kaya na include ko sa cover letter ko and attached ko din yung confirmed return tickets ko?Thank you so so much again Sir!
Hi Rish, not sure if it’s a good idea. Pero I think pwede naman kasi it shows na may balak kang bumalik.
OKay SIr thank you so much! God bless you! =)
Thank you so much Sir! God Bless! =) big help po!
Hello po!!
Can you suggest a 3 day itinerary to Vancouver canada? What places to visit? Thank you
Hi Krisha, naku, di pa namin naexplore Vancouver. :(
I will be applying today but regarding the last question in the application form, “do you consent to be contacted by CIC”? should i answer yes?
yes
Kuya ,
Pag inuupload ko ung form imm5645 ung preview di ko makita ung file. Lumalabas ung please wait… ganun ba tlga un? Pag finill up lang un using adobe hindi mawawala ung mga ittype ko pag sinave na? Sorry po dami tanong
Good day, THEPOORTRAVELER!
I just want to thank you for compiling these for public use. It has been a great help!
Instructions are very clear and concise.. and very accurate to boot!
I used the CANADA one specifically, and, i might say that it made my life (and processing) many times easier!
Although, hindi pa naman ako approved (at the time i am writing this comment) lol
God bless!
Haha, thanks Juniper. Comments like this keep us going!
Good luck sa application! :D
Hi! I want to ask which process is the fastest to know/ to have result? Via online or in person? Also, Pareho ba chance to get approve ng online and in person?
Hi Rose, I have no idea since I haven’t done applying in person.
Hi!
Thanks for this very informative blog. I would like to ask if I will have to submit all my passports(expired and valid) when they request to submit my passport?
Thank you very much!
Hi Danica, I brought both my current and expired passports but they took only one, the valid one.
Hi Again Sir,
I’m Re-checking my Imm5257 form. Sa may UCI po ano po ilalagay dun? Thank you po last question na po bago ko isubmit ang application ko tomorrow.
Thank you sir Godbless always!
Hi Rish, if it’s your first time to apply, you don’t have a UCI yet so you can just leave it blank.
Thank you so much Sir! God bless! =)
No prob!
Good day Sir,
Sir sa Client info pwede ko po kayo iattached nalang dun yung cover letter ko?
Thank you so much po. Yung lumabas po kasi sa optional documents ko YUng Imm5257 and Client Information. So okay lang po kayo na yung ginawa kong cover letter and isubmit or explanation letter?
Hi Rish, usually may Letter of Explanation under Optional. Pero if wala, pwede mong isama ung cover letter sa Purpose of Travel.
Good pm sir! It is stated that effective sept 10, 2018, the world trade center along amorsolo st., makati na ang visa center. Is this true sir or still in ecoplaza along chino roces?
Hi Edward, thanks for bringing this up. It looks like they have moved already to the World Center along Gil Puyat. We’ve just updated the post.
Hello po kuya!!!
Gusto ko lang mag’thank you sa blog mo tska sa pagsagot nyo sa madaming tanong ko :) nag’email na po sakin at pinapa’submit na po yung passport namin ng mama ko at kapatid ko. Very helpful at informative po yung blog nyo! Thank you po ulit!!!
Yayyyy! Congrats!!! Enjoy Canada! :)
Yung mga nakalista po sa taas un lang po ang dadalhin pag issubmit na ung passport? di ko na po kelangan iprint ung mga sinbumit ko online?
Yung nakalista lang. No need na ung mga sinubmit mo online.
Yay!!! Thank you so much!!!!
Hi Yoshke,
I have been following this blog for almost a year now and sobra pong laking tulong! :) Madaming blog/forum na po ang nabasa ko, pero wala pa akong nabasa na pinoy na aaprove with ASIAN VISAS ONLY.
Eto po profile ko:
-28 yrs old, F, single, licensed pharmacist
-working for german logistic company for almost 4 years (can provide COE, ITR, Performance bonus, etc)
-travel fund (plane ticket, accomodation, allowance) is 300k with staggered transaction, staying for 20 days only
-have 3 cc (one is gold)
-own a house thru pagibig (1 year palang)
-travel history: Singapore, Hongkong, Macau, Malaysia, South Korea, Japan, Bali Indonesia and then this december I have a confirmed fight for Vietnam, Cambodia and Indonesia
-I will purchase travel insurance
– I will not purchase a confirmed flight (bibili lang pag nakapasa na sa visa)
-I have a boyfriend in Canada (citizen na sya). He will provide all documents (invitation letter, employment certificate, payslip, proof of vehicle purhcase & drivers license, Tax assesstment etc.)
My question is:
1. I am applying for tourist visa next year around Feb-March 2019 malaki po kaya chance ko na maapprove? based sa profile ko?
2. My boyfriend will only sponsor our meals and other stuff (like entrances sa mga museum, park, etc) pero I will shoulder my own accomodation and plane ticket, we are planning to book hotels. Mas better ba na ideclare upon application na sakanila ako titira (they own a house) or okay lang po na mag hotel?
3. Mas better po ba na ideclare ko yung relationship namin ng bf ko for 2 years (with pictures) or as a friend lang? kasi may mga nabasa ako na red flag daw pag dineclare relationship since single ako at baka magpakasal kami dun at hindi nako bumalik ng pilipinas LOL! (wala po ako balak mag over stay dun) :)
4. For the cover letter it should be address to Embassy of Canada here in the Philippines ? (ADDRESS: Level 6-8, RCBC Plaza Tower 2 1200, 6819 Ayala Ave, Makati, 1227) sorry medyo nalito lang po.
Sorry ang dami ko pong tanong 1 year ko na po itong pinaplano at kinakabahan pa din ako :(
Thank you po sa reply. Godbless :)
Hi Jonalyn,
Naku, di kami expert sa mga visa-visa ha, we’re just blogging and giving tips based on our experience. Pag ganitong outside our experience na, mahirap na sa amin na mag-assess. Pawang opinyon lang namin ito, so take it at your own risk.
Sa tingin ko, based sa profile mo, ok naman yung chance na maapprove kasi okay naman rootedness mo, which is yung pinakamalaking issue ng embassies sa applicants.
However, madalas, declaring na you know someone sa destination country affects your chances negatively kasi it shows na you have more reasons to overstay.
Pero if you don’t declare your relationship, tatagilid yung chances mo rin kasi hindi believable yung 20 days in Canada as a tourist na sagot everything kung P300,000 lang ung nasa bank account mo.
So pareho syang may cons. Di ko lang alam kung alin ang mas risky.
wowwww… thank you po sa reply nyo really appreciate it :)
sabi naman daw po ng iba mas okay daw na may invitation letter mas mataas ang chance na maapprove kaso in relationship po kami so parang negative pa din because baka isipin nila magooverstay ako :(
anyway i will just try my luck nalang po. babalitaan ko po kayo if approve or not.
thank you po sa pagsagot! Godbless! :)
Hi! I want to know if ano balita sa iyo? I am planning to apply visitor’s visa din to visit my boyfriend :)
No problem, Jonalyn! Balitaan mo kami para makatulong din sa ibang nasa similar situation in the future.
Good luck with your application! Sana approved!
hello po..ano po form na dapat gamitin sa family information..imm5707 o imm 5645..thank you
Hi Lorna, ano po ba yung nakalagay dun sa personal checklist sa account nyo? Kung ano po yung naka-indicate, yun po. Yung sa akin kasi, nakalagay Form 5645, so yun ung inupload ko.
Kuya,
Regarding dun sa visa stamp, wala talagang picture? Kelangan ba lagyan un?
What visa stamp? Sorry, di ko gets ung question. hehe
I think she’s referring to the visa counterfoil. :)
Hi Yoshke, Ive been meaning to thank you for this blog. :) It was a MASSIVE help when i was processing my application. Just followed the step by step, and submitted all the required documents with the exception of personal assets (i don’t have any haha!). Then 6 days later I received a passport request. :)
Yayyyyy! Congrattttsssss! Enjoy Canada.
And thanks for coming back to this blog just to share this. It made our day kahit maaga pa, haha. :D
sa mga balak mag apply ng Temporary Residence Visa (Tourist Visa) sa Canda una sa lahat mag research kayo ng mga ganitong articles malaking tulong ito para sa inyo ganito ksi ang ginawa ko bago ako mag apply at hindi nman ako nabigo na approve ako Multiple Entry Visa up to Expiration ng passport ko ang binigay ng Canada Embassy dto sa Riyadh, Saudi Arabia….
Thanks for sharing, John Paul!
Hi !
Im here in Canada right now and Im planning to invite my cousin to come visit us here. Can I apply here online for her?
Thanks
In theory, yes, since the application is done online. As long as you have all the details and the required documents, it could work. But it’s just best practice to have them apply for themselves.
HI YOSHKE,
Papano ko po ma susubmit ang mga docs ko at ng mga anak namin(bank certs, itr, land titles, etc) kasi we plan to apply as a family. Ang husband ko ang primary applicant and I noticed in the submission of the documents portion na yung part lang ni primary applicant ang may mga attachments ng docs while doon sa other members of the family yung forms 5645 at 5257 lang plus yung current passports lang ang nakalagay na isa submit?
Hi mam eileen just. Want to ask you what you did about the submission of the documents. . We are planning to apply also as a family and my husband will be the primary applicant.saan were you able to manage your concern po?i mean yong kung saan attachment yong documents ko at mga kids ko? I hope you can give me tips/advise po .were planning to make the application on line this friday po.thank you.
Hi, Do I need to download the IMM5713 form (Use of a family member representative for online application) and have the other members joining the applicant in one submission to sign the forms? Then after signing have them scanned and uploaded? Hope you can help. Thanks!
Hi Eileen, naku pasensya na, hindi ko pa kasi naranasan mag-apply with family so hindi ko alam talaga sagot. :(
It’s ok ano ang National Identity document?
Hi! It can be passport, driver’s license, senior citizen card, SSS card.
Hi Yoshke! I will be applying for a Canadian visitor visa. However, I am travelling for a week this Nov. I remember reading somewhere that you have to be in the Philippines when you receive the decision. Im doing everything online and I know that if approved, I’ll have 30 days to submit my passport. Have you heard of that ruling before or have you come across it in your past research? Unfortunately, I can’t find the link to that article anymore or any other resources to confirm. Thank you!
Hi MT, ang alam ko lang, you have 30 days to submit your passport from the moment they send you the notice. I think even if you’re abroad when the result is released, as long as you submit your passport within the next 30 days, it should be okay. But that’s just my guess.
Thank you! Sorry additional unrelated question… when you submitted bank certificates or statements, did you redact the numbers?
no, I submitted as is. I think the numbers are exactly what they want to see.
Good day po. My father got denied because he wasn’t able to submit additional documents on time. He is planning to reapply, does he need to revoke old CG KEY account and create a new one? thanks.
Hi Jack, I’m not sure but I think he can use the old one and create a new application.
Hi Yoshke,
What other documents can I attach to the Client Information? Do I still need to make an explanation letter along with those other documents? Thanks so much!
Hi Eileen, I honestly don’t know the answer to this because when I applied, there was a separate slot of a Letter of Explanation and none for so-called “Client Information.” Not sure if this is the same thing. It looks like it, but I’m just not sure.
Yung travel history dapat ma gumawa ka ng excel file to specify lahat including date and country visited or yung passport stamp sapat na?
Ganun ung ginawa ko. Gumawa ako ng table, pero sa Word ko ginawa.
hi, I sought assistance po from Gazelle Travel and Tours for the flight ticket and hotel booking. kaya lng po, valid lang po ung flight ticket for 48hours, and hotel booking for 72hours.
Okay pa rin po kaya n gamitin ko un kahit next week pa po ako mgssumbit ng application ko?
Salamat po.
Hi Andy, yes, we use flight reservation from Gazelle too when we apply for visas. These days, most airlines, 24-48 hours na lang talaga ung validity ng reservation, and embassies know this, so it shouldn’t be an issue. Often, they just look at the flight details nung target mong ibook and check if it’s something that you can afford. Mas ok though if valid sya at the time na nagsubmit ka kahit na nag-expire sya during processing or while waiting for results.
But mas concern nila ang rootedness, employment, and finances talaga kesa dun.
Thanks Yoshke, I was really worried, thanks for your reply and info.
Actually Yoshke, grabe parang bumuhos na yung kaba ko hahaha but at the same time optimistic pa din ako. Kung okay lang sayo, bigay ko yung profile ko kasi medyo di ko din sure yung chances ko and kung mas maganda ba na maghintay pa ako, kaso lang yung iba ko kasing mga issues, they don’t really need time. They need alternatives and I will be most grateful if you can lend me your opinion kasi pangarap ko talaga makita ang Niagara :(
– I have limited travel history– twice in Macau (2013 and 2017), and twice in Japan (2017 and 2018). The last time in Japan though, I was granted a 6-month Cultural Activities visa along with a resident card (I attended some kind course in Tenri). Never overstayed, and no matter the length of stay I am granted anywhere I always leave (way too) early.
– Planning to visit Niagara and Toronto for 7-10 days in August. Leaning on 7. Travel fund is 6000 CAD. But I’ve heard people saying staying for too short a time might be construed as someone doing a job interview or something of that sort.
– I did not work from 01/2017-08/2018 because of health reasons which was resolved mid-2017. Then I decided to travel Japan and Macau at the latter part of 2017 (since I had the money saved up and my mum and I do real estate), then I went back to Japan March 2018 for said course. After that, I found work August 2018. By the time I apply for a visa I would be employed for 9 months.
– Working through Upwork. Will be able to provide contract details, invoices, bank statements, etc. but NOT ITR.
– Will provide hotel and flight reservations through Gazelle (thanks for the suggestion!) By the way, do they also offer assistance in conjuring up an itinerary? I tried googling their website but for the life of me I cannot find it.
Now I feel like these are my two biggest issues:
– Rootedness. Since I am working remotely. The alternative I thought of was this. My mum has 3 land titles, and as her sole living child, and since she never married my dad, they automatically pass down to me. I was planning on submitting them as proof of ties together with an explanation letter, and I will also provide documentation for my mum’s identity and status should the VO wish to verify it.
– Issue of half-siblings. I have 4 from my dad. Though we don’t have any legal documents that identifies us as half-siblings since as I mentioned, my folks never got hitched. I am not in touch with them, I have no idea what they are up to. Basically we just share a dad. What do you suggest is the best way to go by that?
Where do you think I will take the biggest hit, and what can you suggest to help me strengthen my case? Thank you so much and more power!!!
Hi Bea, thanks for sharing all the info u could share.
About ITR. It’s not yet too late. Since you’ll be applying in June (?) next year, you still have time to get an ITR for 2018 in January-April. Freelancers can still have an ITR. You just need to register and pay taxes. In theory, you can skip the ITR but because of the nature of your work, submitting an ITR will help your case, I think. Especially because…
About LAND TITLES. I’m not sure if it’s a good idea to submit titles that are not under your name. Maybe it is, but I just don’t know. I think, in theory, your mom can still will them or give them away to someone else, so I’m not sure if that is proof of anything. Marami namang naaapprove na walang land titles pero may regular office job sila.
About HALF-SIBLINGS. This is not an expert advice ha, haha. Di ko kasi naexperience ito. Pero if I were in your shoes, if I have the information the form asks about them, I’ll declare. But if I really don’t have any clue, like di ko alam birth dates nila or nasan sila or anong ginagawa nila in life, I’d probably just skip it.
About ITINERARY. We’ll be making a Toronto/Niagara travel guide soon. Hopefully by early next year. It will have a sample itinerary din. :)
I think your biggest concern is employment. I can relate to that because I used to be a freelancer too, working online, so you should try to submit as many supporting docs as you can to strengthen your case. ITR will be helpful and you can still do something about it. :)
hi po…asking your advice…
di ko alam paano sasagutin…
Last year na deny po ako ng US visa, then i ireapply last month, and nag grant po ako ng visa…do i have declare na deny ako dati?
2. a Have you ever been refused a visa or permit, denied entry or ordered to leave Canada or any other country or territory?
Thanks po in advance
Di ko alam if ano dapat gawin kasi di ko alam if nasa record mo un or may access ba sila dun. Pero honesty is the best policy.
Thanks for the reply…
Nilagay ko sya sa application
Got my passport today multiple entry visa valid for 3 years…
1 week din ung waiting…
Thanks again..
Marge
Hi Marge! Thanks for sharing! Congrats and enjoy Canada!
THANKS PO KAY POORTRAVELER! Napakalaking tulong po ng article na ito. Just follow the instructions by the book and wala kayong magiging problema.
Share ko na lang din siguro, I dunno lang kung dahil security feature ng website ng Canadian government, make sure to double check the version of IMM5257 form na active sa website.. I downloaded here version 7 and filled it up, but apparently, sa mismong website nila, nagrelease sila ng version 10.
I had trouble at first kasi version 7 sinasubmit ko but version 10 pala ang gamit sa website, so I have to fill up version 10 then pumasok. Then for some wierd reason, problem naman dun sa mother ko, by the time na nagsubmit ako ng version 10, ang active version sa website is version 7 HAHAHA :D, so I have to submit version 7 kasi nageerror yung version 10 na form.
Tinanggap naman both and everything went fine.
Again thanks!
Hi Richard,
Thanks for sharing! haha. Weird nga! :D
HI again SIr! =)
Since I applied here in Singapore, I waited too long I submitted my Application last October 17 and I received an automated message that they received my application. And then last night I received an email sabi po nila hindi daw po nila ko matawagan pero before ko naman po sinend ang application ko 5 times ko chineck lahat ng dapat ifill out sa form and i just want to ask po kung yung email na nareceived niyo meron ganito “Canadian Visa Professionals
Your gateway to Canada” na malaki sa middle ng email? Nag aalala po kasi ako kung scam yung email. Sinabi din po kasi nila sobrang tagal na daw po naka pending ang application ko. And did they tell you before po b sa email nila sir na they will contact you? Wala naman po ako narereceive na calls from them. And true, sobrang tagal na nga po ng application ko pero inisip ko nalang na kailangan iconsider kapag masyado marami ang applicants na nagka sabay saby. Pease sir help me. Thank you.
Hi Rish, when you said you applied in SG, online application pa rin or via agency ka? Sa experience ko and sa mga friends ko na tinulungan ko mag-apply online, walang ganung email and walang tumatawag. Lahat ng correspondence ay andun sa GCkey account. Yung sa email, mga notifications lang na meron nang message sa account ko.
Tama na yung website na pinag-applyan mo? Kasi maraming mga “visa assistance agencies” ang nagpapanggap na sila yung official website. Check mo kung anong website ka nag-apply. Dapat ito un: https://www.canada.ca/en/immigration-refugees-citizenship/services/application/account.html
Hi Sir, online po. After I submit naman po ng application ko i received 2 emails na i have new messages sa GCkey account and i checked meron nga po. Yes Sir tama po kayo scam yun. Question nalang po is it really possible na abutin ng almost a month ang pag receive ng confirmation po from Canada Immig? Nag submit po kasi ako October 17. And until now wala po update. Thank you po.
Hi Rish, yes, possible yun na umabot ng 1 month. Kasi yung average right now is 16 days. A few months ago, ang average ay 25+ days. Average yun, so pwedeng shorter, pwede ring longer than that. Depende kasi sya sa volume din ng nag-apply.
Okay Sir. Maraming Salamat po. I’ll post an update regarding my application once na nakareceive na po ako ulit ng email from Canada Immig. Nakatulong po talaga ito ng malaki sa part ko. =)
No prob! Sana maapprove ung application mo. Good luck! :)
Hi can I ask if anong gagawin kung maling file yung nasend ko dun sa cic?
Hi Burke, naku, i have no idea. :(
Hi Yoshke,
I want to thank you for creating this page. Super helpful siya sa pag apply namin ng friend ko online (although at first she insisted to apply in person haha!). It seems easier na to apply online when I read your page :) We applied last Oct. 19 and my friend received an update last Nov. 6 requesting for her passport, then for me naman nung Nov. 7. We are now waiting for our passports to be delivered and hoping for a multiple entry visa. Thank you so much again and God bless you more!
Thanks for taking the time to share this, Raj! And congrats on your visa!
Enjoy Canada! Where in Canada are you going?
hi mas gusto ko po sana na thru online mag apply, but my problem is waa ako visa card or master card o pay for the visa fee.. wala na po bang ibang options aside from credit cards?
Hi Jenn, if you have a friend or family na merong credit card, pwede ka humiram (Meet mo sila tapos ask them to enter their card details para they don’t need to disclose the details to you).
Hi Yoshke, I want to thank you very much for this step by step visa application to Canada. I’ve been thinking of applying in person or thru the help of a travel agency. I googled which one is easier. Luckily, I saw your post. I followed it. I applied online this Nov. and in just 12 days I got my passport with visa (multiple, expiring in 2028). That was so fast and hassle free!! You’re such a big help. Thanks again and God Bless you!
Hi Edna! Thank you for sharing your experience! We’re always happy to help! :)
Hi sir!
Just want to ask if you have any idea kung anong document ang kailangang i-submit sa field na “proof of relationship” under supporting documents. Thank you so much!
Hi jeline, if close relative, pwedeng birth certificates. If hindi, pwedeng pictures or any other record.
Hello, With regards to this question.
Shall I also include our marriage certificate under proof of relationship?
Just so curious kasi hindi ko alam san ko iuupload ung docs nato. Though ako lang naman bibisita sa tita ko and not with my husband
Hello po sir!!
just wondering po kasi ang friend na e vivisit ko po ay student pinoy po sya and meron syang apartment dun. ok ba na lagay ko yung friend ko sa “person i will visit” or para mas safe lagay ko na lang na sa hotel ako mag ststay pero dun ako sa friend ko mag stastay. I need your help po, I wanna hear your thoughts thank you po!!!
If kayang ibigay ng friend mo ung documents needed kapag invited, ok yun.
Your trip will be sponsoring your trip or ikaw yung gagastos? If ikaw ang sagot sa expenses mo and wala kang sponsor, it’s simpler if hotel na lang.
Yoshke, odd question. I just came back from HK but Ive submitted my TRV application for Canada. I dont know if naexperience nyo na pero when you send the passport thru VFS, how do you deal with the small slip of paper from HK na parang immig slip? Sorry kung weird yung question haha. Did you staple it para di mawala?
Hi MT, this immig slip is the one that replaces the stamp, right? I haven’t been to Hong Kong since they stopped stamping passports kasi.
But do you really need to submit that to VFS/Canada? If they’re asking you to submit your passport, most probably, there is already a decision regarding your application. I don’t think you need to include that immigration slip; it wouldn’t serve any purpose. That’s what I think, but that’s just me.
What I can suggest is this: Bring the immigration slip to VFS when you submit your passport. Then ask the VFS staff if you really must include that slip. My hunch is, no need for it. But just ask when you’re there na.
Hi Yoshke, went to VFS yesterday and the representative said it really didn’t matter and that it was up to me. I decided to keep it. I’m just waiting for my passport to be sent back to me – hopefully with the Visa haha. Thanks for everything. Your blogs are well-written and your responses are professional and helpful. :)
Thanks MT! Malamang may visa na yan. :D
After surfing interminably for days, I finally found THE BEST resource, and the only resource, that clearly states the steps. I was not sure if people outside Canada could obtain a GCKey, as I have. Thanks so much for this excellent resource. I am going to place a link to you at my web site.
Hi Harry, yes, people outside Canada can have a GCKey as I was able to get one even though I’m not based there. How I understood it, if anyone wants to make a “transaction” with any Canadian government office, they need to have a GCKey even if they’re not in Canada.
hello po. im planning to apply for Canadian tourist visa. im married po. but since ginamit ko maiden name ko sa passport, i used “single” when i applied for japan, korea, dubai and australian visa. this time, i want to use “married”. hindi ba magkaconflict sa passport ko kung married ang dadalhin ko na marital status?
Di ko po alam kapag ganyan po. Pwede nyo po i-ask sa Support Group namin: https://www.facebook.com/groups/thepoortraveler/
hi. im filling up the form now. ano po ibig sabihin ng “do you national identity document”? passport ba ibig sabihin nito? thanks
Yung nilagay ko, passport.
Hi sir good am, Ask ko lang po kung magkano ang CVAC handling fee and other services. Nag apply po ako online. Nabayaran na ang VISA fee. Paano po ang mode of payment if by mailing po ipapadala ang original passport? thank you po
Hello there!
I know it’s late, pero I just want to share my experience (para na rin sa iba). Ang mode of payment lang na tinatanggap nila ay thru Managers Cheque. Tapos yun na ang pinadala ko sa VAC with my passport, yung letter of passport submission, and personal information kung saan nila ipapadala pabalik yung passport.
Hi Irish, di ko alam if different yung handling fee pag by mail. Usually need ng Manager’s check pag by mail. Follow mo na lang yung link that I included sa post to see the details kung paano mag-apply by mail.
Di ko kasi naranasan na by mail kaya di ko alam ung details nun, in person kasi ako nag-apply.
Hi Sir!
For Almost 2 mos. of waiting… I received an email just now and pinapasubmit na po nila yung passport ko together with the letter they sent me. Meaning po nun approved na? Nandito po kasi ako sa Singapore nag wowork so hindi ko pa po alam saan ko isusubmit. Pero ang question ko po is okay na po kapag ganun?>
Yes, most likely approved na yan. :)
Hello Sir,
Canadian embassy is asking us to submit our passport, do we also need to submit a copy of the documents we submitted online? Thanks
Hi Angela, no po. Only yung hinihingi nila for passport submission. Nakalista un sa email nila. Nakalista rin sa taas, under “SUBMIT YOUR PASSPORT”
Hi Sir!
Finally approved po ang application ko! First time ko nag apply ng ganito kabigat na “VISA” and Im so grateful and Blessed na tinupad ni papa God ang prayers ko and syempre po sa tulong ng Blog post niyo na to. Sa ilang buwan at pabalik balik ako na viewer/reader ng blog post niyo na ito sobrang napaghandaan ko po mabuti at sinunod ko lahat kaya kung mapapansin niyo din po sobra kong daming tanong sainyo. And worth it po lahat ng makulit na tanong ko. haha Hindi mo na talaga kakailanganin ng travel agency to help you with the application just to have one.. Dapat iprepare mo muna talaga lahat documents na kakailangan. Thank you Sir! sobrang naiyak ako nung nakita ko sa email ko na may notification ako sa GCKey account ko. Almost 2 mos. po ako nag antay… Thank you talaga Sir! God bless.. wag po kayo magsawa na magpost ng mga helpful articles gaya nito. Ang laking tipid nito sa mga kuripot na tulad ko.. hahaha See you soon CANADA!!! hooraayyy!
Hi Rish,
If its not much of a bother can I ask help I am unable to download the form. I tried seeking a travel agency help but it seems it all boils down to the form . Would really appreciate some help.
Kind Regards.
aaa
Hi, finollow ko lang po yung sinabi ni SIr Yoshke open niyo po sa Internet explorer yung site wag po sa Chrome. Hindi na po talaga kailangan ng travel agency as a first timer na gaya ko basta lahat po ng documents na kailangan niyo iready niyo po pwede niyo naman po balik balikan ang GC key Acct para sa pag complete ng mga documents na kailangan. Iba iba po kasi ang hihingin na documents sa laha ng applicant depende po kung paano niyo sasagutin mga questions nila. Like kung may kamag anak ka na nag invite may iba ibang documents sila kukunin.
Yayyyy! Salamat din! Hope you could also share our blog with your friends. :D
Congrats and enjoy Canada!
Yes Sir no worries! recommended po talaga ang mga blogs niyo! God bless Sir! POwer! =) Thank you.
Hello,
I’m a little confused of where you guys send the cover letter.
If I have an itinerary + reservation for hotel and plane or say invitation letter, I believe they all go the purpose of travel file to submit right?
Where does my letter of explanation go? And is that the same as the cover letter? I haven’t been to the website yet because I wanted to complete my requirements first and got a little confuse where this and if it is mandatory to submit.
Hi Boj!
Yes, cover letter = explanation letter.
No, it’s not mandatory. It’s optional.
When I applied, there was a separate field where I could upload the Explanation Letter. If your checklist has it, then upload there. If none, you can include it in your Purpose of Travel file.
I will travel to Pittsburgh, USA by March 28, 2019 and will stay there until June 19 to see my Godmother while she’s still alive. While staying there, I would like to visit too the relatives of my husband in Toronto , Canada, Could I possibly apply for a Canadian Tourist Visa since it is only 6 hrs travel to Toronto, Canada from U.S.
Hi Fleur, I think that’s possible. But since you still have time, best to apply while you’re still here in the Philippines, I think.
Good day!
sir, paano po kapag yung land title ng lupa e nasa pangalan pa ng mother ng husband ko? yun po kasi sana ipepresent namin na rootedness dto in applying for tourist visa. pwede po ba mag pa notary nalang kami ng Deed of donation ng portion ng land na para sa asawa ko po since buhay pa naman po si mother nia?. and yung travel insurance po mas maganda po ba meron kami isama na ganun? and saan po maganda kumuha noon? salamat po ng madami
Hi Dawn, malabo yun if hindi naman nakapangalan sayo yung title, kasi ibig sabihin hindi sya sa’yo. Di ko alam if pwede ung deed of donation.
Di ko rin alam if oks lang ang travel insurance. Feeling ko okay lang naman, although hindi ako nag-submit nun. Pwede ka kumuha from Pacific Cross. More info here: https://www.thepoortraveler.net/2017/06/flight-hotel-reservations-visa-application/
thank you po sa reply.. sa mother po ng asawa ko yung land then ipanotary po namin na yung portion ng land e dinodonate na nia sa asawa ko po. kaya yun po sana ang isa sa assets na iinclude po namin.. salamat po sa link bout travel insurance.. last na po sana tanong.. may friend po kasi ako sa canada na very willing po mgprovide letter of invitation, mas okay po ba na humingi pa kami sa knya or declare nalang po namin na wala kami kakilala dun since mdyo okay nmn po financial namin? thank you po sobra…..
Hi Dawn, if confident ka naman sa finance and rootedness docs n’yo, simpler kapag wala nang kakilala doon. Mas nagiging complicated kasi pag meron pang nag-invite. :)
Dun sa land, di ko talaga alam if okay lang ung Deed of Donation.
Ok po.. i’ll follow your advice po.. sa ngaun po kasi wala pa kami land title on process palang po.. baka kaya lang po kami madedenied e dahil wala kami land title.hehe.. sobra salamat po talaga sa reply
… GOD BLESS YOU PO..
good day… sir last question, need pa po ba isend lahat ng pages ng ITR or yung first page nalang po? thank you so much po…
Hi Dawn, hmmm, yung saken kasi 1 page lang so di ko sure kung ano ung laman ng ibang pages nung sayo. Pero isend mo na lang lahat.
ok sir, thank you po sa lahat ng reply nio.. thumbs up sa blog nio sir very helpful… GOD BLESS PO
No prob po!
Hi! I am planning to apply for a Canadian tourist visa. Would the salary matter a lot in the application? I have a relative who is a permanent resident in Canda, btw. She’s the one inviting me to visit them. Thank you!
The short answer is yes it matters.
The long answer is, it matters pero depende talaga yan sa maraming factors. Combination yan ng finances, rootedness and employment. If mababa ang sweldo pero strong ang rootedness, pwede pa rin maapprove. If malaki ang sweldo pero mahina ang rootedness, pwede pa ring madeny.
Hi po, sana matulungan niyo ako. Sa uploading part kasi hinihingi nila yung invitation letter but my boss don’t need it. paano po siya mawawala sa uploading part kasi hindi po ako maka-forward. Thank you
Hi MJ, maybe I’m just tired but I’m not understanding the “my boss doesn’t need it” part.
Enjoy Canada! Sayang 2 years lang yung validity ng sayo. I applied when my passport was renewed nung June 2018. Luckily, I was approved till 2028. No plans of visiting Canada pa talaga. I just applied for the visa since till the end of the Passport validity naman. Anyway, I ended up visiting Toronto for a week. Just finished my trip as of this writing. Enjoy Toronto! I do hope you’re not going during winter. I must say it’s true that Toronto’s weather can be deadly.
Hi David, thanks!
I wrote the intro 2 years ago though, so nakabalik na ako from Toronto, haha.
Hello. I submitted my application yesterday but I have not received any email until now. You mentioned on this blog that after a few hours an email will be sent with regards to the application. Is this normal?
Yung sa akin and mga friends ko na nag-apply na rin before, within a few hours lang.
Thanks for this. I see that the title is for 2019. Do we need to apply for a Biometric or something?
Hi Robert, not everyone. You’ll know after you submit your application online. They will tell you in a letter if you need to or not.
You can also check here: cic.gc.ca/english/visit/biometrics.asp
hi sir, its me again po.. currently doing our itinerary po.. im with my husband and son po in this application.. help nmn po sa day to day itinerary.. realistic po ba na 10 days lang you tour namin like ex. first day is toronto then 2nd say ottawa, 3rd day montreal 4th day quebec.. considering distance of places po.. how many days po kaya ideal na itinerary for us? gusto ko po kasi talaga maapprove kaya gusto ko po convincing po tlg itinerary plng.. thank you so much sir
Bakit di na lang po yung totoong plan nyo ang isubmit nyo? May problem po ba sa totoong itinerary nyo?
Hello, My Aunt in Canada sent me an invitation for 6mos visit. She will sponsor all the expenses during my stay. Can I apply for 3 mos visit visa kahit naka-indicate sa invitation that she will accommodate me for 6mos.? Also, do i have to make itineraries for that long visit? Is it required? Thanks
Hi Dane, baka makalito ung 6 months na nasa invitation letter tapos 3 months ung applyan. Iwasan mo na lang yung mga inconsistencies kasi red flag yung ganyan.
Thanks sir, additional concern po. nakalagay din sa invitation that the 6 months visit will start on February 14, 2019, but just 2 days ago I received the invitation and others docs from her. Ano po ang magiging effect nun sa visa application?
Right now kasi , nag i’m gathering palang the requirements and seems not possible to apply right away na hindi pa complete ung requirements ko.
Hi Dane, basta dapat consistent yung mga documents para maiwasan na mag-duda yung mag-aassess.
Hi! I am planning to apply for a Canadian tourist visa. May I know if it is important that the documents esp. the pages of the passports and the visa be notarized or stamped with a note “certified true copy”?
Thank you!
Hi Sabina, I don’t know but I never had the pages of my passports notarized when I applied, though.
HI Sir,
May tanong po ako, mag travel na po kasi ako sa March papunta ng canada. Ano po mga kailangan ko ipakita sa phil. immigration at sa canada immigration? Ang ETA is only for visa-exempt foreign nationals po diba? Pa help naman po sir!Thank you and God bless
Hi, bukod sa visa, make sure you have return ticket and proof of accommodation. If invited ka ng someone in Canada, get a letter of invitation.
More info here: https://www.thepoortraveler.net/2014/03/offloaded-philippine-immigration-rules-requirements-airport/
Thank you po! Pero siguro po mas okay nalang na dito nako sa Singapore mag exit? SInce dito naman po ako nagwowork? Sa tingin niyo po ba Sir?
Hi! Yep, mas mahigpit kasi talaga ung PH Immigration.
Sir, one more thing. Mag papa approve po kasi ako ng bagong leave form since na move yung pag punta ko sa canada due to late approval nadin po na natanggap ko sa canada. Saan ko po kaya pwede i address yung Certification ko Sir? Last nalang Sir. Thank you po in advance. Magtravel na po kasi ako ng End of March.
Hi! Medyo lost ako (baka gutom lang me haha), pero anong certification ito?
Learned a lot from this blog. My brother and I applied visitor visa and got approved after 13 days processing. My brother doesn’t even have travel history. Thank you so much for posting useful information. More power to you and God bless! :))
Thanks for taking the time to share this, Lexing!
Hi! I am on the process of applying a canadian visitor visa. The next step is to upload the required documents but I can’t seem to find the upload option on the website just like what you have posted here. All I got was the list of forms and supporting documents needed. No upload button on the right side. Can you help me regarding this matter? Thanks you!
Hello po. This is very helpful and I followed the instructions. I submitted it yesterday and now I received a letter that I need to have my fingerprint scanned and photograph taken. It says I only have 30days to comply. Do I need to go to Manila to do that? I’m from Palawan po. Thanks!
Hi Belle, yes, I think so. It’s an additional step and you need to personally show up at the VAC.
You might want to update the process of this :)
There’s an added, required step as of December 31, 2019 requiring all visitors/PRs/citizens to get the biometrics before they clear you for a Visa.
Also something to note, you have to pay CAD$ 185 up front and not just CAD$100 upon submission of application. Hope this helps!
Hi Gabriella, yep, we already updated last night, even before your comment, which is weird.
Where did you view this post? What browser? It looks like the one you’re seeing isn’t the updated version…
Thanks for the big help. It really really made everything easier. From start to finish, this was my guide. Submitted my online application Jan 8, 2019… got biometrics request and additional info Jan 9. emailed the additional info Jan 10 and submitted biometrics Jan 11…Since then no activity….till jan 31, original passport request na agad. Thats Thursday afternoon. Feb 1, Friday morning submit agad … And today, got 3 updates… checked my cic account, its multiple entry, valid till mar 2028!!!! WHOAAA… God has been so good to me, and Yoske, you’re an angel. Maraming salamat tlga… btw, been following your blogs way way back then pa…yun mga DIY local tours!!! God bless you more and more power!!…Teka teka…ndi ko p nkukuha yun passport ko s VFS global, wed or thurs na…holiday bukas eh..haha..buti nlng nbasa ko d2 n mkikita s cic account yun decision…hehe
how to upload b yun cic account page ko d2 so others could have idea how it looks like?
Hi Jhorez! Wowww. Congrats! And thanks for taking the time to share this.
You can email the screenshot to yoshke@The Poor Traveler®.net! It will be a huge help top others. :)
Hi po, I have a friend from Canada, hes 74 years old, and weve been trying to get my tourist visa. unluckily before, I applied thru agency but turns out that they really dont help you to get approved and didnt really even clarified the requirements but take your money instead. Nadeny ung application last 2016 due to my no travel history, current employment (COE), and Purpose of stay ( since they didnt really helped us at all how to create one). Now we just applied again, and Im still unemployed, but a freelancer (low income)..hehehe.. ung travel history ko naman po recently is Hongkong, and I it added to my application also I created a long letter (purpose of stay) and plans while in canada. Nagbigay na rin ako ng biometrics. Then ung travel po and everything will be sponsored by my friend (literal friend). Hes been helping me every month and he treats me like a daughter. U think ok naman po ung application ko? Or will they ask for more?I also sent my bank cert and monthly statement.
Hi Chinny, malaking bagay yung employment. If freelancer ka, nakapagbigay ka ba ng proof of income?
Okay ba yung laman nung bank account mo? And walang anything suspicious sa monthly statements?
Since invited ka, naexplain ba nang maayos how you’re related to the inviter?
And yes po, naex plain naman ng maayos. and my friend is the one na tumutulong sa akin for my needs. as in super bait lng po tlga nya. we just need to see each other in person before something happens, coz hes old and hndi xa pwd sa long trip ksi under observation xa ngaun ng doctors nya po which we indicated also in the letter.
Warn lang din kita na baka mahirapan ka rin sa Immigration nyan ha. Pero hintay mo muna yung visa result before mo asikasuhin yung for immigration. Pero heads up lang. Medyo unusual kasi yung situation mo so they might take a closer look.
yan din po ung worry ko. haist. complicated maxado. once na approve po ba and may tatak na ung passport tapos flight mo na, iinterviewhin pa rin po ba ng IO? an d may chance bang ma offload?
Yep, pwede ka pa ring ma-offload kahit may visa ka na, lalo if you’re visiting a foreigner. Make sure you have all the documents needed like affidavit of support and proof of relationship (photos, etc).
You might want to read this first especially yung part about visiting foreigner friends: https://www.thepoortraveler.net/2014/03/offloaded-philippine-immigration-rules-requirements-airport/
hi. yes po. naexplain naman, pati ung places na pupuntahan namin. waiting for contract pa po kasi ako as of now as an escort aide/assistant. sa march pa.. pero napasa ko na po lahat requirements eh,. huhu.. pero sinunod ko nman po ung sa blog nyo. tapos inindicate din namin sa letter na enough time lng na pagbalik ko dito is election na. and yes, ok naman laman ng bank account ko po . i think enough for the proposed stay but i mentioned na it will only be used for back up source since all expenses will be covered by my friend naman. hes a business owner kasi doon . he owns a company.
Hi po, I was denied last 2016 dahil sa agency na pinag applyan ko, 3 days lang binalik na agad ung application and was denied! Hndi nla ako tinulungan kung anong requirements dapat and all, as long as nakabayad na ako nun, wla na. go lang cla, wla mn lng kaming convo. I got denied due to this 3 reasons:
1. Purpose of stay (since ndi ako tinulungan ng agency ko how to create one and it was very short)
2. Travel history
3. Current employment (COE)
Then now po, i applied again, may travel history na ako sa Hongkong (ok lng po ba un if isa pa lng travel history ko?), sponsored by my friend from Canada (citizen), no current job since kakatapos lng po ng contract ko last Dec 2018. and created a purpose of stay (plans while in canada and the letter which is very long) . Tanong ko lng po, ok lng po ba ung req. na pinasa ko. ? nakapag bigay na rin ako n biometrics, and also gave my bank cert and monthly statement. is there any chance to any of this?
Hi Chinny, having complete requirements doesn’t guarantee anything. Syempre titingnan pa rin nila yung bawat document. Malaking factor din yung employment. If unemployed ka sa ngayon, tatagilid ka sa rootedness, which is something na kino-consider talaga nila.
Hi po. i think because sa letter ko po un noon,cla nagduda kasi wala naman po tlga ako alam at di naman tlga mag ttnt. pero xmpre as a first timer, di ko alam gagawin non ,.
kasi nakalagay sa letter ko nun is to look for a school. so parang un ung mali sa letter ko po.
Ah naku, oo nga, medyo red flag yung sinabi mo na you’re looking for school. And possibly na baka macompare din nila na last application mo na you’re looking for school tapos ngayon, iba naman.
Pero nasubmit mo na rin kasi so wala na tayo magagawa sa ngayon kundi hope for the best.
Good luck sa application mo!
ano po pala dapat gawin sir. kasi if ever ma deny ako. i will apply again. and hopefully want ur help regarding sa letter
I don’t think I’d be of much help kasi di ko rin alam ang gagawin kung ako ang nasa situation mo, to be honest. huhu
hi po! ask ko lang po if okay lang na ilagay ko sa application ko na for 8 days lang stay ko pero ang invitation ng husband ko is for 21 days. inexplain ko nlang sa may purpose of travel na due to my business back home kaya i’ve decided to make my stay short. mainly purpose ng travel is to spend my husband’s birthday on the 8th of may. thanks po.
Hi PJ, di ko po alam kung makakaapekto yun, pero kung ako yung nasa posisyon nyo, ganun din po gagawin ko, i-eexplain ko na lang sa letter.
Hi sir! Ask ko lang po if okay lang ba na different ang # of days naka indicate sa invitation letter and sa application letter ko? I tried to explain as to why I’ve decided to reduce my stay from 21 to 8 days(i said in the first paragraph in my purpose of travel that kailangan ko I attend ang business ko back home). Ginawa ko nalang 8 days na matatama ang date to the birthdate of my husband.
Second question, do I need to put a cover letter? Where ko siya i-uupload? Thank you
Hi Princess, I don’t know for sure. If I were in your shoes, okay lang yun since shorter ung nasa application form and within the dates na indicated sa invitation letter. That’s just me though.
When I applied, there was a separate section for Letter of Explanation. Not sure if they still have it now. If there isn’t a space for it, I would add it to the Purpose of Travel file.
Hi,
What is the “personal info form” you mentioned here…
Where do I get that?
When your number is called submit all the requirements:
– Passport
– Request Letter from IRCC/CIC
– Personal info form
– VAC Consent Form. You can also download here
Thank you!!!
If you’re submitting the passport in person, you can get one sa VFS office. The guard will give you these forms upon entry.
If you’re submitting by mail, there will be a link on the website where you can download the forms.
Big thanks!!!
thank you!!!
THIS is THE GUIDE. Thank you, good Sir, for such an in-depth how-to! Seriously, it’s so detailed and easy to follow (plus super navigable, haha).
Just a quick question: When I applied, I indicated a seven-day trip. Now that the embassy gave its green light, do you think a three-day or four-day extension will be an issue?
Original plan was to stay for just a week, but now that the flight fares have gone up almost twice as when I first checked it, I’m thinking I probably should make the most of it.
Thank you, again, for such an awesome guide!
Hi Dax, as far as I know, you can extend, as long as it’s within the allowable length of stay. :)
I am applying for my uncle’s caregiver who was granted a Tourist Visa last year, Single Entry. However, I noticed there is a biometrics portion already and the form is quite different. When do we schedule the Biometrics appointment for her? Can I apply and submit online for her? The one who got the visa approved last year was thru a lawyer in Canada but we want to do it personally this time since their rate is quite expensive.
Hi Lindsay,
After you submit your application, you will receive an email with instructions on how to submit biometrics. You can set a biometrics appointment here: https://www.vfsglobal.ca/canada/Philippines/Schedule-An-Appointment.html
The appointment must be done within 30 days of the email issuance.
Not sure if it’s possible to have a CIC account on behalf of another person though. But you can create an account under her name and just guide her through the whole process.
Hi,
I got this letter.
Dear Applicant,
This letter refers to your application for temporary residence.
On December 31st, 2018, biometrics (fingerprints and a photograph) became a requirement for some IRCC applicants. Your application was received on or after December 31st, 2018. After a summary review of your application, it was determined that this requirement applies to you.
In order for IRCC to process your application, you must complete/submit the following to this office by February 14, 2019
Payment of Biometric Fees
1. This fee must be paid at the following link: https://eservices.cic.gc.ca/epay/.
2. Click “Continue” at the bottom of the first page.
3. Select “Immigration” then under “Other immigration services”, select “Biometrics”.
4. Select the fee that applies to your application.
5. Click “Submit” and complete payment.
6. Upload the receipt via your IRCC myAccount.
a. If you are unable to upload your receipt via your IRCC myAccount, you may submit your receipt via the IRCC Webform.
Note: You only need to pay biometric fees at this time. When your payment is received, you will receive further instructions within 24 hours on when and how to give your biometrics. For more information on biometrics, please visit the IRCC website at https://www.canada.ca/en/immigration-refugees-citizenship/campaigns/biometrics/facts.html
My question is how did you do step 6? I could not figure out where to upload in both options. Thank you for the help.
Hi po,
I just want to ask if need pa magschedule sa VFS kapag magsubmit ng passport personally sa office nila sa Makati? I received a message na po kasi regarding Original Passport Request. Thanks po :)
Yes, you need to schedule passport submission.
You don’t need an appointment if passport submission! Just walked in yesterday :)
hello po ask Lang since recent ka :) upon biometrics pinapaiwan na PO ba Ang passport !?
Waaah oo nga pala, nag-walk in lang din ako. Nacoconfuse ko na ung passport submission and biometrics submission. Arghhh!
Congrats pala sa application!
hello there!
can i use my debit card (visa) in paying visa? the total fee would be 200cad for both my aunty and mom, so i deposited around 10k in my debit card…is it acceptable?
thank you very much!
Hi Jenjen, I haven’t tried so I’m not sure. There is a Visa DEBIT logo in the accepted modes, but I haven’t tried. :( I used a credit card.
Thank you so much for this post. I have shared it to friends who are also applying for a visa like myself to attend a conference in Vancouver. I turned in my application last Friday, Feb. 8 and the next day, I already got an email to submit myself for biometrics and to bring my passport and travel documents. Fingers and toes crossed, that my application is successful. Keep on travelling and keep on telling your story.
Thanks, Chi! And good luck!
Hi Mr. Yoshke!
I’m currently applying my niece and father for a TRV in Canada. We will be accompanied by my sister (living in the US) for a 4-day trip in Toronto. I have a few questions regarding our application.
1. My niece and father do not qualify as my ‘Family Member’ as described in the glossary. Thus, I need to apply for both of them (and make separate CIC accounts), correct?
2. We do have friends to visit in Canada, but I’m actually thinking of just foregoing with the invitation letter as we will just meet them and not to stay at their place. Do you still recommend to include one in my submission of documents?
3. For the proof of financial support, my Father is already retired (thus no more source of income) and my niece is still a student. Can I just upload a sponsorship letter from my sister (living in the US), stating she will cover their expenses in Canada? (this will include her bank statement, payslip, American citizenship cert, etc).
Hope to hear from you soon, sir!
Thank you very much!
Regards,
Hi Sir!
We have the same situation. My sister who is a resident in PA, USA naman ang kasama ng reried mother ko pa Canada pero we have relatives kasi sa Canada so ang hiningi ko is invitation letter from them, sa case niyo since hindi kayo magstay sa kanila just provide a hotel reservation siguro plus the invitation letter. Then for the proof of financial resouce of supporter ganun din ginawa ko, letter and supporting docs from my sister in USA. same nga lang ang inupload ko sa Proof of Financial Resource of Supporter and yung Proof of Means of Financial Support since same requirements.
Hi jerome, unfortunately I haven’t tried applying for a Canadian Visa as someone invited or sponsored by relative/friend or as part of a group, so I can’t adequately answer your questions. What I suggest is that you post this on The Poor Traveler Support Group on Facebook because maybe some of our members have experienced it. :D
Hi Mr. Yoshke, thanks for the prompt response! This is noted, I’ll just post this one sa FB. Thanks!
Good morning, Mr. Yoshke.
The question in the FAMILY INFORMATION form about “Will accompany you to Canada?” refer to family members who will ACTUALLY TRAVEL with the applicant? It does not refer to the ones who are already in Canada? Thanks for attention.
Hi Agnes,
Naku, sorry, di ko alam kasi I didn’t travel with family. :(
Hi. I’m applying for someone one on their behalf. Which is better for the application submission, should I do it online or in person? Thank you.
Hi Ann, I don’t know for sure, but I think online? Because online, you can create an account for them and work with them through the whole process.
Hello, sobrang thank you po sa blog na to super detailed, sobrang bilis intindihan .
Ask ko lang po kasi nirequesy ako ng biometrics pinapaiwan po ba passport kasi kasi may trip din ako for a week. Or better pagbalik ko nalang po..?
Hi Mam!
Hindi pa po iniiwan passport for biometrics but you need to have an appointment.
For Passport submission naman, upon receipt of letter you have 30 days to accomplish it.
Goodluck! :)
Hi Maya, ang alam ko, pag biometrics pa lang, hindi pa yun ipapaiwan. Dun lang sya hihingin pag passport submission na.
Hi,
Super grateful sa guide mo. It is my 2nd time to get visa and the 1st Visa I had was 5 years ago.
Parang I do not recall na ganito ka haba at kadami mag back and fourth to get an email, submit this and that, etc.
Parang mas simple noon ang application.
Now, just like what you said it is daunting, quite frustrating, honestly. Without your post I would have not known what to do.
Kung hindi ko nabasa dito na to submit biometrics I need to set an appointment, I would have just showed up sa VFS. Mind you the BIOMETRICS COLLECTION LETTER does not say you need to make an appointment. Combine mo pa na hindi ata nag oopen ang site nila ng maayos kapag safari ang gamit. Oh yes the forms too. Thank God after 50 tries na-open ko din ng maayos ang mga forms. Super thank you talaka Yoshke and Vins!
Kahit na nakakuha na ako ng visa noon grabe nalito pa rin talaga ako ng husto. Super grateful sa blog nyo! I will be submitting my passport na bukas!!! God bless you more!
Dami nyo na bless sa post na ito for sure!!!
Cheers,
Alet
Hi Aleta, thanks so much for this! It always makes us happy to know that we get to help other travelers!
Congrats on your new visa! :)
Hi po!
Salamat po sa blog niyo! Sobrang helpful. Nasubmit ko na po ung passport ko sa VFS. May instances po ba na madeny pa at wala pong tatak yung passport pagkapickup ko po? Thank you!!!
Hi Kyle, sabi nung staff ng VFS na tumanggap ng passport ko, if hiningi yung passport mo for submission, almost always ay approved na. SYempre may chance pa rin na hindi, di rin masabi, pero it’s very highly likely na approved na raw yun.
Hi Sir!
I just wanna say thank you very much for this post. It helped me a lot in processing my mother’s visa. Though may guide naman sa website but its quite intimidating to read and understand. haha
The first time she was issued a Canadian visa was through an agent so medyo napagastos talaga kami . But with the help of your post sobrang nakatipid kami. May mga reminders ka pa and complete instructions like the signature part and yung paggamit ng Internet Explorer instead of Chrome.
We already submitted the passport sa VFS yesterday and waiting na lang. I just hope umabot sa flight niya on Mar 7.
Please take note ang binayaran lang ng mother ko nung sinubmit niya passport niya was just Php350 pero pinagdala ko pa rin siya ng extra just in case.
Again, thank you very much and please continue being helpful to others wandering the world. USA visa kailan ka kaya magpost? :)
Hi Rhems, I also applied for a Visa and I have a trip end of March. I already had my biometrics and already passed a week but no news yet on the passport submission. Would you let us know the timeline of your mother’s visa application? Thank you and have a great day.
Hi Rhems,
Yayyyy! Masaya na kami na nakakatulong kami! Sana umabot kayo sa March 7! :)
Mag-apply kami this year ng US visa. :D
Aabangan ko yan Sir!
Thank you.
Update: Nasa courier na daw po yung decision envelope. Ang bilis! :))
Good luck! :)
Sirrrrr… Im crying now.. Kailangan ko po talaga ng advice. Patapos na po kasi yung project namin this Month and unfortunately wala po bago project ang company namin. So kailangan muna nila kami cancel mga permit. Tapos po nakaplan nako na magvisit sa ate ko sa canada citizen po siya doon ng April. Hindi po ba alanganin sa Immigration? I have invitation naman po, money, marriage and birth cert to prove na magkapatid kami. SIr please i badly need your advice. Thank you po. Granted multiple entry visa po pala ako.. Working dito sa SIngapore until feb 28 na nga lang po.
Hi Rish, unpredictable ang Immigration. Mahirap malaman kung ma-sesecondary inspection ka or hindi. The only thing you can do is prepare the docs.
– Visa (which you already have)
– Roundtrip ticket
– Proof of relationship with your sister
– Letter of Invitation from your sister, ideally notarized/authenticated at the consulate/embassy abroad
And just answer the officer’s questions confidently and truthfully.
Need ba talaga ng ticket agad? kasi pag nadeny pano na ung ticket.
For visa application, HINDI. Diniscuss po yan sa post twice. Pabasa na lang po.
Pero may kakilala po ba kayo same case ng sakin?babalik po talaga ako kasi waiting lang kami sa next project para sa June. Sa singapore po kasi lalo na sa construction field pag wala project wala work..
Wala po eh
Maghahanap po sila ng Itinerary sa phil. Immigration? May mag maiprepresent naman po ako na documents namin ng ate ko. And roundtrip naman po ang ticket ko. Ano po sa tingin niyo Sir?
Dala ka na lang ng itinerary para pag naghanap, meron ka.
Hi sir!
Thank you so much for this very detailed blog, sobrang napakalaking tulong. I already received a letter for biometrics, at nagsend na ako ng schedule. Ang tanong ko lang, do you have any idea kung gaano katagal bago nila i-confirm yung schedule? Last Friday ako nagsend, up until now wala pang confirmation. Di rin ako sure kung natanggap ba nila.
Thank you so much po!
Hi,
I am planning on submitting TRV application this year and I too, was reading guidelines from your blog. So first off, thank you ‘coz it’s indeed very helpful to us all.
I happen to see some discrepancy in the Family Information Form you mentioned as IMM 5645E Form because from the Document Checklist (IMM 5484) and Manila Visa Office Instructions that I downloaded, they mentioned it there as Family Information Form (IMM 5707). Please verify/clarify what is/are the difference/s between the two?
https://www.canada.ca/en/immigration-refugees-citizenship/services/application/application-forms-guides/guide-5256-applying-visitor-visa-temporary-resident-visa.html#5256E3
In addition, I have a question about filling the Employment section in the IMM5257 Form. I need extra 2 pages for that section to fully indicate all jobs over the last 10yrs. Please advise how should I accomplish (or attach the extra 2 pages of Employment section) and submit it online. Because from what I understood on your instructions, you can only attach one file for each required document. I hope to hear from you. Thank you.
Hi Joan,
1. It varies per application. In some cases, they ask for 5645E. Sometimes, they ask for 5707. Not sure who needs to submit which. In my case, they asked for 5645E, but I have friends who were asked for 5707. Just submit whatever is in your Document Checklist. I’ll also update this post to clarify. :)
2. What I did, I just listed down my 3 most recent jobs. Not sure if that was the right thing to do, but that’s what I did. :)
Thank you for getting back to me.
Using 5707 wont let me save data into the form. It says there “Please print your completed form if you would like a copy for your records.” … May I please know how your friends completed and uploaded their IMM5707 form?
Also, when you said “in my case, they asked for 5645E”… do you mean that during the time of your application, the form indicated on your Document Checklist guide referred to 5645E? because checking out form 5645E allows me to save data typed into the form. Your help figuring this out is appreciated =)
Hi Joan, dunno how they submitted the 5707.
Yep, my Document Checklist indicated 5645E.
one last question po :)
how or where did you get your Document Checklist guide? was it after you signed-up for your GCKey?
Hi Joan, di ko na tanda exactly saan sya lumabas, basta may GCKey na ako nun and I already answered some questions about my visit.
Dear Mr. Yoshke,
In the required documents for uploading, walang hinihingi na PURPOSE OF TRAVEL. Instead, ang naka indicate ay INVITATION LETTER (required) . In this case, kailangan pa ba ng FLIGHT RESERVATION? at naka-include ito with the letter of invitation?
Thanks for your time.
Hi Agnes, as tourist kasi ako nag-apply, not as invited by a resident, so di ko alam if oki lang. Pero if wala naman sa list yung flight reservation, I think keri lang naman na wala yun. Although if I were in your shoes, I would still submit a flight reservation for good measure.
Hello po..question lang po, I am planing to apply for a tourist visa together with my husband and 1yr old son. I will be the principal applicant. Details or information ko lang po ba ang kailangan? Where do I need to attach the requirements for my husband and our son like Bank statements, coe, travel history, valid & expired visas, etc? For the family members kasi only current passport and IMM5257 and 5645 were asked to be uploaded. Does that mean they don’t need any infos from my husband & son other than their passport? Thank you po. Hope someone with an experience can help.
Hi Camille, di ko pa natry ang family or group application, but you can post your question on our Support Group. Our other members might have the answer: https://www.facebook.com/groups/thepoortraveler/
Hello,
7 years ago, my application were rejected. I was single at that time, walang travel history,OFW sa Dubai at hindi pa ganun kaestablish yung work ko.
Now, I’m already married, with Asia travel history plus bumalik ako sa pinas because my company in Dubai has opened branch here.. On my cover letter, I stated na kaya ako bumalik is para mgstart ng family. I’m already 6 year sa company ko. I can say na stable sya. My concern i my bank account is like only 4000 CAD and land titles is under my husband name. Ano kaya chances ng application ko? I only intend to stay in Canada for 10 days. Magapply nako next week. Please advise. Thank you
Hi Marimar,
It’s hard for me to assess kung ano yung chances. Di ko rin kasi alam how they evaluate cases like yours.
Thank You
Shall I need to submit my husbands bank cert. Or mas okay kung sakon nalang po.
Hi Yosh,
I was having a hard time putting signature on 5645e file (acrobat pro’s magic doesn’ work, lol), and then stumble upon your post. The rest is history sabi nga. Got my VISA LAST week (and for my mother too!). So THANKS HEAPS! You the man!
Hahaha, yeah, It took me a loooong time to figure out the signature bit too! Congrats! Enjoy Canada! :)
Dear MR. Yoshke,
First of all, thank you for passing all your experiences to us and for the time to answer all our queries.
I just submitted my passport this morning. I suppose that means an approval. I was told that I can pick it up after 14 days, at the average.
Since prices are going up, is it advisable to already buy the plane tickets now, even without seeing the passport with visa? Are they strict about the duration of trip and approve only the days we indicated in the application? I plan to adjust the dates, 2-3 days different from what I applied for.
Have a nice day.
Hi Agnes, I would recommend to wait until you see the actual visa so you know the validity dates and that there is indeed a visa. :)
Hi Yosh,
Thank you for your detailed guide. We were able to get our Canada Temporary Resident Visa because of this blog. I have a question though, for Filipinos visiting Canada for less than 6 months, do we need to provide vaccination records? Thank you.
Hi JM!
Thanks for using our blog! And congrats!
Hmmm, when I visited Canada, they didn’t ask me for vaccination records.
Hi. Question lang regarding schedule1 form, pwede ko bang lagyan ng blank page yun at yung client info. para masubmit ko na yun application? Since ndi naman sya applicable. Kase wala akong makitang next button sa page na un. Exit questionaire lang. Salamat.
Hello po ulit
Regarding po sa photo na iuupload. This might be a stupid question but I really dont know. scan lang po ba to then upload Kasi may nakalagy po as pdf or doc. please advice po. So prang ung photo pag scan masasama ung bacground.
Hello @The Poor Traveler®!
thumps up for your vlog. this is very helpful!
Dun sa proof of financial support, is it ok if my dad doesn’t provide a bank account statement or any financial statement instead I will provide a letter that I am covering all his expenses in his stay (will reside in my apartment, i will book the tickets, i will provide food/transpo etc). pwede po ba yun letter ko nalang instead of him providing financial statement? it won’t affect the application negatively?
Hi Justin,
Often, developed countries would still like to look at the applicant’s own financial status even if the trip is sponsored because it’s not just a matter of financial capacity but also rootedness in PH. I’m just not sure if Canada is like that too.
Thanks for sharing these steps Yoshke. I followed them to the letter and was able to help my loved one get a multiple tourist visa within a month. I have forwarded the link to a friend so he can save on fees as the agency that he approached to help on applying for a tourist visa was charging around Php10K.
Hi Monty!
10K? Wow, ganun na pala kamahal ang agency fee ngayon, haha.
Thanks for recommending our blog! :)
Hi there. Thank you for your informative blog. I will be applying for a Canadian visa soon. I will be entering Canada through land since I will be coming from Washington. What would you recommend that I will put in the Application form regarding the name and address and relationship of any person(s) or Institution(s) I will visit since I will just be visiting some of the tourist sites in British Columbia?
Thank you.
Hi Ivy,
I just entered the name of the hotel where I would be staying and their address. Dun sa Relationship to Me, I don’t remember if I left it blank or I put N/A.
Hello!
I will be needed to travel to a conference in Montreal soon thus I need to apply for a Temporary Visit Visa if I’m correct. I have good travel history where I traveled to 9 countries in less than 3 years in Asia, Europe and North Africa. I have sufficient financial funds as they’re multiple accounts and will only be in Montreal for a week.
My issue now is that my current employment is online-based and contractual where I receive my money thru bank transfer and not consistently monthly as they’re in bulk transfer (1 transfer covering multiple months).
My conference travel is also called by the same company I’m working with and they will cover all expenses.
How big of a chance will I have for this application? Is there something I need to do?
Hi Tony, I think there still is a good chance, provided that you’ll submit proof of your engagement with them. :)
Hello!
Thanks for your helpful blog. I really need information regarding biometric enrollment and the UCI. So two years ago I was granted a visitor visa and now I have to apply again since I only got a single entry visa. My problem is I can’t remember if I enrolled my biometrics. Since the application was two years ago it’s a bit fuzzy. I wanted to check if my biometrics were enrolled or valid but I need the UCI but I don’t have the original application they sent back to me. So do you know if the UCI can be found on the visa page? If you have any information it would be greatly appreciated.
Thanks!
Luis
Hi Luis, if you’ve been granted a Canadian visa online before, yes, you’ll find the UCI in the upper left portion (below the date, above the barcode) of the passport request email sent to you. :)
hi sir,.. may chance po ba maapprove kahit denied ako canada tourist visa almost 2 years ago? mag aapply po kasi ulit ako ngayon pero iba napo employment situation ko ngayon kasi dati dineclared ko employed ako and then ngayon po self employed na idedeclare ko with business permits po and itr naman.. makakaapekto po ba yung mga dati ko declared status pag nag apply po ulit ako ngayon? kasi totally different napo yung situation ko ngayon like source of income, financial status, etc… and last po ung UCI ko dati hnd ko napo alam kasi agent lang po nag ayos ng application ko kaya lang po hinihingi po pla yun. ano po pwd ko ilagay sa part na yun? sobra salamat po…
Hi Dawn, naku, sorry di ko po alam yung answers sa parehong questions nyo. :(
Hello may i ask i have uploaded my IMM5257 file already with bar codes , then i realized there were some wrong spellings in my files and need to update it…. will i need to have a new IMM5257 to fill up again and validate and upload? or i just have to edit the files i have previously i saved with bar codes and send it again. please help i don’t know what to do.
Hi Yoshke,
I’ve followed this blog post since day 1 and it has helped me tremendously. I submitted my requirements online last March 6 and was able to submit my biometrics and photo last March 12. It’s March 21 now and still no news, which I suppose is rather normal. However, I’m planning on leaving for my NY trip on April 5 (in two weeks). I don’t think they’ll have any issue on my requirements though, but I am getting nervous on my passport submission. How long does the passport submission and passport pick up usually take? Thank you.
Also.. should I be worried? haha
Hi Joanne, in my experience, it took 7 calendar days from submission of application to a passport request, then another 6 calendar days from passport submission to pick-up.
If that were me, I’d probably wait maybe 5 more days. If no word still after that, then I’d be really worried. :S
Hi I was reading through your blog and for the past three days, I cant figure out how to apply for a tourist visa online. I have been searching this part of your article “On the next page, click “VISITOR VISA, STUDY AND/OR WORK PERMIT”.” here https://www.canada.ca/en/services/immigration-citizenship.html and cant find a “next page” button. i feel like im lost. is there a specific website? am i even on the right website (tho this is where they gckey directed me)
I then called the embassy and they said you cant apply online but weirdly, some people can so now im unsure whos saying the right thing. The lady at the embassy said i must bring all requirements and submit in person because online isnt possible for first time applicant for tourist visa for canada
any help would be appreciated as our flight to US is on april 20nd. thank you!
Hi Kath,
Maybe you can assist me with my problem, I am trying to open up my unfinished online tourist visa application and also directed to the same page.
https://www.canada.ca/en/services/immigration-citizenship.html
And now, I’m totally lost because I supposed to be directed to my dashboard since I already start uploading some docs 5 days ago.
Please enlighten me on this part. Thank you. Your help is really appreciated.
Hi Kath, you’ve created a GCKey account already? If so, when you sign in, you will be directed to a dashboard where you can see your applications. You will find towards the bottom “Start your Application”. Click on “Apply to come to Canada.” Then follow steps 6-7.
When you called, they must have misunderstood you because it *is* possible to apply online. I have applied online. If you see the comments section, you’ll find a lot of our readers have applied online. If you see our Support Group, a lot of members have applied online. Or maybe the person you talked to was just unfamiliar with the online process. (There is a regular paper application available too. Maybe that’s what she’s aware of.)
Hi,
I keep having the same issue while I’m trying to apply online today. After I created my GCKey account and signed it, what comes out is “Please select Continue to return to the Government of Canada online service”. I can’t seem to find that “next page” as well. When I click Continue, it just brings me back to Immigration and Citizenship, then I have to sign in again. I’m also lost.
Hi Pauline,
I tried again just now, wala namang issue. After I click Continue, it leads me to the Terms, which is the right page.
Have you tried using a different browser?
thank you i actually have figured it out from your post!
my next question is, im flying to US next month april 20. do you think its possible to get my visa before? i can submit everything by monday but im scared that i wont get my passport before my flight. i have called agencies and they have all declined to accept my passport as they dont want to be held liable in case my application gets delayed- which i totally understand
any help would be appreciated. cheers!
Hi Kath, according to the Canadian Immigration website, the average processing time for PH applicants this season is 9 days. Add 2-3 days for you to submit biometrics. Then in my experience, 6 days from passport submission to pick up. If everything goes well, that’s 18 days. :)
My advice is to push through with the application. Nasa ‘yo naman yung passport until i-ask ka to submit (which most likely means approved na). When you’re asked to submit your passport, dun mo na lang i-gauge kung aabot ba. If feeling mo hindi aabot, submit ka na lang after your US trip (supposing na shorter than 30 days ung US trip mo).
Multiple entry naman ang Canadian visa and mahaba ang validity so even if di mo magamit this time around, may chance pa rin later.
Hi Yosh.
First of all thank you for writing this post. It was really helpful for me and my parents.
I just have a question. I received my letter for biometrics and in the letter they ask to bring my original passport with the letter.
My question is, will i have to submit the passport then and there?
I work for an airline kasi and i always use my passport. The earliest i can submit my passport is still on May since i already have a schedule for April.
Salamat po and Hope to hear your reply!
Hi Miguel, as far as I know and according to a friend who recently applied, no, not yet. They won’t collect it yet. They will just check it and add a sticker to the back. But you still get to keep it. Once you application is approved, you will be asked to return to submit your passport. That’s when they will keep it for a number of days.
Hi. May i consult you on the ff 1). I scheduled for a biometric appointment before sending the application for visitor visa. Is this ok? 2) my passport expires this November 24 2019. I will renew it on my 60th birthday on april 10. Is it ok if my date of travel on the application is may 15, 2019. Thank you for your assistance.
Hi Carol,
1. I haven’t tried doing this so di ko alam talaga. I think okay lang. Basta sa appointment date mo, nasubmit mo na.
2. I think okay lang kasi pasok pa sa 6 months na limit. Pero di ko rin sure ito. Di ko alam ang rule ng Canada pag pauwi ng home country. :(
Hello! My mom has 10 siblings and I try combining 2 PDF (IMM5645E) but it won’t let me because of the security feature of the form itself. What should we do? Thank you.
Hi Camille, naku, di ko alam. :(
Hi Yoshke,
Just want drop my big thanks to you! Sobrang laki ng naitulong ng blog mo. Ang bilis at ang daling sundan. In just two weeks I got my visa na. Thank you sooo much, sir!
Keep up the good work!
Yay! Congrats, Helena!
And thanks for taking the time to share your experience! It keeps us motivated. :D
I also recommended your blog to my friends who will be visiting Canada and Australia. Sana makakuha din sila ng visa. =D
Thank you! :)
Hello!
This is probably a stupid question but are the IRCC office and Canada Visa Application Centre (CVAC) the same thing?
I applied thru the Cebu branch of the CVAC and mailed my passport there (I’m already at the end of the process where they requested it), then I received a notification that the application has been dispatched to IRCC office.
I’m confused if these two are different or the same because in the canada.ca website, it looked like they’re the same thing.
Hi Ram, in my understanding, the CVAC just receives applications but the IRCC assesses and makes the decisions ultimately. I think the CVAC serves as the middle agency between the applicant and the IRCC. I could be wrong but that’s how I understood the setup. :)
Hello there! That was a very informative and helpful blog. I already have my Visa after 1 day of submitting my passport. Though it really pays to check one’s CIC account from time to time, not to entrust it all through the mail.
Congrats! Enjoy Canada!
Hi po , ask ko lang kung may chance ba ako ma-grant for working visa? Magwork po ako sa toronto as a farmer. Wala po akong travel history and proof of financial support like i dont have assets or house (im living with my parents) i was referred by a canadian citizen friend in their company and the company will write an invitation letter like i will work for a span of winter and summer season. What do i need to do po? Please help :'( what are the requirements? am i going to provide medical test result also ? my friend will going to shoulder everything with my plane ticket, accomodation and he will get a copy of his payslip. He dont have an asset as of the moment like company because he is helping his mom with the house bills and their house is under his mother name. Please help , i want to work there :'(
Hi Diana, wala po akong alam sa work visa.
Hi! Just wanna know what other proofs of relationship possibly they would need from me if I’d be invited by a friend to visit Canada.
Hi Marie, other than photos? No idea. :(
Hi! I’m having trouble with the payment. I have no idea where to click. I have a shitty internet connection. I submitted the forms and then supposedly, I’ll pay na. Pero nawala yung page. I closed the tab then reopened my account. But di ko maaccess yung nasubmit kong application. :( Kaya di ako makapagbayad.
Hi! Thank you for this blog! Kudos to all the people behind this blog! Laking tulong especially ako lahat nagayos ng papers namin for applying a tourist visa. I just want to say that having a valid US visa is a big factor din talaga! We submitted our application online last 07 April and done our biometrics on 09 April. On April 11, we received an update from our CIC account for the original passport request. Thank you everyone for all the help! :)
Hi! Is it true na no need for financial docs na if you have existing US visa? :) Will I see it once I logged in to online acct? I’m applying canadian visa kasi.
Thanks for sharing, Camille. And congrats sa visa!
Hi! Your blog is really helpful. Thank you so much. Regarding the payment, we tried via Landbank Visa Debit but it got declined, – transaction not approved. Do you have an idea why is this happening? Thanks!
Hi Key,
No idea. I haven’t tried paying using debit card. Maybe you should call your bank to be sure?
Selamat Po. I am an Indian living in Indonesia for 30 years(i lived in Phils 1992-94). This is the best and most elaborate Instructions I have ever found. Thanks a lot
You’re welcome! And thanks for visiting our blog!
Hi again, what credit card did you use? We tried BDO credit card and debit card but still declined. Or maybe they will only accept American Express? Thank you!
I used BDO. No problem.
Is there a difference between the regular Canada visa application process you posted and CAN+ ? I heard from my friends that individuals with a U.S. Visa can apply for expedited processing (and submit fewer requirements).
Hi Al, never tried Can+ so I’m not sure.
All I know is, Can+ is for those who have already visited Canada in the last 10 years or holds a valid non-immigrant US visa. You’ll find out if you’re eligible when you start your application. The form will be asking if you hold a US visa or if you’ve been to Canada, then it will tell you if you’re eligible.
which for that ask if I have US visa?, I can’t find this form yet !?
hi sir,
i submitted our application on april 11, then i received a letter for biometric collection po.. kaya lang sa letter wala po instruction na kailangan appointment for biometric.. pero since nabasa ko sa blog nio po nagpa sched ako.. kaya lang po long holiday and april 24 lang po earliest available date.. my question po e okay lang po ba na ganun katagal bago namin maisubmit ang biotmetrics? THANK YOU SO MUCH PO
You have 30 days to submit naman.
thank you po…. the best blog ever…
Thanks po!
Hi Yoshkie,
Good day!
I’m just wondering kasi if it will it be a hindrance to put that both of my parents are already deceased? I have a stable job though and would just like to tour Canada, but I am an only child as well. I’m afraid that they might deny my application due to lack if family ties here in the Philippines.
Please advise.
Thanks
Hi R,
I think di naman. Mas titingnan nila yung stability ng employment mo. Mas okay din if may properties ka dito.
thanks for your blog. got my multiple visa already, until 2028 ( expiration of my passport ). this blog was a huge huge help. going to canada on June 2019. grateful!
How long did it take for you to get the correspondence letter? Was it on the day you submitted your biometrics.?
What did you do after submitting biometrics? Did you wait for few hours to know the result of ur application?
Im submitting my bio on oct 10. Im thnking about how long you need to wait for the result.
Congrats, Anna Marie! :)
Hi Yoshke
i would like to say THANK YOU! for your blog here in poortraveler. i have followed all the steps and i read all the comments to get many inputs for our application. and i want to share it with you that 5 OF US IN THE FAMILY WERE APPROVED for our Canada temporary resident visa. exactly 15 days after i submitted and downloaded all documents online for it to be approved. March 29,2019 i submitted online then April 12, 2019 i received an email that we need to submit our passport for final processing. i just mailed our passport today hoping we will be granted multiple entry. THANK YOU TO YOU AND MORE POWER!
Hi Maggie,
Thanks for taking the time to post this. Comments like this keep us motivated! :D
Congrats sa visa! Enjoy Canada!
Hello po ask ko lng kung pede bank certificate instead of bank statement kasi naka time deposit yung account? At ng eeror po ung im 5257 pag inuupload.
Hi Yoshke
After filling-out the forms successfully online, what is the next step? I understand that we have to submit some documents at the Canadian Embassy personally, and how soon should this be done? Can we choose a date for submission of these documents?
Hi Art, you’ll need to upload the requirements, pay and submit biometrics. The entire step-by-step process po is in the post above.
Hello po ask ko lng po my error ako ganito narereceive pag ng uupload nun form na im5257
The form could not be submitted because errors were found.
Error: We couldn’t upload your file.
Error Description:
You have submitted an invalid form. Please complete and validate an electronic version of the application form, save it to your computer, and upload it.
Note: You cannot submit an application form that has been scanned.
You do not need to sign your application form. You must provide a digital signature once you are ready to transmit your completed application.
Ano po bang ginawa nyo sa form?
Helo po ask ko lng pano ung application ng sa parents ko kasi ako ung ng aayos ng sa kanila. May business sila kaso sa mother ko lng na ka name pati ung bank account pero sa land titles both sa kanila. Pano ung pag process ko ng application ko sa father? Thanks for answering
Hi Glenn, di ko po alam pag ganyan. Pero feeling ko pwede naman yan since they’re married. I-declare na lang po ni father na si mother ung sasagot nung trip. That’s just me po.
Thank you po sa mga info and tips sa inyong blog.. i just got a request to send my passport today. Can i submit it directly to canada embassy? Is it faster than sending my passport through vfs? Thank you for your prompt response..
Hi Jr, I dunno. I haven’t tried sending to the embassy itself. I submitted mine at the Canada Visa Application Centre, which is VFS-run, I think.
Helo po ask ko lng after ng payment dun po sa online ano po next step? Sa email po ba o dun sa account i checheck lagi ung status ? You are expected to provide a COPY of your passport with your electronic application. If IRCC needs your physical
passport, IRCC will request that you submit it to our office and ano po electronic application un? Thanks po sa pagsagot
Hi, how about if I am applying with my family?
In which part can I combine our individual applications? Is it right after submitting and paying it?
We are planning to visit Canada as tourists next year, and we don’t know anyone there.
We are planning to apply soon (maybe this month or next) due to my father’s availability. He’s a seafarer.
Thank you.
Hi Claaaaaares,
I don’t know po for sure kasi solo po ako when I applied.
According to some of our readers who tried, when you start your application, you will be asked if you are also applying for a family member. They say that if you answer yes, your checklist will include requirements for them too.
Yun po ang sabi nila but I haven’t confirmed it yet.
do i have to submit birth certificate?
If tourist and you’re not visiting a relative, not really. If I remember correctly, I didn’t submit one.
hello! I just like to Thank you for this VLOG! you are such a great help. At first, it’s so intimidating to do online thing but i was able to do it on my own. Thanks to your step by step guidelines! More power to your work! God bless! I hope we will get our visa approved soon.
No prob, Sheryl! Good luck with your application!
Is it ok to submit bank statement na current account? O kelangan savings account lang dapat? I have valid us visa and some told me that once you have us visa and you are not required to submit any financial docs?
Hi , how long do i need to wait after i submit my biometrics?
thanks,
Hi Yoshke!
Apply ako in person. Ask ko lang if u have any idea if I still need to bring the original copy of the docs when lodging the reqts. Are they going to check them pa? Thanks.
Hi Boks, I don’t have any idea about applying in person as I’ve only experienced online. :(
Alright, thanks. Galing na ako vfs yday & submitted all the reqts. Kinuha rin yung passport ko. Wait na lang daw mga 2 wks. I’ll be notified thru sms/email.
Hi po! Ask ko lang po kung gaano katagal po ung process ng personal application?
I applied in person. After lodging all the docs sabay na yung biometrics, they notified me after 11 days that my passport is ready for pick up. Got my visa pero 1yr lang binigay. Kala ko nga co-terminus. My pport expires aftr 2 yrs pa. Case to case basis pala.
Yay! Thanks for sharing this. Makakatulong sa mga mag-aapply in person.
Hi Yoshke! When I got my visa, may extra paper sya kasama re measles immunization saying that it is helpful to have my vaccination up to date & carry my records for my trip to canada. I just need to know kung hahanapin kaya yun sa immigration pagpasok ko. Anybody here na may ganung case na hinanapan sya pagdating sa immigration. Baka dahil lng dun mapabalik ako sa pinas..hehe. Hindi ko kasi alam kung meron na ako nun or kung kailangan ko ulit magpa-vaccine to get a record to show them. I am leaving nxt month and start readying some possible docs na baka hanapin pagpasok ko ng canada.
By the way, no need to bring the orig copies. Hindi na hinanap. Yung passport lang since iiiwan mo sa kanila.
Hello Yoshke,
Awesome website! Very big help and thank you! This will be my first time to apply for a Canada Visa. My 5-year passport expires in 9 months, and I don’t know if it matters that I renew it first, or Apply for my Canada Visa now.
Do you have an idea if I apply for my Canada Visa now, would I still be able to use it once get the new 10-year passport? Or does it expire with passport its attached to?
Hi Boj, ang alam ko co-terminus yung Canadian visa sa passport mo. The visa expires when your passport expires. I could be wrong but that’s what I know.
I would renew my passport first, if I were in your shoes.
Okay, I’ll do that, thanks!
So helpful! Thanks for this. :)
Thanks din for visiting our blog!
Hi!
Ask ko lang if magpabiometrics na, will we be asked to leave the passport na din? May travel kasi ako in 2 weeks. Im worried my passport wont be released in time if kunin na nila yung passport. Or may option for rush?
Thank you.
According to some of our readers who applied, if online ka nag-apply, hindi pa. Kukunin lang nila biometrics tapos pag may result na, tsaka lang sila magmemessage na isubmit yung passport.
Pero po nakasulat sa biometrics instruction letter, bring passport daw po. So bale, di pa naman po ipapaiwan? Ippresent palang po? Thanks po!
Yep, pepresent lang. If you want, you can also post your question sa Support Group namin: https://www.facebook.com/groups/thepoortraveler/
Thank you for answering my queries. I’ll join the Support Group.
Hello po! I have received my passport with the visitor visa on it, thanks for this blog it helped me a lot! I am referring it to any of my friends who’s planning to apply. I only have one question though when I travel to Canada. Do I need to pay anything at the airport such as Terminal fee or Travel tax? How much if ever? I have no idea which of the two is already covered in my air tickets. I’ll be leaving on the 29th. Thanks so much for the answer!
Hi Belle, in my experience, I never had to settle any fee at the airport. I entered/exited via Toronto.
Hi, Thanks for the details. My lola and i will apply canadian visa later this year. we both dont have bank accounts but we will be supported by my tito, can we submit financial documents of my tito instead?
HELLO AGAIN, PLANNING TO VISIT CANADA THIS DEC. 2019..I HAVE 2 COUSINS THERE..WHAT IS THE BEST TIME TO SUBMIT THE VISA APPLICATION? AND ALSO SABI NG COUSIN KO AIR CANADA AKO BUMILI NG TICKET..THE PROBLEM IS BAKA DI SILA NAG ACCEPT NG FLIGHT RESERVATION..NOW IS IT POSSIBLE NA FOR THE MEANTIME KUHA AKO FLIGHT RESERVATION SA GAZELLE PAY THE FEES AND THEN PAG NA APPROVED NA YUNG VISA CANCEL KO NA YUNG RESERVATION THEN BOOK THE ROUND TRIP TICKET SA AIR CANADA? THANK YOU, HOPE TO HEAR FROM YOU THE SOONEST..
Hi Teresa,
Di ko alam how early pwede mag-apply pero safe na yung 3 months before your scheduled trip.
Yep, you can get a flight reservation and then cancel it after you get your visa.
Hi Yoshke,
Thanks for this blog, really a big help. I’m just finding it hard to sign in again. I followed your steps and found myself directed to the link below.
https://www.canada.ca/en/services/immigration-citizenship.html
After this I’m lost, cause I supposed to be directed to my dashboard.
Please help. Hope to hear from you soon.
Click on MY APPLICATION under SERVICES & INFORMATION.
Or click on SIGN IN OR CREATE AN ACCOUNT under MOST REQUESTED.
Hello Sir,
My family is (husb, 1yo, child me) planning to visit Canada w/ invitation letter from my Aunt. Husband is new sa work, me 3 yrs. Can my mother from US sponsor us whole family? Husband has small fund and and i have an account too but that’s my mom’s money baka magtaka bkit ang laki ng laman ng account ko? existing na yung account 2011 pa. so im thinking na sponsor nlng kami ng mom ko atleast she has all the documents needed to prove na may business sya sa US.
Hi Kathy, to be honest, I’m not familiar with the intricacies of cases wherein a relative is sponsoring someone to Canada, so I don’t know what to answer.
But usually, it’s easier to do away with a sponsor if you have the funds and your employment is okay.
Hi, for the appointment on submission of Biometrics at Embassy of Canada. How long will it take based on your experience? Should I take a half day leave or a full day leave on my work?
Hi Sir Yoske
Question lng po about sa form. Hindi po kasya ung employment history sa form since past 10 yrs dapat i declare in cluding gaps..also di rin kasya sa from ung details of visit to canada kasi mga 5 un but the form has only 2 spaces yata.
pano po gagawin dun? kapag nag attach nmn po separate sheet and combine pdf, error ung nalabas..
Hi Jon, di ko alam kung tama pero yung ginawa ko, kung ano lang yung kasya sa form, yun lang nilagay ko. Tapos sinama ko ung ibang di kasya sa Letter of Explanation sa separate documents.
Hi Sir Yoshke!
Magtatanong lang po about Canadian TRV–if ever nabigay na ang biometrics, will that be the time na mapa-process yung mga na-submit na documents if approved or denied ang visa? Will the process take 2 weeks or more? Salamat po! :-)
Hi Celeste, based sa mga testimonials ng members ng support group namin, around 1 week.
Hi again Sir Yoshke,
I received a letter from IRCC with this message:
This is in reference to your application for temporary residence. A decision has been made onyour application. We require your passport to finalize processing your application.
Sorry for the confusion, but will this mean I’m onto the next step of the visa approval I applied for?
Hi Celeste!
Tapos ka na mag-biometrics?
It looks like for passport submission ka na. Most likely ay approved na yan. :)
Hi Sir Yoshke!
Yes po, tapos na last 29th of May ang biometrics. Wow, many thanks po! :-)
This blog is really helpful!
hello Yoshke Dimen,
Please i will need same information regarding study visa too. all the necessary requirements for me and my spouse., processing time. To top it , i shall be accompanied by my spouse. she will also be applying for an open work permit. We intend using one application for us both.
would medical be required?
school resumes september 3rd,2019 and i shall be making application on the 17th of june 2019. hope am in order?
DO WE NEED TO SHOW EVIDENCE FOR A BOOKED TICKET OR HOTEL RESERVATION AS YOU EARLIER STATED?
Norbert.
Hi Norbert, unfortunately, we don’t know anything about study visa. :(
I wasn’t able to submit my passport for stamping of my Canadian tourist visa within 30 days after receiving the letter of request. Thus my visa was refused. What should I do? Thank you.
Hi Flor, naku, do ko po alam. Hopefully ung iba na makakabasa nito, may idea.
Hi po sir! Thank you so much for writing this blog such a big help. I am applying through Online and I just have a few concern po. I will be using 1 GCKey for the entire application ng parents and 2 siblings ko excluding me since I will be getting my student visa separately. Ang main sponsor will be my dad, so bali siya po yung principal applicant. Regarding po kasi sa requirements ng mom ko and siblings ko, ang hinihingi lang po sa kanila is yung Valid Passport, Form IMM5257, Form 5645 and Passport Size photos. I’m just wondering kung kailangan ko din po bang isubmit yung travel history nila, then yung copy of school id and school certificate ng dalawa kong kapatid na nagaaral para mas malaki yung chance na magrant yung visa application nila? If yes, san ko po kaya pwede iattach? hindi po kasi nakalagayn dun. Baka sakali po sanang matulungan niyo ko at may idea po kayo, since wala po akong makita sa net na ibang source. I tried calling vfs then sabi nila kailangan daw gawan ng sariling account separately ang bawat isa and I was wondering paano yung dalawa kong kapatid? wala naman silang proof of income and hindi naman po mag push through yung application kung kulang po yung hinihinging files. I really hope you can help me po. Thanks in advance and God bless!
Hi JC, naku, I haven’t tried applying for Canadian visa with family so di ko alam. Pero you may post it sa The Poor Traveler Support Group. Baka yung ibang members, alam. Join here: https://www.facebook.com/groups/thepoortraveler/
It’s okay sir nagbakasakali lang din po ako baka may idea po ako. Anyways nagrequest na po ako sa group paaccept na lang po sir. I have another concern po sir, there’s a question in the form about any relatives to visit in Canada. And I indicated my father’s cousin which is in Niagara. And at the same time, I included in the itinerary that they will be the one to pick us at the airport. Hindi rin po ako nagtentative hotel reservation sa Niagara since may relative po na matutuluyan. Pag ganun po ba yung pinalabas ko need pa po ng invitation letter from the host and document proving that they’re a canadian citizen or permanent resident? Or isama ko pa rin po sila sa relatives na kakilala tapos magtentative reservation na lang po ako ng hotel sa Niagara para palabasin na dun po kami magstay and makikipagkita lang po kami kunwari sa kanila pagdating sa itinerary para di na po sila magsubmit pa ng job title, document proving that they are a canadian citizen or permanent resident? Ano po kaya sa tingin niyo sir? hangga’t maari po kasi sana ayaw na po namin mang istorbo sa kanila for the visa application. Hoping for your advice po. Thanks and God bless!
hello sir yoshke. i badly need your help! my sister in canada is inviting me to visit her. her are my concerns:
1. she wants me to stay in canada for 6 months (make the most out of the 6 months validity of visit visa) but will only declare 2 months visit to avoid suspicions with my intent to stay, is this okay?
2. is 2 months itinerary too long for a visit visa? do i have to declare a shorter itinerary?
3. my mother just got her PR visa in canada, she is 74 and will not able to travel along by herself (even with the help of airport officers), is it okay to write also on my letter that i will accompany my mother?
4. i dont have any immediate family here in the philippines, i only have my sister and mother who will soon reside in canada, but i have a common law partner and we live together for 2 years now, where can i attach my proofs of our relationship? and other proofs that i will really leave canada before my visit visa expires. i really need an advice pls.. i am very anxious.. thank you so much!!
Hi!
Unfortunately, I haven’t experienced applying for a Canadian visa as a visitor or as someone invited by a resident.
I wish I knew the answers to your questions, but I don’t. My knowledge is limited to my personal experience, which is as a tourist.
Sorry I can’t be of more help.
Hi! Thank you for sharing this is a helpful blog. I noticed that on your print screen at the UPLOAD YOUR DOCUMENTS portion it was indicated that business registration is “required”. Please clarify if this should be left blank for employed individuals.
Hi Yda, it’s only for self-employed. If employed, ang alam ko, di nag-aappear yan.
Hi,
Thank you for a very detailed assistance. If nakakuha na po ng confirmation na pwede na dalhin yung passport, kailangan po ba a day after you received the message dalhin na agad? Magfifill-up na po kasi sana ako ng forms and upload ng files. Eh I will be using may passport for the next days, baka kapag nag-email wala pa rin ako sa Manila.
Pabasa na lang po ng message sa inyo. Usually nakalagay naman yung deadline ng pagsubmit ng passport. Madalas 30 days pero check nyo ung message sa inyo.
Which part in Canada is your cover photo? The one with the mountains and trees and lakes?
Is that far from the city and is it expensive to go there?
It’s Banff National Park. Nearest city is Calgary.
Hi There,
we did the steps you said and logged out so we can complete our documents. Now I wanted to upload our documents but i can’t see where do we do that. I hope the application did not get lost. It is really hard to navigate this Canadian visa application.
Hope to receive response from you thanks
Hi Tracee, I don’t remember how the interface looks anymore so I don’t know where you can find it. But I remember I was able to exit and continue uploading documents on another day.
Were you able to log in again?
I am able to log in again. But I can’t seem to find where to upload again :( this is giving me a hard time
Is Canada an expensive place to visit? Is it the most beautiful country you have ever been to?
Is Canada a bit boring?
If it is your first time to go to Canada, which destination is most ideal — wherein you can visit nature as well as city life?
– Alberta
– Ontario
– Toronto
Hi! Just want to say first that this is probably one of the clearest, most helpful travel blogs i have come across. :) Anyway, i just want to ask if you’ve heard from recent applicants how fast / long their processing took? I talked to an agency (and called vfs too) that the embassy is taking 3 weeks or even months to process now. Im stressed because i need to travel na soon to US & canada and i dont know if i should push through with my canada visa application bec i might end up having my passport stuck in their embassy. So my questions are:
1) how fast / long does it take these days, for the full processing tsaka yung time you submit your passport to the time you get it back?
2) if i dont decide to push thru, can i still refund the fee kaya?
3) if i push through and malapit na yung travel ko pero wala pa din news abt my passport, can i request for an early passport release kahit wala pa yung visa?
Sorry dami questions. So stressed! Hope you can help!
Hi, I went to VFS on May 31 (Friday) for my biometrics and I received the passport request soon after. I went back on June 11 (Tuesday) to submit my passport and it was delivered on June 14 (Saturday). Hope this helps!
Hi Kat,
Yung isa kong tito applied late last month. He said his application took 2 weeks from biometrics submission to release of passport.
I don’t know the answer to your other questions, though. :(
My application just got approved! This post truly has been helpful. I referred to it all the time while processing my application. I’m expecting my passport to be delivered next week. Big thanks to everyone running this blog!
Congrats, A! And thanks for taking the time to share this.
What’s your destination in Canada? Enjoy!!!
Ontario! I don’t have any actual plans yet besides helping my cousins with their schoolwork hehe. I’m currently looking for attractions in Toronto that I can commute to as I’d probably be on my own most of the time, especially during weekdays when they’re all at work and school. If you have any suggestions I’d appreciate it! Thanks again Yoshke!
hi.would like to know which website to apply and submit all those requirements. Sorry if i wasnt able to notice in your blog.
thanks.
Hopeful Traveller here
You will need to register first here: https://www.canada.ca/en/immigration-refugees-citizenship/services/application/account.html
Hello there!
So I just submitted by visa application online and had the payment process as well. I received an email containing my application number. I’m just wondering when will I do my biometrics? Next step is for me to schedule an appointment for biometrics?
Hi
I gave Bio on 23TH April. 8 weeks have passed but still, there is no response. at that moment processing time was 7 weeks. today processing time has become even shorter as 5 weeks. It is really strange!!
Hi there, Thank you so much for your very detailed post on getting Canadian Visa. I have it on bookmark since i am also preparing for my application.
I just have one concern which i hope you can help me with. I have plans to go to the US soon and i am concerned that i might receive their approval or request to submit my passport while i am in the US (i will be staying there for about 2-3 months). Is it possible po ba na sa US VCAC ako magsubmit ng passport kahit hindi ako citizen doon? i mean, i will apply and do biometrics here in the Philippines, but will have to submit the passport sa US. Do you think it is possible? Hoping you have come across this info. Thanks for any help you can extend to me.
Hi Belleliv. Di ko po alam. :( Hopefully ung ibang readers na makakabasa nito, may idea. :)
HI,
Thank you for this infos. Very helpful, i just have two questions, what if im taking a cruise from seattle to Vancouver canada , theres a question on the form about what name/ institution i will visit in canda, my question is what details should i enter there? The address of the hotel ill be staying?
2. kasama ko kasi mag cruise ang family ko (tatay and kapatid and they re both US citizen)
There is a question there, are you accompanying with a family member to come to canada, mejo confusing to. ( Yes ba dahil kasama ko mag cruises ang family ko or NO ba dahil nde naman cila Canadian Citizen?) Please help!
Thepootraveler…YOU.ARE.HEAVEN.SENT!
I visited Vancouver last 2017 and the process I have undergone was different back then. Now that my brother and his wife is applying for a visitor visa, we got lost in the new process… But through your complete and concise guide, we made it through the new application process and they are on their way to the VAC to submit their passport. Thank you very much!
*Bookmarked* ^_^
Yay! Thanks for taking the time to share this, Christian! :D
Wish i have seen this site before. I paid a travel agency 15 000 pesos and my girlfriend been denied.
What i don’t understand is the reason why she been denied.
“I am not satisfied that you will leave Canada at the end of your stay as a temporary
resident, as stipulated in paragraph 179(b) of the IRPR, based on the limited employment prospects in your country of residence.”
“….., based on your current employment situation.”
She been working for the same company for over 2 years and had a 30 days leave letter approved by the company.
“…., based on your personal assets and financial status”
She have over 250 000 pesos in her bank account, 250K is not enough? I don’t get it.
The only reason i found legit is ” based on your travel history. ”
She never traveled before, she just got her passport last april, is this a primary reason to deny someone?
Anyway, how long we need to wait to make another visa application?
Hi Tricky, usually, it’s a combination of factors.
If you don’t mind me asking, what purpose of travel did she declare? Are you Canada-based? Is she visiting you?
Your answers can help us figure out the reason for denial.
Hello,
I am stuck. I am trying to apply online.
After successfully registering for my GC Key, I am brought to a window where I can click CONTINUE and when I do, I am brought to the CIC page this is where the Labyrinth maze begins. I was able to fill up the IMM5257 form but am unable to send it in or find the page where you can Upload the form and other documents.
Hello Sir. Id like to ask po bka may idea ka .. can i still use my tourist visa on my old passport if i have a new passport since validity na dapat magrenew 6mons? A travel agent told me the new rule daw 2019 is to to ask the embassy to transfer the visa to the new passport. Na confuse tuloy ako.. pls help.. thank you very much
Hello Joan,
Same case with my parents. I called VFS Call Center kanina lng and confirmed na you can still use your visa from OLD passport as long as valid pa. Yung sa parents ko valid until Dec 2019 yung visa and they renewed passport na valid for 10 yrs. You just need to show both old and new passport sa immigration.
Hope this helps.
Thanks! -NK
Hi Joan, di ko alam kung ano ung policy pag ganito. :S
Hi po, Is 100K enough for show money po ba? 6 days lang naman po yung plan ko doon sa Canada.
Hello, Thank you for your helpful blogs.
Noticed that in my recent travels:
Hong Kong (8 days Feb 2018) &
U.S.A. ( Dec 25, 2018 – Jun 1, 2019)
That my passport is no longer stamped upon arrival at destination & subsequest depature. Though there’s a stamp out & in by Manila Immigration.
How would I show proofs of my travels then?
Thank you so much.
Hi,
Where should I address the letter of explanation as a requirement to obtain TRV? Thanks!
Hi! What to upload if I don’t have a business registration? Thank you.
Hi, there’s no upload option to send documents in my account. The upload option only appeared twice, I can’t complete the submission because of this, I also tried to send a tech difficulty report to the website. What would you suggest that i do now?
Hi Jess, the only way I know is to get in touch with them using this form: https://secure.cic.gc.ca/enquiries-renseignements/canada-case-cas-eng.aspx
But you have done this already. :S
Hi kuya! I’m planning to apply for a canadian tourist visa because I want to visit sana my friend in Winnipeg after my Internship program in the US. August 2020 pa naman matatapos internship ko sa US. Is it okay kahit yan lang reason ko? Ma approve kaya application ko?
Thanks!
Hi James, naku, di ko alam kapag ganyan. :(
Hi,
My eldest daughter is getting married on Oct 2019 and it will be our (me and my youngest daughter) first time to travel to Canada. My questions are:
1. Do we need to secure an Affidavit of Support even if she will not cover expenses for our trip?
2. My mom and sibling will be flying from the US to join us which means our hotel accommodations will be shouldered by them. Will that affect the application if the hotel reservation is not under my name? Do i still need to present that?
3. Would a wedding invitation be sufficient enough to show proof of our travel?
4. Also, since she needed to carry her father’s last name when she had her canadian citizenship (her dad and i were never married), will that also affect the visa application?
Hi Fritzie, it’s hard for me to give answers to your questions because they are way outside my personal experience. :S
Hi! Earlier today, I signed up for a GC Key account to check if Im eligible to have a Candian visa. But then I had to run some errands, so I just put my laptop into “sleep mode”, and left the tab open where I was answering the required questions.
When I got back, I tried to log-in using the username and password I created, however, it says there’s an “error” with my username and password. I tried to click the “forgot password” option, tried filling up new answers for the ‘security questions’ part, and creating a new password for several times, but there’s still an error.
Right now, I couldn’t log in, and this is what appears on the screen:
You have exceeded the maximum number of consecutive attempts allowed to either:
sign in with your GCKey;
change your password;
change your recovery questions;
revoke your GCKey; or
recover your forgotten password.
For your protection, your access to the service is suspended for 24 hours.
Should I just create a new account?
Thank you so much!
Kind regards,
Via
Hi Via,
I don’t really know because I haven’t encountered this error before. Try again after 24 hours and if the error still persists, try contacting their technical team? Maybe they can help.
This is what appears on the screen during my first attempt of logging in:
The form could not be submitted because 2 errors were found. For your security, all fields have been cleared.
Error 1: Username may be missing, invalid or incomplete.
Error 2: Password may be missing, invalid or incomplete.
It’s just weird since I made sure that I typed everything correctly. What can I do? Please help me :(
Hi Sir,
Good day! Please help me out regarding my online application submitted last July 19, 2019. I already paid for the required fees (visa and biometrics fees) amounting to $185 and I received email notification 4x containing my application number that starts with letter V, saying that I have new message in my online account upon checking my Sign-In Partner account there are no messages and my application still appears in the area saying “Continue an application you haven’t submitted”. I also didn’t received instruction to submit biometrics. Do I need to wait for the email regarding Biometrics instruction or can I just schedule an appointment for biomentrics? Thank you so much.
Hi Aurelia,
I haven’t tried applying using a Sign-in Partner. Only GCKey. Not sure if there are significant differences in the process, so I don’t know what to advise. :(
Have you tried contacting the webmaster? It might be a technical issue. Or call Canada directly and ask for the status of the application. But I really don’t know. :S
Hi Yoshke,
Thank you for being so responsive to your readers. This page is very interactive. Kakatuwa. hehe. I bookmarked your page nung December pa but never had the courage to gather all the docs and apply until about 2 weeks ago as I was so afraid of getting declined. I am recently married to a Canadian citizen and I don’t want any visa refusals to get in the way of my spousal sponsorship (been reading horror stories about TRV application refusals pag meron dawng Canadian bf or spouse! kalerks!!). Now, napatunayan kong nasa rootedness mo talaga sa bansa mo yan. I think that is the primary factor. Secondary na lang yung capacity mo to finance your trip, etc. Just a few minutes ago, I’ve gotten a request na to submit my passport! I am sooo happy! I think this is already a good indication that I was approved of a TRV. :)
Anyway, this is my timeline. Baka makatulong sa ibang readers. Pay it forward. hehe
July 12 – Submitted my application online and immediately got a Submission Confirmation and a Confirmation of Online Application Transmission
July 13 – Biometrics Collections Letter
July 17 – Biometrics completed
July 24 – Correspondence Letter
July 24 – Original Passport Request
I would be submitting my passport in-person and plan to pick-it up the same way too. Sana nga approved na to at multiple na. Thanks again, Yoshke!
Yay! Thanks for sharing your experience and timeline, Mae! For sure maraming matutulungan. :)
Approved na yan! Enjoy Canada! :)
Hi! I just want to thank you. This blog post helped me in applying for canadian trv.
Our whole family applied for a visa through online application. We applied as a family. We use 1 account. And my father is the primary applicant. Then my mom, me and my brother both adults.
We already got a passport request. Does that mean we are already approved?
Hi R.L.! Yep, there’s a big chance your applications are approved because denied applicants are notified of the rejection straight away. They’re requesting for your passports so they could affix the visa stickers. :D
Hi Yoshke! Bookmarked your blog last December pa but was only able to muster the courage to apply for TRV 2 weeks ago. I was so afraid of getting denied as my Fil-Canadian spouse will be submitting our Spousal sponsorship application next month and I dont want any Visa refusals to get in the way (so many horror stories of TRV refusals sa may mga Canadian bf/spouse – Kalerks!)
Finally, with the help of your blog (which I’ve read multiple times btw. Lol), nakapagsubmit na rin ako and No, I didnt ask my spouse to give me a letter stating that he would sponsor my trip kasi sinikreto ko to sa kanya. Lol. Here’s my timeline:
July 12 – Application sent online / got a Confirmation of Online Application Transmission & a Submission confirmation email
July 13 – Biometrics Collection Letter
July 17 – went to VFS Makati and submitted Biometrics
July 24 – received Correspondence Letter
July 24 – received a message saying my Temporary Resident VISA was APPROVED and they’re asking for my Passport
July 25 – delivered my Passport to VFS in person
There! So the lesson here is, just because you have a canadian spouse/bf doesnt mean you’d be denied right away. Your rootedness to your own country would primarily be the deciding factor. Secondary na lang yung lagay ng finances mo. Kelangan mo lang patunayan na di ka mago-overstay sa Canada kumbaga.
Thanks again for your help, Yoshke.
Oops. Naapprove na pala mapost yung original message ko so kebs na to. Lol
Sonrang haba na po ng mga comments and i cant read all through. However could you please share pano naman mag RENEW ng canadian toirist visa? Same website lang din po ba ang ivivisit at same requirements po ba ukiy?
Hi Liz, di ko pa po natry mag-renew. :(
Hi Yoshke! Thanks to you our online application was flawless We’re a family of 4. My parents, me and my daughter. I saw a lot of questions regarding FAMILY APPLICATION. Here is my experience:
I applied online for us 4. I applied my Dad first. At the end of the personal info questionaire you will be asked “DO YOU HAVE FAMILY MEMBERS WHO YOU WOULD LIKE TO INCLUDE IN THIS APPLICATION?” (not exact words yata, i forgot na pero same context). Answer Yes. Then answer the questionaire again with your family members’ details. Then at the end the of the questionaire you will be asked the same question again. Until you answer No. then, continue, next step na. The difference, my dad will be the Primary Applicant. All documents needed will be uploaded by him or under his name (the primary applicant) . I think it’s the same as the docs needed for normal or personal application. But my Dad was also asked to upload Marriage Cert and IMM5713, consent letter that my dad is the primary applicant and we are giving him permission to do so (should be printed, signed by the applicants and scanned). All the family members will be asked lang for the application form, family members form, pic, and passport.
For the Biometrics appointment, kelangan all members of the family applying will be added. We’re 4. So we had 4 Biometrics appointment letters. Not just the primary applicant.
So there. I hope this helps. Thank you again.
Hi Mean! Thank you din po! Sobrang naappreciate namin that you took the time to return and share your experience with us. Marami pong readers ang matutulungan ng pag-share nyo.
Congrats! Where in Australia are you headed?
Hi Yoshke,
When i saw and read this blog it makes me wanna try to file again. I’ve been denied 3x due to my close relative in Canada (my sister) I can’t convince them that i’ll be coming back home.
There’s two reasons for my trip this time : One is to visit Calgary solely for sightseeing I am planning to book a hostel reservation and as you mentioned on the blog to get a flight reservation(Dec 18-22). However i am also planning to visit my sister in Lethbridge for Christmas, on the 23th till 27th and back to the Philippines. Any suggestions as to what the main purpose should be indicated? Is it as visiting family or tourist? Also, I need to know how much should be in my Bank, Currently i have roughly 50k, Do you think it’s enough for 10days trip?.
I really appreciate if you can give me some suggestions, I also wanna thank you for writing these blogs, for people who cant afford to get Visa advisor it means a lot . Bless your heart!
Thank you in advance
In re: Money in your account:
Based on experience at least Php 250,000.00 is needed.
Hi, I need help with a technical issue. Did you guys experienced that when you click the CONTINUE button cause you are suppose to upload your documents, there is NO UPLOAD OPTIONS shown in the page? Instead, only the checklist and steps page appear.
I also sent a technical issue report about this and already followed their tips on how I can upload better but it still wont work.
I hope you can help me on this matter.
Hi, I experienced this one. Try clearing your Internet Browsing data history.
Hi Jess, I didn’t encounter that issue. Hopefully other readers would be able to help din. :(
Hello can i ask if its necessary to go to the office of vfs for applying visa. Because i am worried going personally at the office since i dont know my way there and i am far from the office i am from baguio city.
You will be asked to show up at VFS for biometrics, if they don’t have yours yet.
Just wanna say a big THANKS to you for this very helpful blog.
Here’s my timeline:
July 26 – submission of online application
July 27 – received biometrics collection letter
July 31 – did biometrics
August 8 – received correspondence letter and original passport request
P.S Also did my flight booking reservation, hotel reservation and travel itinerary with GAZELLE.
Thanks a lot =)
Thanks for sharing, Mitch! Congrats po! :)
Hi!
Additional info:
August 13 – handed my passport in person
August 14 – Visa approved, till 2029.
August 15 – (today) received correspondence that decision envelope is ready for collection. Will get dressed and head off to the VFS
THANKS MUCH!
Congrats! :)
What if I haven’t visited any country yet, can I just skip the Travel History part? Thank youuu!
Hi!!! super helpful blog post but what did you place in the Employment of the IMM5257 form part since it needs to show the current date but I’m still currently connected with the same company. it doesn’t have an option to show that it’s still currently where I’m working
hi. Left the the end date blank
Hi Pax,
I don’t remember that part clearly. But knowing myself, I would probably have entered the current date if there is no other option. I’m not sure though.
Hello Yoshke,
Just wanted to know if the visa application process is the same for Elderly/Senior Citizen?
Thanks!
Jeff
Hi! Regarding the Employment section, I’m in an online job where the company I work at is in the UK. Is it alright if I put UK as the address?
I had an online job previously, placed my own address since it’s the area I’m working at.
Ay, di ko po alam kung may complication kapag ganyan. :S
Hi!
Thanks for the post. Really great help!
I just want to ask if there is a need for us to wait for the BIL (Biometrics Instruction Letter) before booking an appointment? Time is a constraint. Submitted tourist visa application online on August 21, 2019 and our planned departure, as stated in our application, is on October 10, 2019. After submitting our online application and paying the fees (including the biometric fee), do we need to wait for the BIL to schedule an appointment or can we just go ahead and do it?
We are from the province and we would still need to go to Manila to give said biometrics, and considering our constraint in time, what can you suggest we do?
Thank you very much.
Thanks for your comprehensive guide, got my visa on Aug 21.
Multiple til 2028
Congrats, Grace! Happy we could help. Enjoy Canada! :)
Hi, I successfully created a GCKey and logged in to my account. However, I was not redirected to the Accounts Dashboard where I can select “VISITOR VISA, STUDY AND/OR WORK PERMIT” to begin my application. Instead, what appears is the Welcome Page stating that I can “Change Your Password, Change Your Recovery Questions or Revoke Your GCKey” from there. The only other option is to select Continue and I am back in the Government of Canada online service page. Have you encountered this same problem? Thank you!
Didn’t encounter this problem, but hopefully other readers can help…
Thanks very much for your reply. After numerous attempts, I finally got in and was able to submit my application. Am not sure which exactly of the things I did helped but I also tried deleting the browsing history, per suggestion of one of your readers. Thanks a lot for this post. Really helpful!
Yay! Glad that everything worked out in the end. Good luck! Sana ma-approve! :)
Hi, just got my passport back with the visa already. Thanks again for this guide. It’s really more convenient to accomplish and pay everything online so when you get to the Visa Application Centre, all you need to do is get a priority number and wait for your turn. I think it would also help to bring the exact amount for say, locker fee (Php68) (if you have a bag with you; they don’t charge, however, if all you leave is your phone, at least at the VAC here in Cebu) and SMS notification fee (Php86). :)
Thanks for sharing, Patricia. And congrats for the visa! :)
Hi!
I just wanna ask what category should I choose if I’m primarily going to take a PT state boards exam based in Canada and also planning to go to a tour afterwards.
Is it possible and advisable to indicate both in one field? I’ve heard that some of those who applied for a visa for exam purposes only gets denied.
Thank you for your help!
Hi Rahm,
Thanks for your message. I wish I could be of more help, but unfortunately, I have no idea either. :(
Hello!
I recently applied for a tourist visa and I got denied. Now, I want to reapply, do you have any idea if I’m going to use the UCI from the documents that they sent me?
Hi Pipes, not sure, but I think you have to use the UCI they gave you. Again, not sure.
Hi Sir.
Im back to ask one question. Kakagaling ko lang po sa Canada last may to aug. I stayed there for 3 mos. Then umalis din ako nung 23. Planning to go back in december to celerate holiday. Multiple entry visa po ako. Ilang beses po ba pwede mag labas pasok sa canada in a year, kung hindi naman po namamaximise yung 6 mos. May interval po ba??thank you
Hi Rish,
No idea if may limit. :S
Hi,
I read your blog and its very helpful. I got a B1 Visitor Business Visa in Canada, i would like to ask if I can use this kind of visa for a vacation or tourism purpose without any work/business related? Thank you!
Hi Good day!, I would just like to say thank you for this very informative post! And I am hoping you could answer just a couple of queries.
I was recently denied last April 11, 2019, and now I am planning to re apply again, but this time ONLINE. So I was just wondering where I should upload my appeal/cover letter, including the invitation letter my friend sent me, does it go in the EXPLANATION LETTER PORTION?
and lastly
We do not own or run a business since we are all employed and earning a good sum of
money. I am the only child and heir to my parents’ properties, although the said land titles are not named after me, can I still include this as one of my “ASSETS”
thank you very, very much and I would appreciate it if you could spare some time in answering my questions. Thank you again and Godbless!
Hi Chris,
Yep, you can upload under Letter of Explanation.
I’m not sure if they can honor those since they’re not yet under your name. I really have no idea, sorry.
Note that embassies are generally stricter on invited applicants especially by non-relatives. Did you declare that your friend will be shouldering a part of your trip?
Thank you for replying to my comment :)
Actually no, I am going to finance my trip. I just thought that maybe I could visit him over for the holidays and have him send me an invite, cause the first time I applied for a TRV I was denied. I opted to go there as a tourist and didn’t place any “POINT PERSONS” from Canada. That’s why I decided to have him invite me over.
I am planning to submit my application this September 15th. I hope you can reply to this comment so I know if he should still invite me over or not.
and lastly, Do i need to upload photos of us together?
Thank you very much, Yoshke :)
Hi Chris, just to confirm, when you first applied and got denied, you didn’t mention you’re visiting a friend, right?
If so, in my opinion, it’s best to keep it that way. Based on what I know, having a non-relative inviter will further lessen your chances. It will also look fishy that you applied without invitation the first time but with invitation this time. It’s inconsistent.
You were probably rejected based on other factors.
But that’s just what I think. I’m not really an expert. It’s just based on the experiences of others around me.
Hi,
Need help with the Use of Representative form (5476). I am applying online on behalf of my mother for her visitor visa to Canada. The post mentions that the applicant’s signature fields need to be left blank when applying online. However, form 5476 also has the signature of representative field where it requires the representative’s signature.
Do we need to leave this blank as well, since its an online application? Please advise.
Hi! I have no idea because I haven’t tried submitting that form.
Hopefully, others who will read this can help.
Good Day Sir,
Ask ko lang po if tourist visa din ba i-apply ko? kapag gusto ng aunt ko mag-work ako sakanya. mayroon na siya pang working visa for me para sa position ng job. Ang kaso, hindi ko alam next step pano process ng application para maka-punta po sa Canada. Thank you.
Hi! Naku, wala po akong alam kapag work-related. :(
Hello sir! Good day.
This is very helpful and detailed. I created an account to submit my requirements. Just for clarification lang po, if I follow the steps here an approved visa po ba is the same as getting a “temporary resident visa”? Tama po ba pagkakaintindi ko?
Hope to get a reply po. God bless :)
Yep, temporary resident visa ang tawag nila sa tourist/visit visa.
i am currently working in Dubai and been staying in the same company for 7 years. my visa is due for renewal in august 2020 and my friend is inviting us on her wedding in canada in june 2020. when can i apply for the TRV and what do you think are the chances of approval. appreciate your views for the same. thanks. shallee
Hi, it’s better to apply 3~4 months prior to your departure. Since applying from Middle East will take 40~60 days to get a reply (approval/rejection) from IRCC…
BTW, sometimes the IQAMA or Dubai Visa expiration is not that or minimal related to their issuing of TRV, …. it’s more on Passport Expiry. HIH :)
thanks Kirs, btw, have you tried to apply for a TRV from here already? can you please share your experiences? appreciate it very much :)
Hi Shallee, I have no idea po pag ganyang case.
Hello po. I am confuse where to submit the application form. I hope you can help me thanks and God bless.
When you create a GCKey account, you will be prompted to answer some questions and it will lead you to an UPLOADS page. You can upload the form under the designated field.
good day po! paano po if may job offer ako from my relative na permanent resident na sa canada? may idea po ba kayoo if paano yung process pag work permit inapplyan po? thanks po
Hi Aimee,
wala po akong idea sa work permit. :(
hi, my friend from canada is inviting us for her wedding in june 2020. i am based here in dubai as an OFW for 7 years in the same company earning 7K monthly. i am a single mom to a 13 yr old boy studying in the philippines. in your idea, would you recommend na isama ko anak ko sa travel or may ok na ako lang muna mag travel?
Hi Shallee, unfortunately, di ko alam ang complexities kapag based abroad ung applicant so wala talaga ako idea. :(
Hi, Thanks for this very informative post and did managed to apply some tips while filling out the forms of TRV here in Kuwait.
Kuwait TRV TIMELINE:
July 27, 2019 – Applied Online
July 27, 2019 – Confirmation of Online Application Transmission
July 27, 2019 – Submission Confirmation
July 29, 2019 – Biometrics Collection Letter
July 30, 2019 – Biometrics Completed
September 15, 2019 – Correspondence Letter
September 15, 2019 – Original Passport Request
September 16, 2019 – Passport forwarded to VFS Kuwait
September 17, 2019 – Passport received in Abu Dhabi (Canada Visa Office)
September 22, 2019 – Application was Approved (CIC online)
September 23, 2019 – Passport dispatched from the Canada Visa Office ABU DHABI
September 24, 2019 – Passport received from VFS Kuwait
Multiple Entry (expiry 1 day before the Passport expired) May 2028
Note:
OFW, No relatives in Canada, No Friends in Canada, Didn’t put any reference.
I will travel alone, Wife and children is in the Philippines.
Currently working here in Kuwait. HIH :)
HELLO PO!
SAN PO KYO NAGAPPLY DYAN PO B KYO NAGSUBMIT SA KUWAIT.
THANKS PO SA REPLY
Hi, I applied online… then submitting Biometrics and Passport sa VFS Kuwait na sa Kuwait City.
Sila na bahala magdala sa Abu Dhabi.
Thanks for sharing, Chris!
And congrats on your visa! Have a great time in Canada!
Hello.. How long did your friend wait to get an update after submitting the biometrics? Did he or she submit the passport within that the same day?I applied online and im giving my biometrics on october 10th in makati. Thank you
Hello po sir Yoshke,
Kaka submit ko lang nung TRV application ko online. Late ko na notice that I wasn’t able to include my middle name sa TRV application form. Nalito kase ako sa “Given Name”, nasanay kase na dito pag meron i-fill in na forms meron tlga space for “middle name”. Do you have any idea how to correct that? Yung sa passport natin meron middle name kase :'( I’m worried now..
Hi Acer002, by middle name, do you mean your mom’s maiden last name?
I didn’t enter my middle name either. No issues naman yung saken.
Hello po sir Yoshke. Yes po, my mom’s maiden last name. kala ko kase need eh.. by the way went to vfs yesterday fr my biometrics. hoping for a positive result. thanks po sir!
Good luck! :)
Hi po,
Im so worried about me applying for visitor visa in canada.. to be honest i am in a same sex relationship and 2 years na kami together.. pabalik balik na din siya dito sa pinas.. shes a filipino blood but born in toronto canada.. eot po yung mga worries ko
1. di kalakihan sahod ko every month
2. PWD po ako pero active naman po and nakakalakad
3. sakanya ako magstay and siya lahat magbayad ng expense ko..
Red flag po b aito? kung ideclare ko na siya magpay ng mga expense ko during my stay for 1 month. i am employed here for 3 years.. but to be honest above minimum wage earner lang ako ang wala akong 300k sa bank acount ko.. please help.. ano po ba maganda gawin? ideclare ko about samin or wag na?
Thank you :)
Hi Zet,
To be honest, I think di ganoon kalaki yung chances. Malabo either way.
If hindi mo ideclare, mahirap yun kasi if just above minimum wage ka, mahirap paniwalaan that you can afford a 30-day stay in Canada. And mahirap magsinungaling sa application.
If ideclare mo naman, embassies are much stricter to sponsored applicants kaya bubusisiin talaga nila ang finances mo.
We explained it in detail here: https://www.thepoortraveler.net/2019/07/visa-immigration-boyfriend-girlfriend/
Hi Yoshke! Currently processing my Canada Visitor Visa, will only visit for 2 days from Seattle, WA. In the supporting documents checklist there’s a row that says “proof of upfront medical exam – required”. What do I submit in this tab? Many thanks!
Hi Jane, unfortunately, I have no idea. I never encountered that requirement. :(
Hi, Yoshke.
The appointment letter has a consent letter attached to it. In the consent letter, there’s a field where my parent’s name and signature. Does VFS require both signatures from my parents as only one of them is in Manila?
Hi James, hmmm, when I applied, my consent form has no fields for parents. Are you a minor?
But anyway, if so, di ko alam if okay lang na one lang. :S
Hindi ako minor. Yung appointment letter mismo kasi merong naka-attach na consent letter. Yung consent form walang fields for parents. So nagtataka kung bat meron pang consent letter other than the consent form. Can you ask around sa FB group?
Hi James,
You can ask the members yourself here: https://facebook.com/groups/thepoortraveler/
Hello, im applying candian visa this nov. And Can not present a bank statement because I only started saving last sept. However, I can provide bank certificate and payslip. Also, my cousin will be sponoring my trip. Is it okay not to present a bank statement?
Thank uou
The bank certificate that you will submit is for the same account? The one that you opened just last September?
Hi!
as per my understanding, actual passport submission is only when they advise to bring the passport at the embassy? do they provide exact date to submit the passport or will it do on any day i can bring it? because i have travel plans prior schedule to visit Canada, worried that i don’t have passport on other schedule plans.
thank you.
Hi Shirley,
As far as I know, if you apply online and you’re asked to submit your passport, you have 30 days to do it.
I tried the online process, I saved my application so I can pay later on, tapos when I tried to log in, it wouldn’t bring to my account, it keeps asking redirecting me to the home page, prolly a website error. I revoked my GCKey to make another one tapos same thing happened. Did it happen to you? It won’t being me na to the pages according to your screenshots. Weird.
Hi Jesiela, no, I haven’t encountered that error in my or my friends’ applications.
One of our readers suggested clearing your Internet Browsing data history. But I dunno if it will work. Might be worth a try.
andito po ako sa KSA and im interested to apply pero gusto ko po sana isabay sa pag apply ang daughter ko na nasa Philippines (she’s still a minor) . is it possible and how? im a single mother and never married..
Sorry po, di ko po alam. :(
Hi po. I’d like to ask po if what would be the best thing for me to do for applying a tourist visa to Canada. May work po ako right now, it’s just that malayo lang ang sahod ko sa required amount. Is it possible if I can use my parents’ bank accounts to be my sponsor? And one more thing, my first degree cousin is already a resident there too. Thank you and God bless you! :)
Hi Jeanefer, usually, being sponsored can work against the applicant. Pero di ko rin po alam if it’s a better option for you.
Hi Thank you for this very informative blog.
I followed all the steps from here and now waiting for my visa.
Thank you so much.
Best of luck! :)
HELLO PO.
ASK KO LANG PO IF MAS MADALI PO B S MGA OFW N MAGAPPLY SA PINAS KESA SA UAE. WORRIED KSI AKO IF SAAN AKO MAGAPPLY EH.
SLAMAT PO AND PLEASE HELP ME TO DECIDE.
Di ko po alam. :(
hello sir! ask ko lang po magapply po ako via online pero dto p poako sa dubai atmagstart n ako magpply online sa pinas. anu po mas ok n ilagay ko sa current and residential adress ko sa dubai or sa pinas po?slamat
Hi Mary, di ko po sure, pero ang alam ko po dapat Dubai kasi yan po ung current address nyo.
Greetings! My wife and I submitted our online application last October 22. She recieved her final decision last October 25. I got mine yesterday, Nov 1. I admit it was intimidating when we decided to apply for a Canadiqn visa. Good thing is I stumbled upon your article when I was searching for tips on how to apply. Your article is very detailed and HELPFUL. Your instructions made it so much easier for us. I will definitely recommend your site to all my friends who wish to apply for a Canadian visa. Again, thank you!
Thanks for returning to our website to share this! Congrats too! Have a fantastic time in Canada! :)
By the way, our applications were both approved. I will submit our passports next week.
Hey, just like to let you know your site has really helped me in all my visa applications. I’ve recently received my Canadian visa after 8 working days (for a Christmas travel), and my Japan visa 1 month ago (4 working days – which allowed me to go to Japan last week)
Your blog also helped me with my Australian visa application last year. Will always look into this blog for other visas I’ll be applying in the next coming months.
Thanks so much and more power.
Hi Shaira! Yehey, congrats sa bagong visa!
And thanks for taking the time to share this! Always happy to serve! :)
Hi! I have always been refeering to your blog as the most credible one when it comes to travel kase lagi siyang updated. I applied my canddian visa Last October 24. I submitted by biometric october 28 until now wala po. My worry ako, naglagay kase ako ng purpose of travel which is optional but you highly recommend it. May kamali ako sa details. Sabi ko doon, I will be staying for two weeks from December 21 2019 to December 5 2020. Thats almost a year! huhu. I supposed to write January 5, 2020. Would it affect my application? until now, i haven’t received any updates yet. it’s been 11 days.
Whoa! Hala, medyo worrying nga kung isipin nila na almost one year, pero if sinabi mo naman na 2 weeks tapos tama naman yung dates sa application form, I think mas nagmamatter naman yun.
The average processing time now is 13 days. Average yun, so some take much longer, siguro kasi pa-Christmas na.
I wrote down a follow-up on their webform :(
Sana meron na para makapagbook na din ako :(
Thanks, Yoshke !
God bless you always
Ho yoshke! Sad to say my visa was denied. Thinking of reapplying. Do i need to pay the biometrics fee again? Do i need to leave the UCI blank? And do i need to create new gc key?
Hello Donna, may we know the reasons why you were denied, aside from nagkamali po kyo s duration ng stay, just for info. Meron ata cla standard na letter form na chinecheck san cla points ndi nconvince that you will come back. KC po dun s pinoint out nla n yun, dpat my changes na s new application. Thanks
Hi Donna, di ko pa po na-try na magre-apply so di ko po sure.
Pero ang alam ko, pag nasa system na nila yung biometrics mo, di ka na nila kukunan ulit. I don’t think you need to create a new GC key. Just create a new application.
Hello Yoshke and to my fellow followers here,
I have some questions Lang sana. I’m planning to apply for a TRV this coming January for me and my 6yrs old child. I’ve been a solo parent since 2015 pa.
Do I really need to have her dad sign a paper pa for her to travel? We’ve travelled many times na like japan and Australia pero never ako nirequire ng ganon. Okay na ba Kung solo parent ID ko nalang ang ipresent?
Also, papano po magsubmit ng application for family (my child and I) online? Same process Lang po ba to ng sa Australia?
Salamat ng marami!
Hi Yeng,
Re solo parent ID, sorry, di ko alam kapag solo parent. :(
Re family application, di ko pa natry mag-apply as family/group, pero sabi nung ibang commenters when you start your application, you will be asked if you are also applying for a family member. They say that if you answer yes, your checklist will include requirements for them too.
I’m just curious Kung meron na po ba dito na na approve kahig Hindi nagsubmit or avail ng flight reservation from gazelle??
yes, i reserved through CX and paid 20.00 USD online to be able to hold the flight details for 72 hours. approved naman kami valid until 2029. (family of 3)
Hi how do you add an additional page 2 for the Family Information Form. I have a big family and the space to list down my siblings is not enough, I need another page 2 to accommodate and list down all my siblings. The form indicates that an additional page can be printed and completed. I did that but was wondering how to add this additional page when the form itself is protected which does not allow one to edit (add) a page to the form which is in pdf. How you can help.
Hi Imee, unfortunately, I have no idea how to do this.
Hopefully some of our readers could help.
Hi, need help please. Hindi ko kasi natapos ung pag upload ng documents and naexit ko sya. Pano po makabalik dun sa step na un? inexit ko sya kasi sabe pwede ko naman balikan pero hindi naindicate anong button ang iclick.. :(
Hi! We submitted our application thru an agency. We completed our requirements and submitted everything to them by Nov 20. It’s been almost three weeks and they said that they’re just waiting for the email of the embassy to schedule our biometrics. Is this usually the case?
Hi Din,
Paper application ‘to? Hindi online?
If paper application, wala akong idea. :S
I mean, does it really usually take this long to get a respond from the embassy acknowledging na na receive na yung application namin. Until now kasi wala pa kami sched for biometrics. The agency said it’s because of the volume of applicants.
Hello,
this will be our second time to apply for a visa sa canada naconfused lang ako can I apply na as family kami ng husband ko is it much better? yung last time kasi we applied separately pa now kasi plan ko applying for a member of family para isahan na pero pag ganun nman ginawa ko parang nagiging principal yung isa the wala na mashado docs hinihingi dun sa isang family member. any thoughts about this if ano mas better?
Hi Sdee,
It’s difficult for me to say kung alin ang better because I haven’t experienced applying as part of a group. I’ve only tried individual application. :S
Mine took a day for biometrics schedule after finishing via my application through online.
Thanks for sharing!
Hello,
I just wanted to share what I used to merge and compress my PDF files to keep to the 4 MB size limit. You recommended Adobe Distiller which I considered at first, but when I searched for it, I found out that it was not a free software. Further searches lead me to PDFCreator. The program can be downloaded here: pdfforge.org/pdfcreator. It’s a free software that can be used to convert files to PDF as, merge individual PDF files as well as compress them or convert them to other formats such as JPG, TIFF, etc.
I successfully converted screenshots pasted on MS Word then converted to PDF and merged with other PDF files as one of my proofs of means of financial support. I hope the other readers and visa applicants will find this information useful.
hello! do i really need to convert it from micorosoft compilation of documents to pdf?
Doc files (Microsoft word) are accepted. Ang problem lang dun ay malaki yung file madalas, eh may file size limit. Ang pdf kasi ay much smaller than doc.
hello po!
ask ko lang po, sino po dto un naapprove n kht un bank statement n pinasa is due n for a week. ksi po nagrequest ako ng bank statemnt last december 11, 2019 and hndi ko po alam if valid p sya if ngaun plang po ako magaapply december 15, 2019.
please help me po.
thanks
Hi Mary Grace,
Sa tingin ko po pwede pa po yan.
Hopefully, may sumagot na ibang nagtry na ganun.
Hi Yoshke//The Poor Traveler Bloggers,
I’m applying for visitor visas for me and my 2 children, aged 13 and 9, and I’m 90% done with all my requirements. I can safely say that I can complete them within the week. However, one form, and one question in particular, has had me edit and re-edit my answer.
Form 5257, under “Details of Visit to Canada”, the question “Funds available for my stay (CAD)”. My question is, since we will be traveling as a family, and since each applicant is required to submit this form, should the fund amount be the pooled amount for all of us or should I divide this total fund amount by 3 and write that in the forms? For example, should a fund of CAD$6,000 for a 4-day stay in Canada be declared as CAD$2,000/applicant or should it be declared as is for each of the 5257 form?I’ve searched online and there are varying answers. I hope you can help clarify this.
Thank you for your blog. I find your articles and forums very informative. Don’t get tired of blogging because you are helping a lot of people.
MaryS
Hi MaryS,
I don’t know for sure because I haven’t tried applying with family/group. But if I were in your position, I would probably do it per person because the form is per person.
If you want to explain that better, you can attach an explanation letter anyway.
Hi Yoshke,
Thank you for your advice. That makes sense. Dividing the fund among the 3 of us and providing additional explanation in my cover letter should clarify it.
MaryS
Do i need to send NBI clearance for the Canadian Visa Application? Hope you can help on this.
In my experience, as tourist visa applicant, I didn’t submit NBI clearance.
Hello, any idea on how to go about renewing my canadian tourist visa.? Is it just the same process as when applying for the first time?
Hello! Good day!
I just wanna ask about what kind of proof of relationship is needed for the online application of tourist visa. There is a part there that says proof of relationship and the documents they need are
a marriage certificate
Statutory Declaration of Common-Law Union (IMM5409)
a birth certificate
an official document naming you as a parent
a copy of the inside back cover of the inviter’s passport showing the inviter’s parents, if applicable
but the one inviting me in Canda is my boyfriend. Do you have any idea what kind of proof i need to submit? Thank you.
Did you apply for a working permit visa or a tourist visa? thank you
Tourist visa
Hello,
I am applying online for TRV, where do i attached my Host’s T4/NOA together with his invitation letter section or proof of means. My host will finance my trip
salamat.
Just wanna ask about sa flight reservation.. if naka hold lang sya for up to 3 days, wala po bang problema yun? Thanks!
Yep, most flight reservations are really short. Yung sa friends ko 24 hours lang pero naaccept pa rin.
Hello Yashke & The Poor Travelers Bloggers;
I wanna say thank you for this blog kasi this is only my guide on how to apply for a canadian visa as a visitor. Big help and thank you to the team :)
May I share with you the details:
December 11, 2019 – submitted all the requirements via online plus payments
December 12, 2019 – received confirmation letter that they got my application
December 13, 2019 – received boimetric instruction letter. My scheduled was December 24, 2019, no traffic and walang pila
December 24, 2019 – biometric enrollment. 8:AM my original scheduled but I arrived 7:00AM. 15 minutes done at 7:15AM, ahead my schedule at 8AM
January 5, 2020 – emailed only that they still on going processing of my application
January 16, 2020 – received letter regarding the validity of my biometric enrollment for 10years
January 16, 2020 – received letter for submission of original passport ( LITTLE BIT EXCITED)
January 21, 2020 – submitted my original passport (paid P564 – LBC, locker and txt messages)
January 22-23, 2020 – series of messages via email regarding the status and whereabouts of my application. And to my surprised, last message was “my application was APPROVED”. Of course a little bit excited pa lang kasi I want to see my original passport with stamped the canadian visa.
January 24, 2020 at 9:00AM – recieved my original passport with stamped canadia visa with MULTIPLE ENTRY OF TEN (10) YEARS..
THANK YOU LORD, THANK YOU TEAM!!!
SEE YOU IN CANADA SOON…
RENE
HI rene. just wanna know the expiry of your passport. do u have another 10yrs on it? kasi ang sabi depende daw sa expiry date ng passport ang ibibigay na length of visa.
Thanks
please do reply.
Thanks for sharing this!!! And congrats sa visa approval!
Saan ka sa Canada punta?
Toronto, Vancouver and Calgary.
Hi, Just wanna ask if we also need Travel insurance as part of the requirement? I had it with my Schengen Visa before, not sure if it applies for Canada Tourist Visa as well. Thank you in advance.
Hi Emgee, sa experience ko, hindi naman sya part ng requirements. Not sure if lahat ay ganun.
Pero after ko ma-approve bumili na rin ako ng insurance. :)
Hi,
I wonder if other new applicants are experiencing the same as below.
Upon logging in, I only have Change Your Password, Change Your Recovery Questions or Revoke Your GCKey in my Dashboard, no other option to Start my application.
There is an option “Please select Continue to return to the Government of Canada online service” but it logged me out automatically after hitting “Continue”.
Your feedback will be very valuable. Thanks much in advance.
Hi Angie,
Yeah, they made changes na magulo. Paikot-ikot.
I tried something else right now and it worked for me. Try this instead:
1. Go to http://www.cic.gc.ca
2. Click English. It will take you to the Immigration and Citizenship Page.
3. On the right sidebar menu, click CHECK YOUR APPLICATION STATUS
4. On the next page, choose VISITOR VISA. Then click SIGN IN TO YOUR ACCOUNT under Online Application.
5. On the next page (Sign in Page), click SIGN IN WITH GCKEY
6. Sign in
7. On the next page, when you click CONTINUE, it should take you to the DASHBOARD.
Let me know how it goes.
HI! May i ask if what to put in the application form where they would ask to put “Name, address and relationship of any person(s) or institution(s) i will visit?”
I don’t have anyone there to visit, just purely tourism, hence i already have my itineraries, should i leave it blank for that question?
Write down your hotel name and details.
Hi, just wanna ask kung gaano po katagal magpalit ng marital status? February 3, nakapag-fill up na po siya ng mga form. This coming February 18, ikakasal na po kami.
im currently applying for canadian visa. Pero nagtatalo kami sa birth certificates as proof of relationship. Pwede ba ang photocopy lang? or kelangan original? May sinasabi pinsan ko kelangan pa daw authenticated pa ng DFA, pero iba photocopy lang pwede na. Your advice pls.
PS – your tips are very very helpful!
Hi Joseph,
I’m assuming you’re visiting or invited by someone in Canada. Pag ganun, sadly, di ako familiar. Pero yung birth certificate na sinubmit ko (as a tourist), I just scanned it. Since inuupload lang naman sya online, kung photocopy sya, if ang original naman nya was legit and issued by DFA (on security paper), I think okay lang.
Di ko alam if may complexities kapag visiting someone.
hello THE POOR TRAVELER. gusto ko lang po sanang magpasalamat sa inyo dahil sa malaking tulong ang binigay nyo sakin sa pagapply nitong Canadian Visa. nakuha ko na sya 10yrs multiple entry sa loob lamang po ng 12 days. Sinunod ko lang po bawat step na nilagay nyo po dito sa article nyo. nkapa accurate ng mga details ninyo about it kaya hndi ako masyadong nahirapan sa pagcomply ng mga requirements na dapat gawin. Sana wag kayong mapagod sa pagssulat or pagvvlog about travelling dahil marami po kayong natutulungan. Again thank you and GODBLESS po sa inyong lahat.
Yayyyy!!! Maraming salamat din po sa pag-share sa amin nito. Natutuwa po kami pag nakakabasa ng ganito. Nakaka-motivate lalo.
Enjoy Canada! :D
pwede pa ba ma deny kapag hiningi na yung biometrics?
Yep, pwede pa rin. AFAIK, when they ask for biometrics, they still haven’t completely processed your application.
per person pala yung $85 biometrics fee. tatlo yung inapply ko, pero $385 lang siningil sakin, tapos kanina nagpadala sila ng request letter para sa additional biometrics fee.
aabot kaya 15 working days (20 including weekends) sa visa application?
Meron akong expired multiple entry canadian visa, kaka expire lang last year but i visited canada twice na. I am planning to re apply para ayusin yung wedding namin ng canadian bf ko for 5 years. My problem is hindi ganun kalaki ang balance ko sa bangko pero i can provide Cert of Employment, ITR, letter from my company (4 years na ko sa work ko) ,entry&exit flight confirmation, previous stamps /boarding pass from canada. He will also provide invitation letter, his birth certificate, pay stubs and bank statement.
Kinakabahan parin ako na madeny. Iniisip ko na wag ko na lang ipasa bank statement ko. Or ipasa ko na lang
Thank you so much for your guide. I’m planning to visit Canada mainly for tourism but I also have an aunt who’s working there so I will meet her. What would you advise I put in my purpose- tourism or family visit? If I choose family visit, I hope there’s no issue if my itinerary will just be all sightseeing (tourism). Also if I mention my aunt in my application, is it automatic to submit an invitation letter?
Thanks again!
Hi MSA,
Will you be staying with your aunt or at a hotel?
Hi,
I noticed that for people who received the correspondence letter also receive the letter to submit their passport. (same day). Pero on my case kasi i received the correspondence letter but i haven’t receive the request to submit my passport to VFS. Someone has the same experience before??
Medyo kinakabahan lang kasi. :/
Thanks.
Thanks for this step by step blog. It really helped me a lot!
To give others an idea on how long it took here’s my timeline:
February 14 (Friday) – Submission of Documents online
Received 2 letters: Confirmation of Online Application Transmission and Submission Confirmation
February 15 (Saturday) – Biometrics Collection Letter was received
February 19 (Wednesday) – Biometrics at VFS Makati
February 27 (Thursday) – (morning) I received a Correspondence letter stating that they have received my biometrics
– (afternoon) Original Passport Request!
February 28 (Friday) – Passport submitted to VFS
March 2 (Monday) – Passport released to VFS.
IRCC account updated: Approved (Multiple-Entry) until passport’s expiry. (1 year and 7 months)
17 CALENDAR days in total.
Sadly I wasn’t able to renew my passport before applying! Oh well, apply na lang ulit :D
Thank you Sir Yoshke Dimen!!
Hi Sir!!!Im back po….
Bumalik po ako dito sa pinas after may 4 mos. Vacation sa Canada. This year po I decided to go back sa Canada pero planning po to process my study permit. Yung visa ko po mag eend sa jan. 2021 hindi ko din po narenew muna passport ko nun kaya almost 3 years lang ang nagrant sa multiple entry. (Sayang). Pwepwede padin naman po yu Sir noh?or pwede po ba mag apy ng panibagong visa kahit may existing visa kapa?o hindi po.?thank you Sir!lahat ng sinabi niyo dito sinunod ko kaya na approved ako last 2018.
Congrats, Mike! Yan din yung pinanghihinayangan ko saken. Two years na lang passport ko when I applied so di ko namaximize. :S
Hi Yoshke,
Good day! I’m planning to visit my boyfriend in Canada. He is going to sponsor my travel.I’m just wondering how can I submit the letter of invitation in my CIC account. From your screenshot example it doesn’t have an option for me to upload a file of the invitation.I haven’t made an account yet so prolly there are other options in there.
By the way, this is the process that I’m following. So helpful. Thank you!
Hi Jessi,
It can be submitted under Purpose of Travel.
But I think the upload options vary depending on how you answer the form. There could be a specific item for letter of invitation if you declare you’re invited/visiting someone. But I’m not sure. :S
Hi Yoshke,
Thank you for your reply. Also my sister is accompanying me on this trip since I haven’t been into any countries but Bali. I will be financing her trip since I own a small trading business. With regards to the online application, is it better if she can also fill out the online form too. I’m not sure how to inform the embassy that I will be travelling with her. I can fund our trip and it’s a one month stay, but I still have an invitation letter from my boyfriend. It’s going to be my first time meeting with him, we decided that I’ll be the one to visit him first since the Covid19 case is piling up dramatically here in the Philippines. He originally planned to meet me this June but unfortunately this pandemic is ruining our plan.lol.
I’m sorry for asking too much. Please badly need guidance from you. :( This is giving me anxiety. I’m overwhelmed reading a lot of articles out there. It’s making me more nervous and confused. Specially the low chance of visa approval if the case is a long distance relationship.
Thank you for being awesome!
Jessica
Hi Jessi,
Your sister should apply for a visa too. I haven’t tried applying as part of a group, so I don’t know how exactly. You can also include a cover letter to explain.
Based on the accounts of those who shared their experiences with us, embassies generally don’t like it if you haven’t met your sponsor personally. We explained this bit here: https://www.thepoortraveler.net/2019/07/visa-immigration-boyfriend-girlfriend/#Your_relationship_with_the_sponsor_matters_a_lot
Hello. Magkano po funds ang kailangan for 1 week stay? Ok na ba ang 100k pesos in bank account? Please reply
Hi, I’ve learned a lot from this blog. Thank you so much. I just have a question about the biometric, where can I get if I’m from Davao City? Should I really go to Cebu or Makati just to get it?
Is it okay if my sponsor is U.S citizen? Like sa Canada lang po kami mag mimeet. He can’t travel by air, that’s why we’re planning on meeting in Canada. Hoping to hear from you po. Salamat
Hi! Just want to ask, i dont have any international travel history way back then and now since I’m a first timer to travel internationally. But the canada visitor visa has a requirement of travel history. In that case, Do i need to pass a none travel history explanation or just don’t submit anything about travel history? Thank you!
If I were in your position, since it’s required, I would offer an explanation.
Hi. My wife is applying for a Canada Student Visa and I will be a dependent. My wife’s papers are in order and as for me, I don’t have and ITR or land titles to show. I work freelance and I don’t have any ITR. Is there a possibility that I will be denied because I don’t have an ITR? Thanks.
Hello!
Thank you for this very detailed blog. Actually ito lang ang sinundan ko noong nag- apply ako last 2019. And I got an 10 yr multiple entry visa. Very helpful talaga. Just want to ask lang sana kong ito pa rin ba ang requirements nila ngayon? Wala kaya sila dinagdag o binawas due to the pandemic? My sister is planning to apply din kasi. Hope I will get a reply from you.
Thank you in advance.
Hi Helena,
The last time we checked was in 2020, shortly before the pandemic. Not sure if there have been changes since. :S
Hi Guys. This blog and support sa Facebook is really helpful. I followed the steps for Online application ng TRV and it’s pretty helpful talaga. I submitted my application on September 28 and sad to say I was refused on 23 November. Pero I am going to re-apply.
Ang mga Grounds Ko.
I just need your inputs. Quick background:
I am invited by my boyfriend to visit Canada in March for 10 days. He provided the invitation letter that I will be staying with him and his parents while staying in Canada.
I provided all my documents – financial and work. I have family, pets but I don’t have property under my name. Also, well traveled din naman ako. I’ve been to Europe, US, Australia and Asian countries.
So my dilemna, pwede ba sa 2nd application ko wag ko na ba isama un invitation ng boyfriend ko? or pwede din ba isama ko padin pero galingan ko nalang sa Letter of Application ko? medyo ndi ko kasi na effortan un letter ko eh.
Thanks po sa sasagot.
Kumusta ‘yung naging second round ng application? Medyo similar kasi tayo ng case, except sa hindi lang ako well-travelled.
hello
should the applicant be applying from the Philippines or the sponsor apply from Canada? what is the best way?
thank you
Hi Ann, as far as I know, the applicants should apply themselves. Not sure if a sponsor can do it for an applicant though.
Thank you for sharing your experience. I learned a lot. Is this still the same process this year?
Hi! I’m a freelancer and I have a steady income since last March (you stated we only have to provide bank statements for the past 4 months so that’s good right?). However I don’t have a Business Registration Document for my freelancing but I have my own website proving my freelance business. Also, I am only travelling for business but I am going there for my cousin’s wedding. I have an invitation that I can provide, and I also have many relatives there. Do I still have the chance to be accepted without this one document?
Thank you in advance!! <3
Hi Nelle, they might find “traveling for business” and going there for your cousin’s wedding a bit confusing?
I’m not sure what can substitute business registration docs, but if I were in your shoes, I would try to get certificate of engagement from my clients and other proof like ITR? (If you don’t have an ITR yet, you can still file for it for the past year before the deadline.)
I’m there for my cousin’s wedding talaga not for business pero since the Proof of Financial Support is required, does that mean I also have to show proof of where I earn my money from? Or is the bank statement enough?
I’m getting the Visitor Visa. :)
Hi Nelle, sorry for the late reply. Natabunan yung comment. :( Not sure if nakakuha ka na ng visa. (Sana nakakuha ka na.) But to answer your questions…
Aaah, yung wedding lang talaga yung purpose? Medyo naconfuse lang ako dun sa sinulat mo na, “I am only travelling for business but I am going there for my cousin’s wedding.”
If yung wedding lang talaga, you’re not traveling for business but yes, you will still need to show proof of funding/financial support.
Dun sa “Is bank statement enough?” naman: The thing with Canadian visa application is, in technically, you can upload just one proof. So in theory, you could submit just the bank statement. But it’s always better to submit multiple items so your application is better supported, mas kaunti yung doubt, and mas malaki yung chance.
Hello po, sir! Nagsisisi ako ngayon ko lang nabasa yung blog niyo haha.
Wanna share my story and ask a question din po.
2018, nagapply ng sponsorship si Mother for me para sa PR niya.. 2019, nagbiometrics nako and medical, kaso sobrang natagalan dahil nakaencounter siya ng countless mishaps sa papers na pinass niya kaya pinaulit yung mga submissions niya until nagexpire yung medical ko..
so medyo ilang buwan ding nakatengga. come 2020, nagkapandemic, nadelay ulit yung papers. until nagrequest uli ng medical kaya nagpamedical ako ulit, pero may mga kulang na evaluations sa medical ko kaya nagpatest ulit and nasubmit nalang around oct-nov 2021.
january 18, 2022, biglang for PR na si mother and requesting for passport ko narin. kakasend ko lang po nung passport ko and other documents sa vfs makati.
ilang days po kaya est labas ng visa ko? and may chance po kayang madeny siya? also, ilang months po kaya ng visa ang most probably na ibibigay since dependent child po ako? and lastly po, pagkarating po sa canada, pwede po ba umuwi after 2 months? graduating po kasi and magf2f classes na.
more power po! <3333 sorry medyo magulo magkwento hahaha!
Thank you for this in-depth guide about requirements for canadian visa, will be taking trips to some Canadian destinations soon, that’s why checked the guide today.
Need help!
Ive been approved for student visa, I am a solo parent and i did not include my son in my application, thinking that it might affect my application but now that they grant my student visa i wanted to apply my son as may dependent coz i cant imagine being away from him for years. please help me what to do.really really appreciate ur help
Hi Eljay. Unfortunately, we don’t know much about student visa as it’s outside our personal experience. :S
hi , how to renew Canada Tourist Visa? because my visa will expire on April 30 2022
Hi Sir, I submitted my application online today. Should I wait for instructions before i go for biometrics? Or I can just schedule with vfs myself kahit wala pang advise to do so? Thank you.
how to renew expired canadian visitor visa?
Hi. I am applying for Visitor Visa as per invitation of my brother who is a Canadian citizen. The invitation is a gesture to help me get over the death of my wife. I put this in the Letter of Explanation together with details on personal cash (baon) despite full-expenses on the account of my brother, together with the proof of relationship using both our birth certificates. In what section do I upload the page?
Ooops. Just came across the slot for Letter of Explanation at the bottom. That puts my previous inquiry as answered.
This is the best guide ever! Super detailed than any other sites Kudos for a job well done. I really appreciate you for this effort.
Thanks, Angela! Glad this has been helpful!
I hope you could also share some guides on how to renew canadian visit visa. Mine got expired and forgot what I did in most parts. Do I have to provide all the docs like birth cert again tia
Thanks for your blog. I intend to visit my children in Canada this summer, I found difficulties in submitting my application on line. Ive already created GCkey acct however I could not upload IMM5257 and supporting docs. Could you recommend someone who is well verse in this field and may I know how much it will cost me. Thanks.
Hello, maybe u can also help me. Planning to visit CA during Holidays (been wanting a white Xmas!!) I’m still saving pocket/show money (only targeting about 200k) . I have an invitation from my Aunt there po, we’re hoping to have atleast a month or two vacay, she will shoulder food, accommodation (will stay at her house po) and other expenses. Will that be enough for my visa to be approved? Hope you can give me feedback, thanks much :*
Hi Kim. Naku, mahirap po kasi for me to give opinion kung maaapprove or hindi, lalo kapag invited or may sponsor. Dami po kasing factors nun.
Hello! I am applying online foe a visitor visa and i want to find out if i can use the credit card of my son who is in Canada to pay for the $100 fee. Please help.
I’m currently trying to get a tourist visa and I just wanna say, this post has been a big help, so thank you! Just wanted to share some info since I recently went to CVAC for biometrics. I was carrying a handbag and they asked me to leave it in one of the lockers, which costs 92 pesos. If you’ll be availing one, I suggest you prepare the exact amount because in my case, they didn’t have any change when I gave them 100 pesos. Hope it’s not a common occurrence.
The whole process was quick. I was surprised when I got there around 12nn (my appointment was 12:30pm) because there was a long line, but they’ll call you based on your time slot anyway. After I got in, I was done in about 15 minutes, I think.
Hi Yan! Thanks for sharing this! And good luck on your application. Where in Canada are you going?
Thank you! Planning to visit Toronto and Niagara. :)
how long did you get your visa approved?
Hi, I don’t know if you’ll be able to read and answer this but worth the shot. What if the date that I intended to go to Canada as tourist was postponed for a month or two? Can I still fly to Canada even if I won’t be able to fly on the itinerary schedule that I submitted to get the tourist visa? Thank you in advance.
Hi Edna, as far as I know, as long as it’s within the allowed period indicated in the visa, it should be fine. I could be wrong, though.
Hello, would you know if having travel histories from UK Commonwealth member nations like UK, Australia, and New Zealand helps the approval?
Hi Jean, generally, travel history especially to stricter countries helps applications naman, but not a guarantee.
Applied last June28 and got also a mesaage about biometrics, done last july 8 at Vfs makati. As of today still processing according to my cic account.
did you get your visa approved already?
Sa imm5257e, since working ako sa saudi, ano pong ilalagay sa “current country of residence or territory” end date of immigration status? balak ko po kasi mag apply ng visa para magbakasyon sa Canada by Nov. for a few days only. pero iaadvance ko na most of the requirements ngayon para pag dating ko sa pinas, doon ko na kukumpletuhin lahat
Hi, I would just like to ask if I can still submit bank certificate dated last July 6, 2022 and bank statement from April-July 2022 even if its already August? I renewed my Korean visa first kasi and then saw your vlog na I can process pala Canadian visa online so I’m planning to apply. Should I get a new bank cert and statement or valid pa yung July? Thanks in advance for answering!=)
what does “Lovs not available” means in visa application form?
hello. my husband and I went to VFS for biometrics at the same time. In a week’s time, my husband received his passport request letter but not me. What does that mean? Wondering why? Does this case also happen to other spouses applying for visitor visa?
Hi Teng, yes. Because each application is assessed individually. But to check for other people’s similar experiences, you may post sa FB Support Group namin. Mababait mga members dyan: https://www.facebook.com/groups/thepoortraveler/
thanks thanks sir. just received my own passport request letter :).
Hi, how long it took po when you received the your passport w/ visa? Just received my passport request letter and my booked flight is next already next weekend
Yay!!! Congrats po! 99.99% approved na po yan. :)
Can I apply for a tourist visa in Canada even if I have a pending US petition?
This is the most detailed instruction I have seen online, at least for Filipinos applying. I got approved (Tourist Visa) in 8 days. Thank you so much, Yoshke for your help.
Yay! Congrats on your visa! Enjoy Canada!
Hi. Mga how much po kaya ang dapat laman ng bank if travelling solo? Pero may mga tita and pinsan naman po ako dun and dun ako sa kanila magstay. Travelling for a wedding po kasi
I was reading all the comments but find no answer on “HOW TO RENEW VISITOR VISA to Canada”. Let me share my experience, I’m an OFW based in Saudi, single and no relatives in Canada. I travelled to 30 countries already for tourism while in Saudi, including multiple trips to US UK Schengen Japan. I visited Calgary on my previous 5yrs valid passport which already expired last August 2022. Now i have new 10yrs valid passport so i decided to apply again hoping i can have another 10yrs validity TRV. When i applied, current processing time in Saudi was 117 days, but thank God I qualified for expedited visa processing which is called “CAN PLUS (or simply CAN+)”. you can read more about this on IRCC website. You qualify if you had previously travelled to Canada in the last 10yrs and have valid US visa. Visa process is the same when renewing, you need to complete all the forms and upload all supporting docs online. For travel history, please note that Canada does not stamp passport anymore on entry/exit (just like Australia) so save copy of your boarding pass as proof of your previous Canada travel. Though i am CAN+ qualified applicant, still it took them 6 weeks to process my visa. Not bad considering huge backlog due to pandemic.
Timeline:
19DEC22 – before lunch time I completed my online application, evening i got BIL i immediately book my appointment for biometrics the next day at VFS Riyadh.
20DEC22 – went to VFS for biometrics, VFS staff was not aware about CAN+ so i showed him info on IRCC website about it and told him to mark my application “CAN+” so they can process it ahead of others.
05FEB23 – got BVL
06FEB23 – got Passport Request Letter, i noticed the date of BVL is same as Passport Request letter but I received it 1 day late.
07FEB23 – went to VFS to submit my passport for visa stamping.
09/02/23 – got my passport from Aramex with 5yrs valid TRV only instead of until my passport validity which is 2032.
Hi, I’d like to share my visa timeline too for reference. This is my second visa application as my first visa has already expired in 2021.
Feb 27 Mon: Submitted application online
Mar 5 Sun: Original passport request
*no biometrics this time because my bio from my first visa is still valid
Mar 7 Tue: Submitted passport at the VFS office in World Center, for provincial delivery
Mar 8 Wed: Checked online and application was approved
Mar 10 Fri: Received passport with stamp at home
Thanks for sharing this, Dan! :)
Can I apply for Canadian Visa for education while currently studying in India? If yes then what will be the process of the same?
Hello yung IMM5257 Form Hindi na need ng signature after validating deretyo attach na ? Thank you
Hi, Yosh, the link in booking flight reservations is not working anymore, can you share it again? Thanks!
We have good travel history, enough funds, stable jobs at residente na kami somewhere in Oceania though we are still holding PH passports pero denied pa din when we applied for tourist visa in Canada. We provided itinerary for 2 weeks, our bank statement showed that we have more than enough to cover for our trip + 2 time deposits for 5 years. Their reason was insufficient funds and not enough ties. If I did not have my family there, i wouldn’t be wasting my time and money to apply. It’s just that it is more practical for us to visit because it is just my husband and me vs 10 pax traveling here. Wala naman kaming balak mag tnt dahil we love the country that has welcomed us. Guess we will have to wait until we get our citizenship here so we would not have to go through the stressful visa application.
Should we decide to reapply, does anyone know if we should address the reasons why our application was denied? Or should we just submit what are required and not provide itinerary, certificate of employment, letter of invitation etc? We can support ourselves pero should we still declare that we have family there? Hirap lagi mareject.Huhu.
Pm me sa fb messenger Duchess Jimenez. I will tell you Kung Ano ginawa ko nung nedenied ako. Nung nag reapply ako, inaprove na Nila.
Just want to ask, did you include your plane ticket reservation or letter of explanation at least in your documents? In my case, I included Itinerary, plane tickets and letter of explanation about my intention to just visit Canada and to enjoy the amazing country.
Hi, we included everything (as above) with letter of explanation that includes our itinerary for two weeks but we did not have the plane ticket as we were planning to buy the plane ticket only after our visas have been approved (hopeful then but was unsure if we would get approvedor denied). The hotels were already booked by my siblings though. Not really sore about it anymore though. We’ll just travel somewhere else as our leave requests were already approved. Thanks
Hi this website has been super helpful! Ive also read all the comments!
Im just a bit confused because some of the comments here say that they got an email that said they were approved and asked to submit their passports.
Our email doesnt say approved but asked us to submit our passports (which is also consistent with other responses).
I wanted to know our chances since we already bought our tickets (excited much!)
We submitted our requirements online on June 8
Got our biometrics request June 9
Did our biometrics June 13
Got our passport request email June 23
Submitted our passports June 27
Hi May I ask if you also submitted all the original copies requested thru online application? Does it needed to keep? Hoping for your favorable response.
Thank you so much in advance.
Hello! We submitted the documents online by scanning them. We didnt submit everything required but made sure we had at least one of every category (one proof of income, proof of relationship etc). They didnt ask us to bring any of the documents during biometrics or for any follow-ups — just the claim emails.
I do know someone who was asked to bring extra documents though. It will deoend on what tou submitted.
Just to amend my earlier post, we already got approved. I didn’t notice that there was an approved notice just above the status. We chose passport pickup and I wanted to ask if we need to wait for an email that it’s ready for pickup or if we can already pick it up as soon as we see approved?
Hi Sasha! Saw your comment just now. (We have to sort hundreds of comments every week!) We availed of the delivery service, and yes, we were notified by email that the passport was dispatched.
No worries! Actually it’s a happy ending. My husband, who dropped our passports off, forgot to tick off the notification option (you have to pay if you want SMS or email notifs), so we didn’t know if our passports were ready. After a week (business days) since dropping off, he called VFS and was told our passports were ready!
Very informative. I was wondering if how can I contact you? I have questions on the process and maybe you can enlighten my questions.
thanks vin and yosh for your wonderful insights. hoping for more feature places. more power to your blogs in future and Godbless.