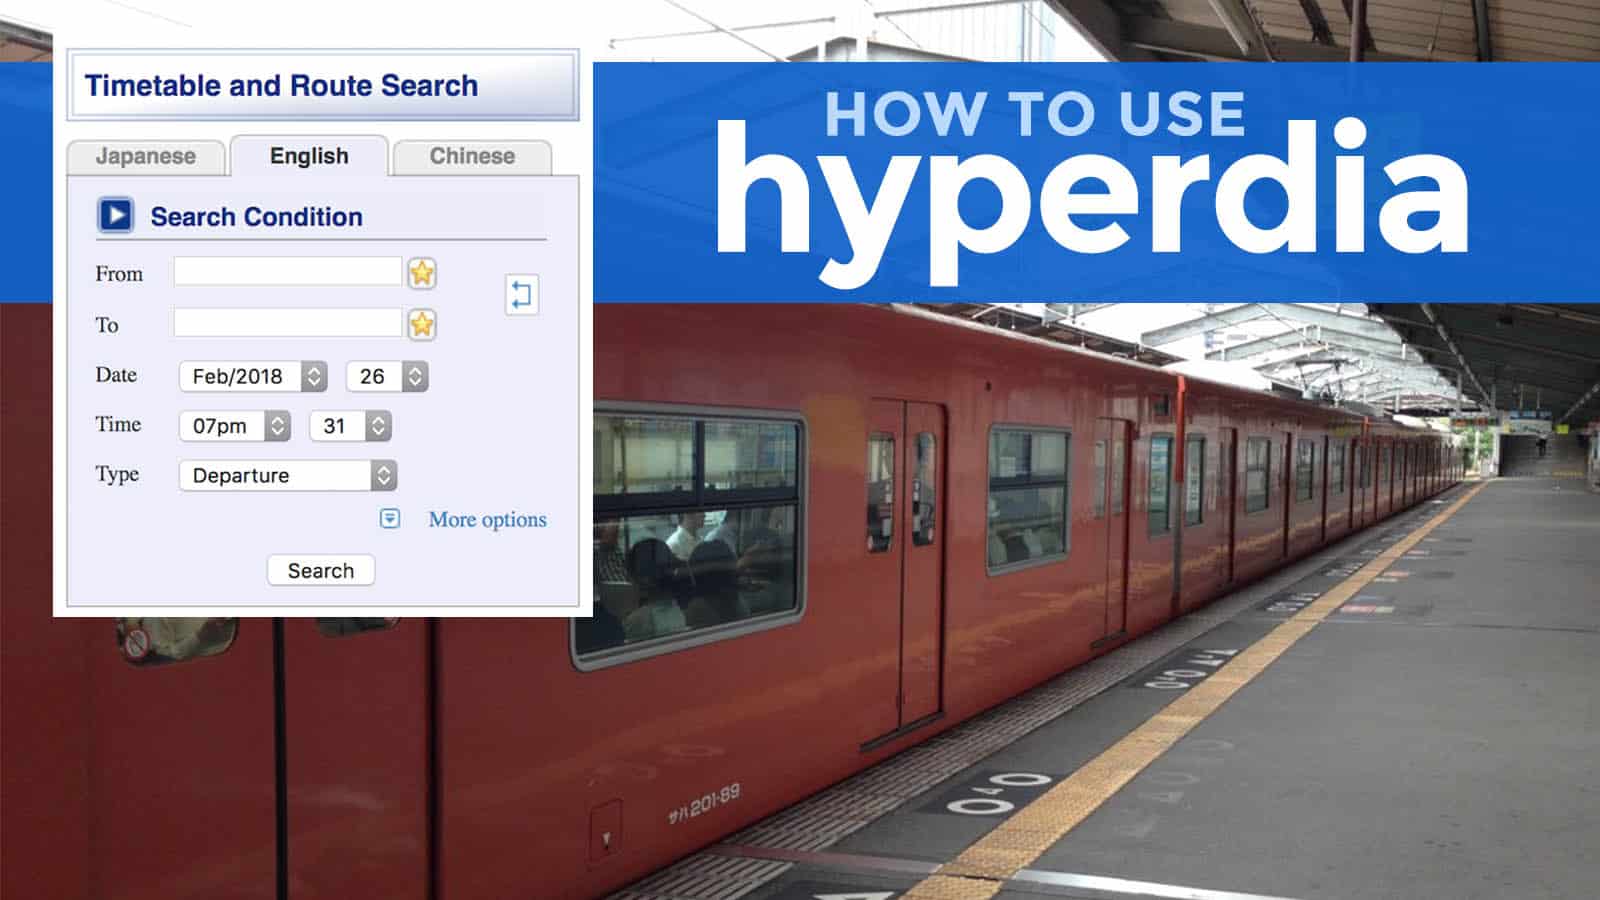
If I could give only one tip to someone traveling to Japan for the first time, it would be this: Use Hyperdia.
Hyperdia is a web-based search engine for transportation timetables and routes in Japan. Think of it as the Google of Japan transpo. Japan has some of the most expansive, most extensive, and most impressive railway and highway networks in the world, reaching the remote corners of the country. Of course, there are exceptions, but it’s safe to say that moving around in Japan won’t be as problematic as in other destinations.


For tourists, Hyperdia is highly reliable because most key attractions are located within close proximity of a train station. Whenever I’m in Japan, this is my go-to site when I want to know how to get to a certain place. All I need to do is enter my origin and destination and it will tell me options on how to get there including travel time, fares, and transfers involved.
But for newbies, Hyperdia can be intimidating. We get inquiries about Japan travel on a daily basis and many of them are about navigation. When we refer Hyperdia to them, they often find themselves at a loss, so we decided to make this simple tutorial. However, in this article, we’re focusing on trains. We’ll just create a separate post for other modes.
Without further ado, here’s how to use Hyperdia.
How to Use Hyperdia
1. Get connected.
Hyperdia is a web-based search engine, so it requires an internet connection to function. I heard there is an Android app version of this site, but it’s not available in most countries so I have no idea if it has an offline version.
But for now, let’s go online.
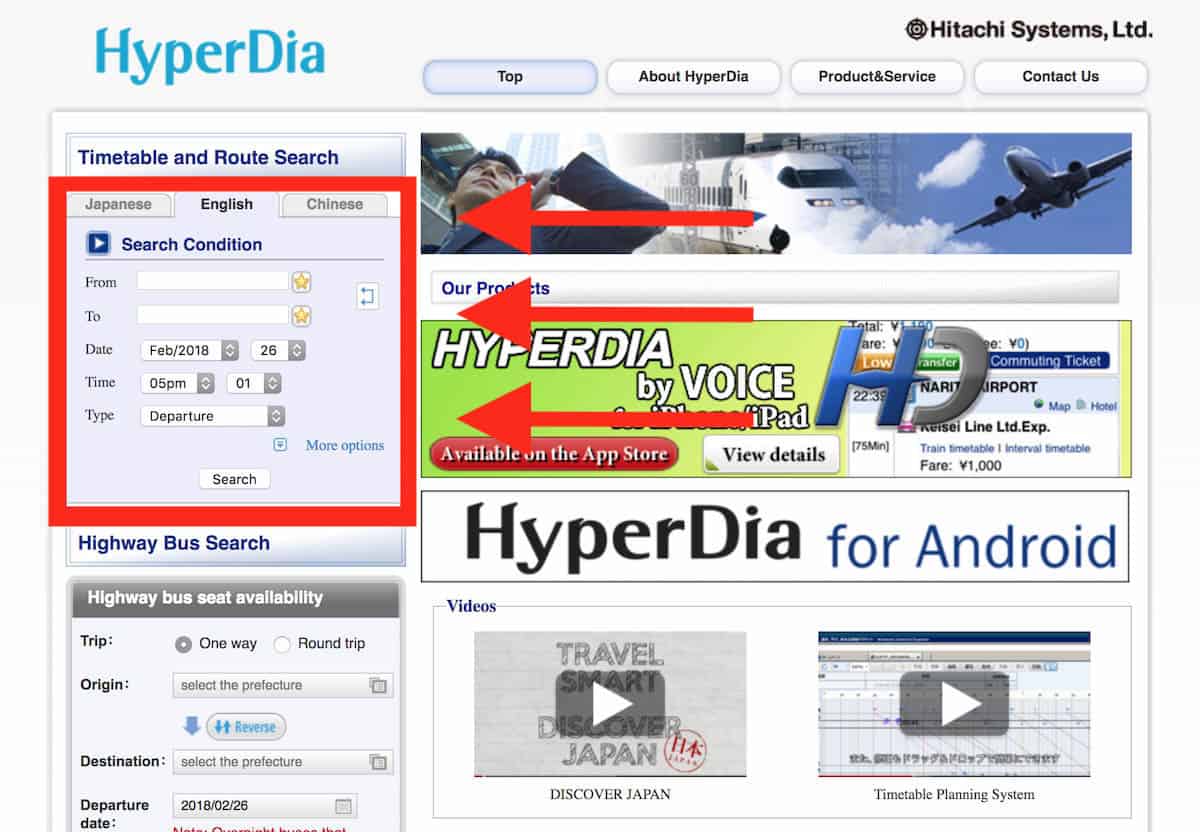
2. Visit the Hyperdia Website.
The address of the English version is: www.hyperdia.com/en/.
3. Enter your origin and destination.
At the very least, you should know the train stations closest to your location and your destination. If you have no idea, do a quick Google search. If you’re using a The Poor Traveler Travel Guide, you’ll find the nearest train station indicated per tourist spot in the Places to Visit or Things to Do section.
Another way is to check Google Maps and scan the place for the closest train station.
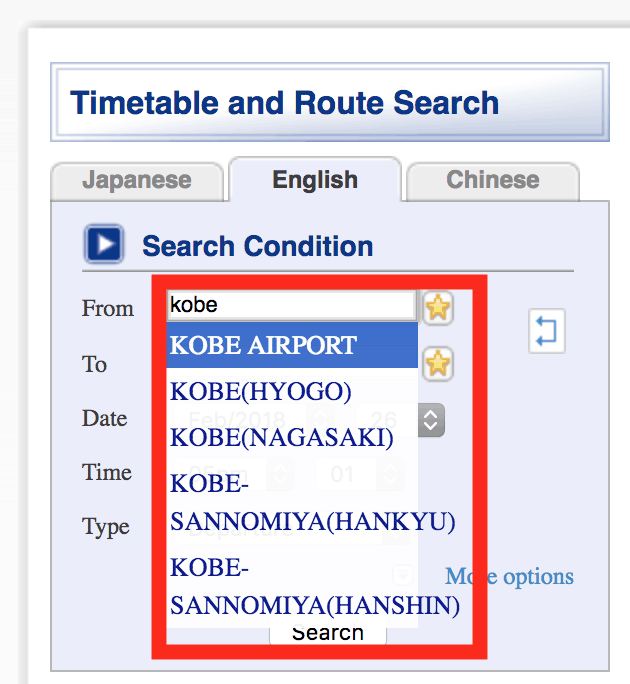
Once you know the station name, type it in the designated field. Often, you just need to type the first few letters and it will reveal a list of possible options. Choose the right station. However…
IMPORTANT NOTES:
- Include the punctuation marks. Some station names have a hyphen, slash, parentheses, and even spaces. In such cases, make sure you include them when you type. Otherwise, the station you’re looking for might not appear on the list.
- Double check the station name. Some people usually enter the wrong name to begin with. KANSAI AIRPORT STATION is NOT the same as OSAKA AIRPORT STATION. These are at separate airports, 1.5 hours apart!
- Make sure you choose the right station. SHIN-OSAKA Station is different from OSAKA Station. NISHI-OJIMA is NOT the same as OJIMA. Some are used by different operators. JR NAMBA is a separate station from NAMBA (NANKAI) or OSAKA NAMBA or simply NAMBA. Although they are close to each other, these are all different stations. UENO is not the same as KEISEI-UENO.
- Some stations share the same name. Good news is, Hyperdia usually has a differentiating tag. For example, there is a KOBE STATION in Hyogo Prefecture and there is another station of the same name in Nagasaki. Both stations will automatically appear when you type KOBE but they are marked as (HYOGO) and (NAGASAKI) respectively.
4. Enter the date and time.
If you have just loaded the page, the current time is loaded automatically. If you’re checking the timetables or routes for another day or time, make sure you adjust these fields.
5. Click ‘MORE OPTIONS’.
Normally, I skip this step. But if you want a more specific search, this is a useful too.
Using MORE OPTIONS, you can fine-tune your results by choosing a possible detour or route.
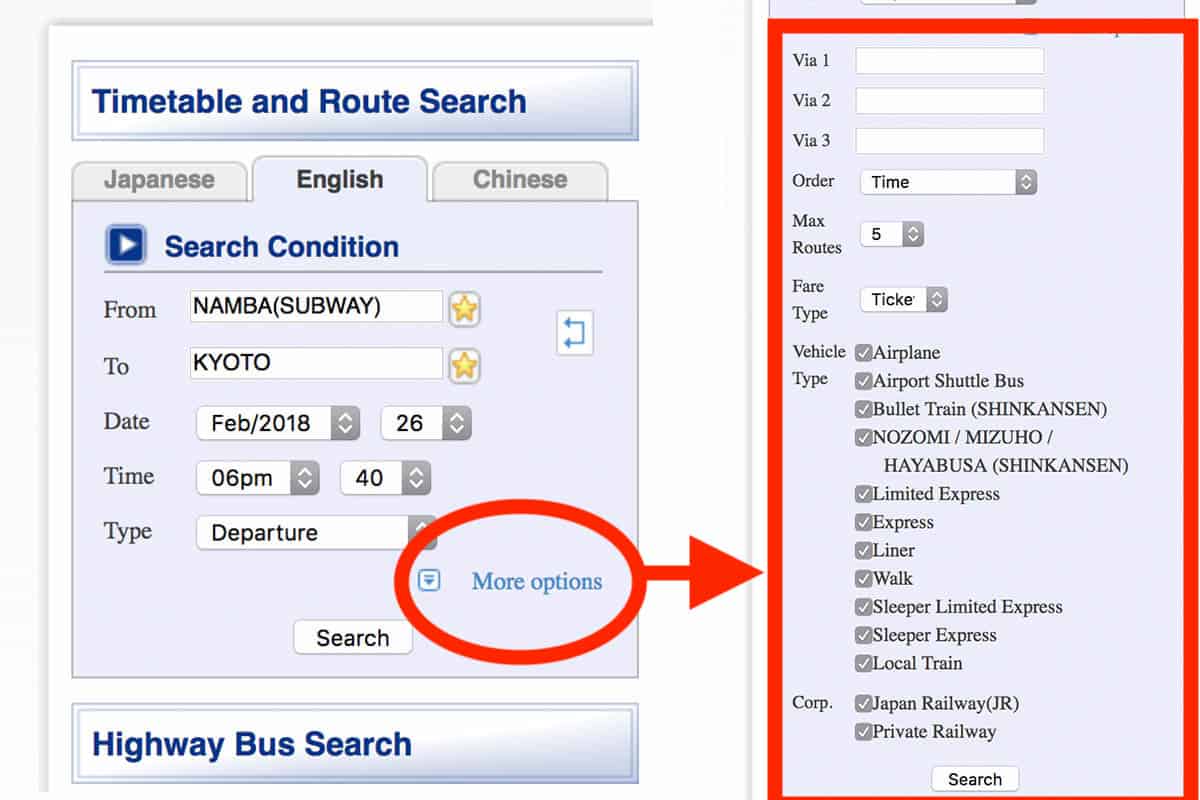
You can also include or exclude a transportation type. By default, all transportation modes are checked including airplanes and buses. If you just want train options, you can deselect them. You can also exclude Shinkansen if you think it’s too expensive for you.
6. Click ‘SEARCH’.
If everything looks fine, click SEARCH. The next page will reveal five (5) routes that best match your description.
Note that the routes are arranged by the earliest time you will arrive in your destination, but that’s not always the BEST route. You also have to consider the following:
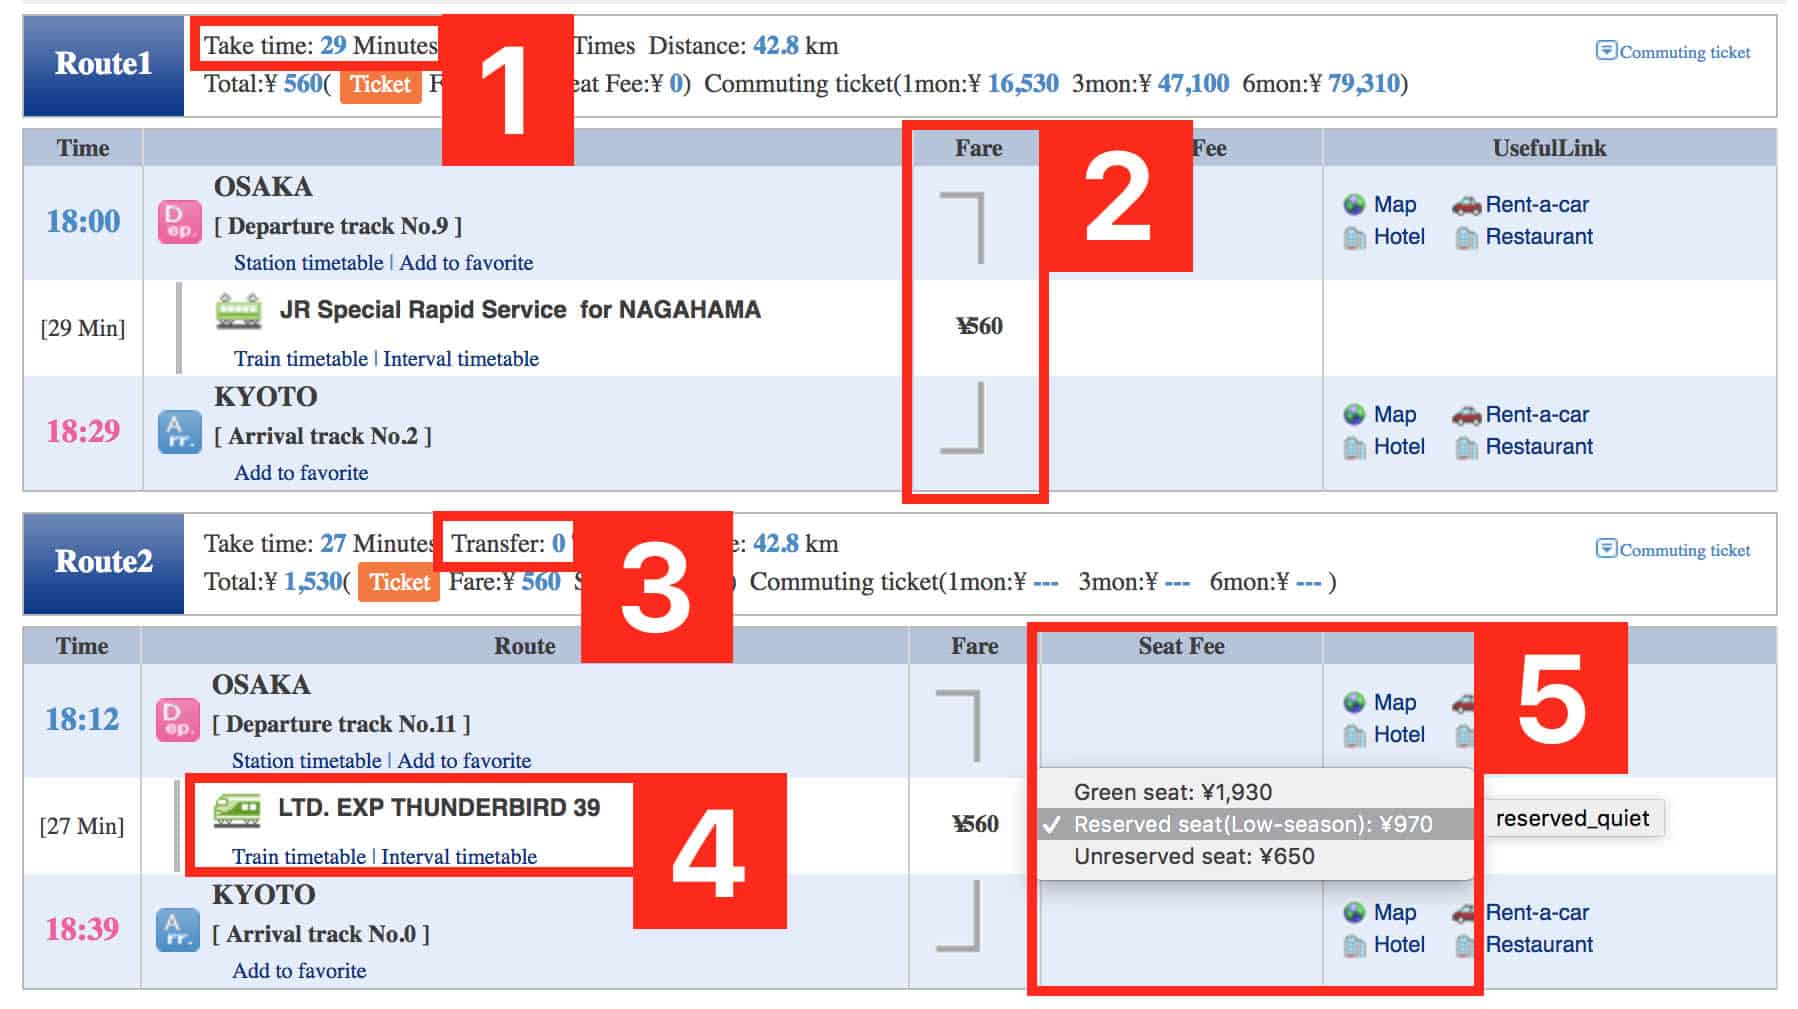
- Travel Time. Being the first to arrive doesn’t mean traveling the fastest. Sometimes, Route 1 actually takes more time because the train leaves the origin much earlier.
- Fare: The total fare is indicated on the top section of every suggested route. The breakdown of this fare is in the FARE column (right side).
- Number of Transfers. Some routes may be faster but might include multiple transfers, which can be problematic if you’re carrying luggage or traveling with children or elderly. Walking times are also indicated so make sure you take that into consideration.
- Train Type. Trains are not created equal. Some trains are faster, some go straight to specific destinations, other make a stop at EVERY station along the way. The four main types of trains are: LOCAL, RAPID,
EXPRESS, and LIMITED EXPRESS (LTD EXP), which I’ll explain further below. - Seat Fee. Fares are different from SEAT FEE. Most journeys only require you to settle the fare, but some (usually premium) trains will collect an extra seat fee. Yep, on some trains, even unreserved seats have to be paid for.
It would also help if you know the different railway companies operating in the city where you’re going because they often use separate stations or at least separate entrance gates. For example, in Osaka, Nankai and JR; in Tokyo, JR Lines are different from the subway lines of Toei and Metro.
Aside from the lines, you also might need to know the different train types:
- Local Trains are those that stop at every single station of the line. EVERY. SINGLE. STATION. If your stop is 20+ stations away, it can take a lot of time.
- Rapid Trains are those that skip some stations. Same price as local trains. Same platforms, too.
- Express Trains skip even more stations.
- Limited Express stop only at major stations. Additional fee is usually required.
If it entails waiting only a few minutes on the platform, I would usually just choose a rapid or express train even when the a local train is already approaching. WARNING, though: Board the non-local trains only if you’re sure it will make a stop at your station. You don’t wanna skip your stop. True story. Hahaha.
How to Use the Train in Japan
Once you have done your Hyperdia search, it’s time to put it into practice. If you’re using single-journey tickets, here’s how to do it.
- Approach the ticket machines. By default, these machines display everything in Japanese characters. But there is a button there that reads ENGLISH. Press that button and you will hear a voice saying “All train information will be displayed in English.” (I said it out loud in the right intonation when I typed that. Totoo.)
- Follow the steps onscreen. Usually, you will need to press the button (next to the screen) that displays how many passengers you are and then press the corresponding price on the screen. Yep, you should know how much you should be paying before using these machines, hence the first two steps. It will then ask you to confirm your booking.
- Get the tickets that the machine will release. (If after getting the ticket you realize you made a mistake or you just change your mind, don’t worry. Just use the same ticket. Fare adjustment machines are installed at every station. Make the adjustment at the destination.)
- Feed your ticket to the ticket slots at the gate. It will emerge at the end of the gate. Pick it up again. The ticket is small so try your best not to lose it.
- Go to the right platform. Although the platform/track number is displayed on Hyperdia, it is best practice to double check the display when you’re already at the station. To check if you’re in the right direction, check the list of stations usually displayed on a wall before the platforms. There is also a more detailed timetable in the middle of the platform.
- Wait for the right train. The estimated time of arrival of the next few trains and the train type (Rapid, Local, etc) are displayed on electronic screens above the platform.
- Follow the route that Hyperdia suggested. Make sure you make the right transfers! There are usually plenty of signs around the station. When in doubt, you can always ask the staff at the gate. They’re usually very accommodating.
Of course, if you have a commute card like PASMO or SUICA or ICOCA or a pass like JR PASS or OSAKA AMAZING PASS, you can skip steps 1-4 above.
You might be thinking, “Oh cool. That looks easy.” Wrong. It seems easy to understand now, but if you’re in a big city like Tokyo, it’s a lot more difficult in practice. These lines are so entangled, and when they meet in major stations like Shinkuku or Tokyo Stations, things get even more complicated. Even I, who have been to Tokyo five times, and my sister, who has been living in Tokyo for years, sometimes get awfully lost.
How to Buy and Use IC Cards
Prepaid IC Cards are available in most cities. It sometimes offers discounts, but the beauty of it is that you don’t need to get a ticket each time you’re using the train. You just need to quickly hover the card over the reader and you’re through.
These cards can also be used on buses. An increasing number of shops and other establishments are also accepting these cards as mode of payment. You can even use it to buy drinks or snacks from vending machines.
SUICA & PASMO
These two cards are used primarily in Tokyo but actually works virtually anywhere in Japan (as long as the station has reader).
What’s the difference between Suica and Pasmo? The companies offering it, mainly. Suica is sold by JR while Pasmo by Toei and Tokyo Metro. However, both cards work in any Tokyo Metro, Toei, or JR line. As far as the user experience is concerned, it’s very similar.
To get one, you just need to approach one of the PASMO or SUICA machines at the station. There’s no use for me to enumerate the steps here because it’s so easy. Just choose ENGLISH on the welcome screen and follow the instructions.
ICOCA
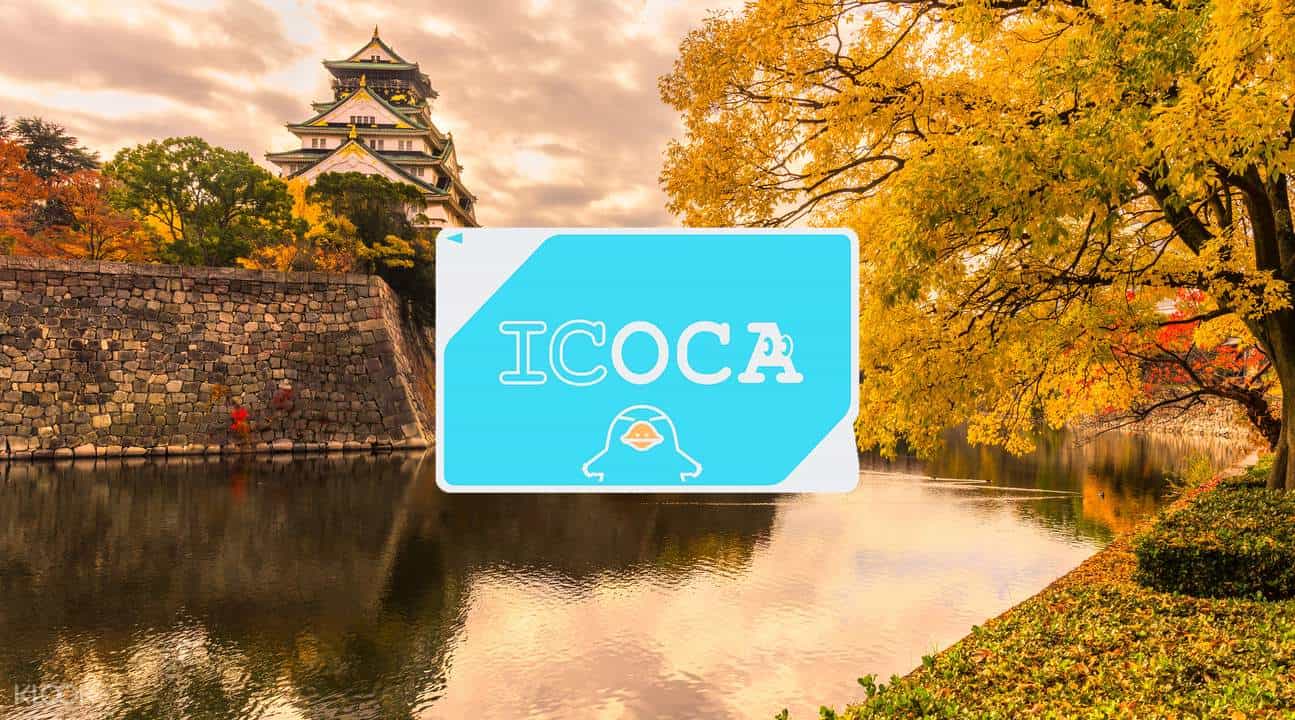
The ICOCA card is primarily used for the JR West network, which covers Kansai (Osaka, Kyoto), Hyogo (Kobe) and even Hiroshima and Tottori. But again, it can work virtually anywhere in Japan.
If you’re arriving at Kansai Airport and you want to purchase an ICOCA Card, you can get one in advance online. The card is preloaded with ¥1500 and ¥500 deposit. You can also use this card and your passport to get a discounted Haruka Rail Ticket for the Kansai Airport Express (which can take you to Tennoji, Shin-Osaka or Kyoto).
Should You Buy a JR Pass?
It depends on your itinerary. Before you purchase one, know that the JR Pass can only be used on JR line rides. You can’t use it on Toei or Tokyo Metro rides. So if you will be staying in Tokyo the entire trip, a JR Pass isn’t really worth it.
It only makes sense to get a JR Pass if you’re on a multi-city journey around Japan. For example, if you will be visiting three cities in 7 days, it could be a great deal.
If your itinerary involves taking long-distance trains often and you’re staying for 7 days, you can save money by getting a Train Pass.
2️⃣0️⃣1️⃣8️⃣ • 2️⃣ • 2️⃣6️⃣


Hi Yoshke,
This is a great post highlighting the one platform that genuinely helped me survive through my first solo trip ever. HyperDia was a revelation to me, mainly because the metro stations in big cities like Tokyo tend to be huge. I got lost in stations a couple of times too and used HyperDia to navigate through them. Glad to see such a comprehensive guide to using a valuable application for travelers!
-Sphoorti
[…] Hyperdia makes train navigation hassle-free. To know how it works, you can check it here: HOW TO USE HYPERDIA for Japan Train Travel […]
[…] Hyperdia makes train navigation hassle-free. To know how it works, you can check it here: HOW TO USE HYPERDIA for Japan Train Travel […]
Hi is HyperDia still working today? Can’t find the app :(
Hi Jaclyne, just visit hyperdia.com :)
Thank you for the info, really appreciated :) I will traveling in fukuoka this coming march, its help me a lot
Enjoy Fukuoka, Jovy!
Hi! Aside from Hyperdia, I also used the Japan Official Travel App which I downloaded from. There’s a section similar to Hyperdia and it’s a plus that the station numbers are available :) You may want to check it too. Just sharing.
Hi Mea! Sige, we’ll check it out! :)
Thanks for the info!
Does Osaka and Tokyo use the same metro card?
ICOCA is mainly for Osaka but it also works in Tokyo and other parts of Japan.
SUICA and PASMO are mainly for Tokyo but they work in Osaka too and other parts of Japan.
So basically it’s a prepaid card which you can use almost everywhere in Japan, right? Doesn’t matter which one you should get if you’re just looking for an IC card to use in Japan.
Yep. Right.
Hi, I am still confused what pass to get betweem Osaka & Kyoto. I am traveling from Osaka to Kyoto and staying at Kytoto for 3 nights. Would you be able to advise what pass should I get during my stay in Kyoto. Sightseeing places: Arashiyama, Kiyomizu-dera, Kinkaku-ji, Fushima Inari
Is it better to purchase the 1 day Kytoto Metro & Bus pass?