2011 • 7 • 30
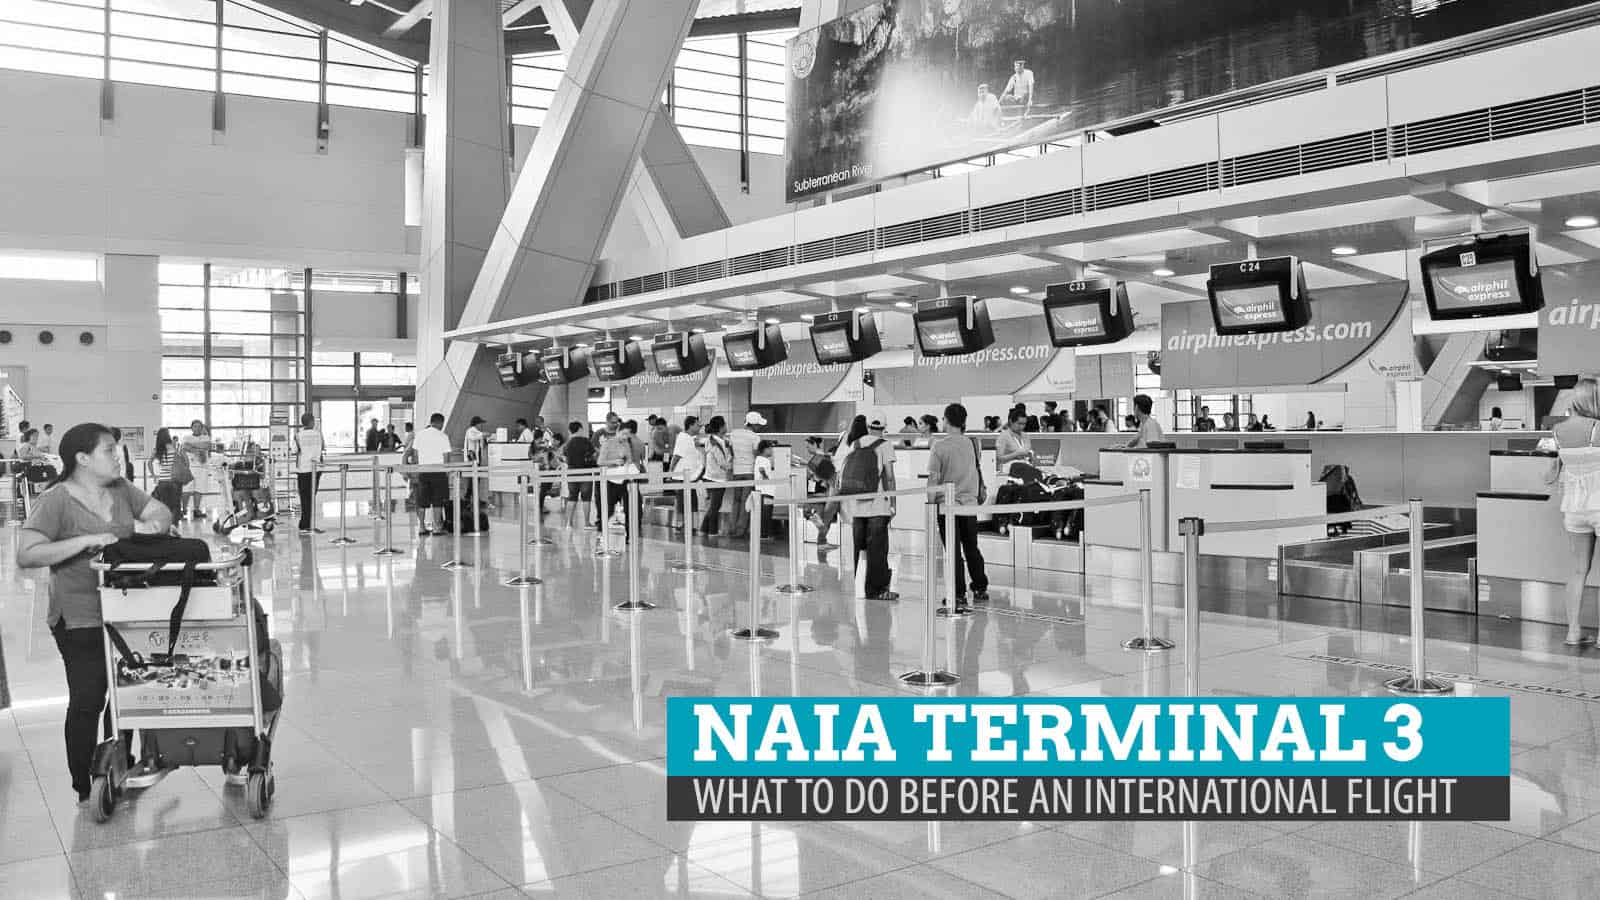
If you’ve flown out of the country before, then you’re probably familiar with the whole pre-flight thingamajig. But if it’s your first time, read on as I discuss in detail the whole check-in and boarding processes so you could breeze through them.
One of the biggest mistakes that you will make if you’re flying to any other foreign destination is to assume that everything would go well exactly like how it does with domestic flights. Many travelers who have flown domestically before make that mistake and it results in stress caused by trying to beat the time and sometimes missing the flight altogether.
The check-in process for international flights is very similar to domestic in many ways but there are also many differences. For starters, you need to be at the airport at least 2 hours before the scheduled departure time for international flight as opposed to 45 minutes for domestic. This is because there are additional steps and paperwork that need to be done before anyone is allowed to board the plane.
WHAT'S COVERED IN THIS GUIDE?
What to Do Upon Check-in
Once we were sure we had all the important items with us, it was time to check in. Here’s the step by step guide.
- Pay the Travel Tax. IDEALLY, the travel tax and departure fee are already included when you book your ticket, so please check your ticket. But there are times when it isn’t the case. If not sure, check-in first. The check-in agent will tell you if you still need to settle the tax. It’s P1,620 per person.
- Check in! Present the Departure Card together with the Travel Tax receipt, printed ticket and passport to the check-in agent. If you’re checking in baggage, make sure they have locks. The Agent will give you your boarding pass.
- Get a copy of an Immigration Form (aka Departure Card). Often, there are copies at the check-in counter. If not, you may proceed to the Immigration Area and get one there. Guards will check your boarding pass upon entry. Accomplish one copy per person. You will need the exact address of your hotel here.
- Proceed to the Immigration Booths. Philippine passport-holders have lines separate from foreigners, so make sure you’re in the right queue. When it’s your turn, give your passport to the Officer, who may or may not ask questions.
- Final security check. Remove all gadgets and metal items (including belts and coins) from your body. Remove your shoes only when instructed.
After the final security check, head to the Pre-Departure Area. Check your boarding pass to see what gate you should go to. You should be fine here. All you need to do now is wait for the boarding call.
Things to Bring to the Airport
Whenever I travel abroad, I always have a checklist of items I MUST NOT forget. This is also why it is important to go to the airport early, like 2-3 hours before the flight. This allows you time to sit down and check your things. And in case you forgot something awfully important at home, you still have time to go back and get it. Allow me to share with you my checklist.
- Passport – The last thing you want to happen is to unintentionally leave your passport at home.
- Printed Flight Itinerary/Tickets – Make sure you print out the tickets. When I fly domestic, I usually just show the check-in agent the tickets on my phone. They accept it. But for international flights, you will be showing your tickets too many times (check-in counter, travel tax counter, departure fee counter, immigration, etc) that it would be impractical and ridiculously annoying to whip out your phone every step of the way. A printed ticket will make it a lot easier for you and the people who will check it. Besides, a piece of paper does not need to be charged.
- Company ID – Immigration Officers sometimes ask for a company ID as a proof that you would return to the Philippines and would not seek employment opportunities in your destination country.
- DSWD Clearance – Only when I’m traveling with my nephew or niece and their parents are not joining the trip.
- Credit card – Some airlines require a copy of the credit card used when the tickets are booked online. You might also need it as a safety net in case you run short of cash. Some hotels also ask for credit card for deposit.
- Travel Itinerary – Make a clear plan of what you want to do and write them down. In case the Immigration Officers pick you for a random check, a printed itinerary will help convince them that you will really go to your destination to tour and nothing else.
- Hotel address and contact number – You will need it. If you’re traveling with a kid or someone who doesn’t speak English (or the language spoken in the country you’re visiting), give them the address and contact number of the place you are staying in. In case they get lost, it will be easier for them to find their way to you. You will also need the hotel address when filling out immigration forms.
- A Pen – Yes, the humble pen is important. You will be accomplishing forms.
There’s a reason why teams competing at the Amazing Race all have a fanny pack with them. Though they might look unfashionable, they are absolutely helpful.
How to Avoid Being Offloaded

Aside from the items above, there may be other documents that you need to prepare depending on your situation or background. We created a separate post for it.
✅ READ: HOW TO AVOID BEING OFFLOADED
During the Flight
At one point on board the plane, flight attendants will distribute arrival cards to all passengers. Accomplish it immediately to save time. Here’s an example of an Arrival Card. This one is for Hong Kong.

Don’t forget to fill out these forms because you will have to present it at the Customs/Immigration booths in the country you’re visiting.
Frequently Asked Questions
Since a lot of people are asking, I’m adding this section and it covers both counters here in the Philippines and those in your destination. Every country has their own Immigration rules. Some require visas from Filipino visitors, others don’t. Some have stricter rules, others don’t. It is important that you know these rules and requirements before your flight.
But here are some frequently asked questions that I thought I could answer. Again, I can’t be too sure but I’m only relying on experience.
- Do I need to have a hotel reservation before my flight?
It is BEST to always book accommodations first before your flight. You will be required to indicate the address of your hotel on your departure and arrival cards, and Immigration officers on both sides sometimes ask for hotel reservation. Even when I’m backpacking across more than one country, I usually make sure I have at least booked accommodations on my first night in the next country I’m visiting. Again, you could go there without prior preservations but if you want to avoid the hassles of getting asked too many questions and the stress that comes with it, better book in advance. - I’ll be staying at a friend’s house, do I need an invitation letter?
If you could produce one, go ahead. They might just ask for one if they deem necessary. You will be asked to indicate your “address abroad” so make sure you have that. To be on the safe side, be sure you have your friend’s contact number, too. - Is there a show money? How much do I need to have for them to let me through?
I have never been asked to show money. I have never been picked for a random inspection or questioning but I know people who have been. My pocket money depends on the destination country. Some are more expensive than others. For example, the cost of living in Singapore is definitely higher than in Thailand. In countries like Singapore, Hong Kong, and Malaysia, I usually bring USD400 for a 4-day trip, USD500 for a week-long trip. But that’s way more than I actually spend. In cheaper countries like Cambodia and Thailand, I allot USD50 per day. Again, that has a big allowance.
✅ VIEW MORE FAQs HERE :)
Enjoy your trip and have a hassle-free journey!
More Tips on YouTube ⬇️⬇️⬇️
Is this post helpful to you?


kaylangan bang ipakita ang cash mo sa immigration? maliit lang kasi dala kong cash since i’m travelling alone and would be unwise if i have the cash on-hand. baka mahold-up or malaglag. all the money are with my BPI card (which is international) and credit cards.
also, my hubby is sponsoring the trip, so i don’t actually need that much cash.
takot lang baka kasi need ipakita talaga… hala!
Hi Pinayshopper! Nope, only when they ask and they rarely do. But I always bring enough cash to be on the safe side. :)
hello po im going to malaysia po this week
ill ask lang po if how much need for show money
thank you! It is my first time to travel(going to Hk).
Very Informative :)
No problem, Jeff! Hope to see you again on this blog! :)
Hi THis is Krizza . First time ko po mag travel abroad. May boyfriend po ako na Japanese pero sa china sya ngawwork and nkatira. Bmili sya ng ticket for me to Macau . Na screenshot ko na po ung dalawang ticket papunta at pauwi. meron lang po ako passport and government id’s and unemployed po ako. And Sya po ang bahala sa lahat ng ggastusin ko. Almost 1 year na po kami mg boyfriend ko. Minsan po umuuwi sya dto sa Pinas pero 2days lang po sya palagi and nagkkita kami. Pwde kpo ba irepresent ung conversations namin and mga pictures po sa immigration? May 10 po depart ko to Macau May 12 po ako uuwi Pinas. Pakisagot naman po. Thankyou so much po.
Hi, this german.. First time ko po magtravel abroad, im going to jakarta to process my visa, foreigner po ba ang mga immigration officers?
Hi German, sa PH side (exit), mga Pinoy. Sa Indonesian side, Indonesians.
Tnx po sa answer. Another question, na offload po kme ng kasama ko, punta po kme Jakarta to process our Slovak working visa, she po sa immigration na dito nmen kailangan I process un, but then pag punta nmen sa Slovak embassy they told us na sa Jakarta talaga po talaga processing ng visa.. Pwde po ba kme mag complain regarding sa wrong info na I binigay ng immigration officers?
Siguro po, pero di ko po alam kung papaano.
Very informative.. best for first timers and travel dummies.. great job.. keep it up..=)
Thank you! Glad to help!
Going to Singapore as a touris, Is it a major requirement to have this Invitation Letter? Saw while browsing.
http://www.sugarpinoy.com/2010/10/todays-hottest-issue-pinoys-travelling.html
Hi Andrei! Been to Singapore 5x already. I never brought invitation letter. :)
Thank You very much, this is very informative especially to a first time traveler like me. :)
I just want to ask about this:
“Having not enough cash is a common reason why travelers are denied entry even when they are already at the airport.”
so i am going to declare the amount i have for the entire trip, are they going to ask for a proof of the amount i have?
Only when they ask you. They usually don’t ask but sometimes, they do random check. :)
it is a great help for me first time traveller in jeddah saudi arabia as of now i feel like fear..my visa is a tourist visa i don’t know what to do when inside NAIA..
Hope everything will work out fine for you! :)
Thanks for this one.
I will have a flight locally but these things will surely help me (specially the ball pen and the IDs)
I wanted to add that If you wanted to bring a laptop, make sure that it has a genuine OS (Windows 7) otherwise, you will not be able to have a flight.
how about Linux OS laptops. is that ok to bring?
Thanks for the comment, Jerald! And thanks for sharing a tip, too. :) Enjoy your trip. :)
I want to ask about the money. Before going to a trip, should you first have your money exchanged to the currency of the country you are travelling to? Like for instance, if you’re from PH and going to SG, should you have your peso money changed to SGD? Thanks so much for this post btw, very helpful for first time travellers. :)
Hi Jane. I’m not sure if this is the wisest way to go about it but this is what I usually do.
1. At Changi airport, I exchange just enough pesos to SG dollars to get me through the day.
2. When I have the chance, I would exchange more money at Mustafa or other changers with better rates.
Ayun. Hihi. But I think the exchange rate shouldn’t bother you unless you’re exchanging big amounts. Baka kasi yung iba-byahe mo to the money changer is mas mahal pa dun sa matitipid mo. :)
Hope this helps. :)
Hi, I am a first time flyer and we will go to Hong Kong on July to spend our vacation with my fiancee. It will absolutely be my first time to step in the airport. I already have all the travel documents and beside, we will only spend 12 days in Hong Kong. However, I want to know if it’s okay that I don’t have any dollars? But my fiancee have and he’s the one holding our money and cards, we will be travelling together. Have you heard such case? Do you think the immigration offices would stop me from flying? Magkasabay naman po kami sa flight. Also, is it necessary na may hotel receipt na agad? Balak kasi namin pag dating nalang sa HK maghahanap ng hotel para mas adventurous daw.
A reply would be very much appreciated.
Hi Kalai! Usually, they don’t ask tourists to show how much money they have or even ask about it. They just check your passport, some times your airline tickets, and ask standard questions like:
– Who are you traveling with?
– How long will you be staying?
– WHERE will you be staying?
They only ask more in very “special” occasions, like, when they do random questioning or when they suspect you’re not entering their country for leisure purposes/business trips.
That said, I strongly encourage you to book hotels even before the trip. Departure cards and immigration forms that you will need to fill out before facing the immigration ask you to indicate the exact address of the hotel or house where you will stay. If you leave this field blank, you might be giving the Immigration officer a reason to ask MORE questions. But that’s just my two cents.
Hope this helps. :)
hi i want to ask if i need to pay the travel tax and the 750 if i have owwa… Kumuha po kasi ako nun dito sa singapore before umuwi sa pinas… Para sa pagbalik kO… Tnx
Hi Ray Anne, i have no idea. :( You might want to call OWWA directly?
Hi,
It’s my first time to travel to Singapore. I will be there to look for a job and I will be staying at my cousin’s place. Do I still need to book for a hotel since I will register myself as a tourist? or just tell the officer that I I will be staying at my cousin’s place? Thank you so much. :)
pwede ba un? For tourism ung reason pero mghhanap pla ng work?
You can say that you’re staying at your cousin’s place. Make sure you have the address. :)
when having a tourist visa what to bring po idea sana please di na po need ng PDOS? ung seminar what to do when your flight day arrived I have no idea po kasi its my first time..thank you po
Hi Princess, I dunno. :( I haven’t traveled to another country that requires a visa.
I’m planning to take my vacation in Bangkok, Do I really have to put the exact address of the hotel?I’m planning to stay in hotel when I get there, I don’t have hotel booking in Bangkok. What should I tell to Immigration about my stay?
When is your flight to bangkok?
Hi Mike! I just got back from my SEAsia backpacking trip and I visited Bangkok. :)
ei… im emie its my firstime to to travel out of the country and i wanna visit thailand, the problem is i have my hotel accommodation but there is no exact address in the voucher is it fine if i just write the name of the hotel in the departure card??
please reply thanks
i have another question, do i need a hard copy of the hotel address and contact info to present the immigration?? or is it fine if I’ll get all the info over the phone and just write it down in my departure card?? still they need everything in print out???
appreciate youre reply
tnx
You may call the hotel and get their address.
It’s always best too book a hotel ahead of time. The Immigration is gonna need the exact address of the hotel. :)
Hi! I’m planning to come to pinas with two little two dogs, ano ba ang procedure diyan now a days.
Dahil sa pandemic kailangan ko ba mag stay sa maynila or mag home quarantine ako. Kung sa maynila naman ng ilan araw poydi ba ako masa lurong ng sister kasi may aso ako paki reply ng buong details kung ano ba talaga ang procedure sa non OFW. Pls. Nag punta ako sa Philippines embassy kung kailangan ko ba ng Philippines Visa at cnabi ko na one way lang ang ticket ko pa punta lang diyan kasi ko pa alam kung kailan ako babalik sa states.
Yes, Son, you need exact address of the hotel or place you want to stay. The officer ask me @ NAIA and you need it to for the departure card. I just been to Thailand last week. Got awed by Amazing Thailand! Better go to Khaosan Road in Bangkok for affordable place if you’re planning for long stay. I stayed there! Cool and lively place!
Thanks for answering the question above! :) Just got back from Thailand and it is indeed amazing! :)
Thanks for the info. Ask lang. Nid ba talaga to indicate the exact hotel address? My friend and i will be going kc to hondkong. We dont have a hotel yet. Ang balak namin is to get a hotel na lang when we arrived at hongkong na. Ok lang ba un? Thanks
Hi Josh! To be safe and to make it easier for you to go through the Immigration of both Hong Kong and Manila, I strongly suggest that you book a hotel before your flight. :)
Hello. Is it advisable to book the tourist attraction in SG before the flight? Im thinking there would be days that tickets will be sold out. And can u give me an idea what are the things to do when we fly back to manila in changi airport? Thanks.
Hi Francis, best if you just buy on site. :)
Re flight back to Manila, same process as flying in. Except, less fees. :)
Nice post! I’m very excited na for my trip abroad (first time). Ask ko lang kung gaano kaimportante ang mga valid IDs bukod sa passport? Passport lang kasi ang meron ako since (unfortunately), naholdap ang wallet ko with my IDs. Hindi na ko makakuha ng replacement IDs since next week na ang alis ko. Do you think it’s just fine?
Your passport serves as your ID but to be on the safe side, bring another ID kahit school or company ID. Sorry to hear about what happened to you.
hi!, hindi pa terror ung immigration natin lalo na dun sa may cebupac? first time ko kasi magabroad this november sa malaysia. may ticket na ko na pinurchased last january during seat fare. ung place na pagiisteyan ko is ung apartment kung saan nakatira ung friend ko dun. ayos lang ba un?
Hi Arvin. Yes, it’s okay. Just explain that you will be staying with a friend. It would also help if you already have an itinerary ready to prove that you will go there to tour. :)
Hello there! I just wanna ask re: credit cards. Do the officer just look at the credit card to match the CC number and the name or do the passenger have to give them a photocopy of the cards? If they need to have a copy of the cards, can I give them a copy with the numbers covered-up or blackened-out? Thanks in advance!
Hi Jan, the Immigration officers won’t need a copy of your credit cards. The check-in agent of the airline MIGHT ask for it if you booked your ticket online and yes the numbers have match. You don’t have to worry because they WILL NOT keep the photocopy; they’ll just look and give it back to you. :)
hi i will be flying alone to bangkok i wil be styng thre for 6 days i already booked for my hotel accmodation.. wat is the other possible thing or papers they wil ask for me i will be seeing my bf also their, im afraid they will ask for my COE ciz im unemployed
Hi Jamilla and Chaw, just got back from Bangkok and the Immigration process was smooth. They didn’t ask me any questions. But that’s just me.
Hi Jamilla, As of this posting time have u visited bankok already? If yes, how was ur experience facing the immigration officrs at the naia did they ask u questions about ur unemployed status? Im also planning to tour bangkok and like u im also unemployed… hope you can reply on this. Thank you…
Hi,
Thanks for the info.
My girlfriend will go to SG for work — She’ll be staying there for two weeks. I am planning to surprise her.
Is it OK to go there over the weekend?
This would be my frist time to fly out of the country.
I have my passport. I have her apartment’s address.
Am I good to go? I have my ID too.
I can buy plane tickets online.
Shall I declare that I am a “Tourist”..
What about the itinerary? What shall I do about it?
aM I good to go?
Thank you so much
Hi Athan! Yes, if you have a passport, you can visit Singapore. To be on the safe side, prepare an itinerary and take note of your GF’s address. :)
hello, first time traveller here. i will be visiting macau with my cousin in December. So at the airport, we just have to pay the travel tax P1,650 and the departure fee P550 right? How about when arriving and exiting Macau, do we need to pay anything too?
Hi Bianca! No need to pay anything in Macau. :)
thanks for the big help. i appreciate ur post :D
Hi Arvin! No problem! Happy to help!
hi! my husband and i will fly to SG for a tour next year already have my e-tickets…i used my married name in my ticket but my passport is still my maiden name…will i be having problem with that…
Hi piyen,
You will have a big problem with the airline co and immigration if your name in the ticket is not the same with your passport. I would suggest that you get a new passport , any way you have time to change your passport(Express Php 1,250), you need only authenticated NSO marriage cert.. Another option is to change the name at the ticket. Some airlines allow this for a fee but not all airlines.
Hope this help you.
Oh, I’m not sure. Usually, airlines require that when you book an international flight ticket with them, you should use the name in your passport.
Hi! Thanks for this post. Very informative. =)
No problem Sheryll! Thanks for visiting!
Hi there!thanks so much for those post it helps me so well!Godbless!
Hi there, bless this blog!
What was the longest trip you had outside? It’s gonna be my first time touring around SEA from Vietnam to Cambodia to Thailand, then a side trip to India, and Lastly, Malaysia. It’s a month-long itinerary. I already booked hotels. Do I have to give them the full list? Or can I just show them the Vietnam part since I’m directly flying there from NAIA.
Hope to hear from you :)
Hi Alia! Longest is a month so far. Thailand, Cambodia, Laos, and Vietnam. (Would have been 2 months but I had to cut it short for budget reasons but I’ll continue the trip in January.)
Anyway, better prepare and print out EVERYTHING (hotel reservations if you have already booked them, plane tickets, and tour itineraries) but just give them the Vietnam part. Present the rest if (and only if) they ask for it to keep it short. Actually, when I left for my month-long trip, they didn’t even check my return ticket or hotel reservations. They just asked if I was going there for business or pleasure, and I answered “pleasure”!!! Haha
I’m surprised that you booked hotels already. I usually just book hotel in my first city coz I usually end up extending in one city, cutting short my stay in another, skipping some altogether, and messing up my itinerary, ahhaaha.
When is your trip? Have a safe one! Enjoy! :)
Wow thanks so much:3 the trip’s actually for August next year. I’m just so way ahead of myself. LOL. Really, you’re a great help :)
Hahhaa, you really are way ahead but good for you! haha :P No problem
Hello Sirs,
I (filipino) am travelling at 2nd of November going to Singapore. My father is Singapore citizen. Do i need invitation letter and how much is the show-money? i only have about 200USD in cash, I have credit card but not visa type( cannot use outside phil). I am very worried now as my flight is near, I know the exact address of my father, It is my first time to visit him and i am alone. the last time was when i was baby. I really need your suggestion, thank you so much. the only means of communication my father is only letters and nothing else, i tried to ask for email address and phone number, but he is not giving it. I wil wait for you reply, thank you so much.
Hi Chris! An invitation is not really a requirement. But you will need your dad’s address. :)
Hi! Matanong ko lang, aalis na kasi ako papuntang Canada this Saturday, kasi no’ng in-orient kami sa CFO, sinabi ‘yong about sa mga pirated chuba ekek. Ang na-explain nga lang nila is ‘yong sa mga external hard drives na may laman na illegal downloads. Though, wala akong external HDD. Tapos may mga naririnig na rin ako na titignan daw OS ng laptop mo kung licensed or hindi. Licensed naman ‘yong sa akin. Pero kasi, may mga downloads ako sa laptop ko, bubuksan ba ang laptop mo kapag iche-check nila sa airport? Or hindi na nila ichecheck?
Hi Lee! I dunno how strict Canadian Immigration is. The experience I had related to it was in Singapore. I brought my laptop and they asked me to open in and turn it on. After logging in and the desktop image appeared, the Immigration Officer was already satisfied and let me through. I guess they just wanted to check if it was indeed a laptop. But they were very nice and kind. Nothing terrifying. I was scared, though. Haha
hello,
just wanna ask, how much would i bring ( incase only) as show money?,got a schengen visa for 30 days to germany,been invited to visit the country all expenses paid by my sponsor, i have the documents ready on my side eg( printed plane fare -roundtrip,passport-with visa stamp,invitation letter,formal obligations authenticated by the host country,my COE,approve leave of absence),Do all these documents make me calm so that i wont be offloaded? Makes me creep reading lots of our kababayan being offloaded for questionable issues. Your reply will sure make me calm to deal with IO officers at NAIA. Thanks….
Hi!
Magtatravel kami sa Malaysia this coming Nov 19. Nalilito lang ako sa money. Kasi sabi ng friend ko na tutuluyan namin dun, pesos daw ang dalhin. Okay lang ba na dalhin ko in hand eh 20k? di ba kukuwestiyunin ng immigration?
Hi Bino, nope. Di kukwestiyunin yun. :)
Hi its my first time to travel abroad, I’m going to Malaysia and will stay for a month purely for vacation purposes. I’ll be staying at my cousin’s apartment. No need for a visa if one month stay only. I’m a housewife, will that be questionable since I’ll be staying there for a month?
Michelle, as long as your stay does not exceed 30 days. :)
HI PO 1ST TIME KO TO TRAVEL papunta korea anu po ba step by step n ppuntahan ko pag kapsok ko plang ng airport ?help me po tnx
Hi Kristhel. The best advice I can give you about traveling and about life in general is to READ. I detailed the step-by-step process in the post above. Thanks.
thank you for this post, i just wanted to ask, kung mahigpit ba sila sa may mga atraso sa bank, malalaman ba ng mga imigration officers? thanks
They wouldn’t ask that. Maybe when you’re applying for a visa but not at the Immigration booths at airports. At least, not usually.
Hi, me and my family will go to hongkong on september. 5kami, I just want to ask pano kung magstay lang kami sa house ng employer ng lola ko? do we need any documents po? saka how much po ang standard pocket money.? thanks
No, just indicate the address on the Arrival Card. :)
Hello guy’s –
We will be going to Macau this coming March 17 2013, Me and my girl cousin. Concern ko lang Sabay kaming aalis diba, Pero magkaiba yung Surename namin. Sa tingin nyo ba na ki-questionin kami ng immigration officer dto sa NAIA about that?? Much better ba na magpa book kami ng HOTEL?
ko-contakin ba nila yung HOTEL kung san kami naka booked?
tour only. And we will bring 30k CASH. [ NO CREDIT CARD ] Unemployed kami parehas.
Well thank’s for the INFO above.
kamusta po tour nyo? tsaka kamusta naman sa immigration? kc first time ko din abdroad tour lang din and i’am unemployed as well. Wala nmam bang naging problem sa phil immigration. Thanks
Thanks sa blog very informative blog!! thumbs up!!
Hello. I highly recommend booking a hotel first before flying. Other than that, I don’t see any problems. :)
Hello i just want to ask kung bukod s NAIA n bbyarang 750 b un plus 1650 eh may bbyaran p rin po ba s changi airport pauwi?
Hi Silver! Wala na. :)
Hi thanx for this very informative blog I’ll keep this notes. This is my first time to travel outside the country and also my first time traveling alone :( .
Im going to visit my boyfriend in SG worried lang aq kasi baka hassle bumyahe pa pntang SG but then thanks sa mga tips mo.
Thanks for dropping by and leaving a comment, Christine! Have a safe trip!
Hi,
I would like to ask your opinion lang kung saan ba maganda magexchange ng SG dollar? sa mga Money Changers, sm forex exchange etc, or sa NAIA Terminal 3 or sa SG Airport na mismo?
I am considering factors like best value for money, safety and easy access…
Will appreciate your response!
Thank you very much!
When exchanging your Philippine peso to the currency of the country you are visiting, it is better to bring the country’s currency. I suggest you exchange a few peso in Sm or Czarina they have good rates. You will have to call a day before when you want to buy in bulk. You will find better rates in case you want to purchase more in the malls near the hotels you are staying at rather than the arrival airport of the country you are visiting
Dear ,
Greetings…..
i need your advice .my girlfriend and me are planning to meet in Bangkok on 2nd week of August.
i will join her from London and she will travel from Philippines (Manila).we will stay 7 days in Bangkok
the travel agent told her that she should not tell her that she is going there to meet her Boyfriend otherwise she will be in trouble
its her very 1st travel to abroad. as the requirement of tourist visa for a Filipino for Thailand are below
1)return ticket
2) hotel reservation proof
3) show money at least 10000 Thai Baht
she will be carrying with her all of the required things.
A travel agent told us that she should carry 2000 Thai for per day.So her stay is of 7 days so she will carry 500$ with her
she will carry her job certificate with her
she have few friends who work in a hotel in Thailand
please tell me are these all things are enough to let her clear from immigration or let me know if she need more things to carry with her
it would be great if someone can share his/her recent experience for a tourist visa for thailand
Waiting for your kind reply
best regards
Sikandar
what happen to you and your girlfriend trip?
Hi
Very informative article you have! good job! Btw, i have a question. I will be assigned by my company for 4 months in SG but temporarily lng toh. And I decided to invite my father who is at 54 and my brother, a college student, to visit me sa SG for 2 weeks. Wala ng work si papa. Purpose is to have a tour around SG and at the same time to visit me. They wanted to have it on the last 2 weeks of April. Would you know what r the other requirements needed? And is invitation letter enough n yun?kelnagan ba din ng COE ko as a proof na may trabaho ako? Sagot ko nman yung stay and food and other related expenses sa kanilang dalawa. DI b gaano strict is Immigration Officer for that? Hoping for your reply soon. =)
Thanks!
hi, thank a lot, that is very informative. i have a question, is it possible to fly from vietnam then to cambodia then to manila?
thank you very much for the reply!
Hi! Thanks for the tip.. this indeed is very helpful for me as I’m about to leave the country and ride a plane for the first time. I’ll be having my vacation in Malaysia. I’m actually a little worried since I’ll be staying there with a friend for 4 weeks. Just want to ask what the “Invitation letter” should be like and if the Itinerary should be detailed, as in yung may date and time pati length of stay mo sa certain place for the tour?
Thanks a lot!
Hi there!
Just wanna ask, what if I made a booking in one of the backpacker’s hostel in SG but no hard copy (e.g. receipt or printed document stating I’m booked) about it. Does the immigration need one or simple address and contact number of the hostel will do? And about the itinerary, does it need to be printed (from a tour guide company even when you’re not traveling with a tour guide) or simple plan for the day (handwritten) can suffice the immigration?
HI Che, you’ll find the answers here: https://www.thepoortraveler.net/2013/03/philippines-first-timer-international-flight-travel-guide-abroad/
Very informative! Thanks a lot! :)
Hi its my 1st tym to travel out side d country.my sister invited me in dubia.she apply me a visit visa gud for 3months.asked ko lng pgdating sa immigration sa naia wat r the posible question.my posible din bng madenie?all d documents r complet some r denie by d immigration officer
Thank you for the information you Posted. It is a really big help for me.
cause Its my first time to go abroad ;)
and just dropping by ;)
Thanks
Hi, I am travelling to Hong Kong with my family on September 2013. Bale, 4 kami. (Lolo, Mom, Sis and I)
Tanong ko lang, individual ba ang pila sa immigration? or okay lang na 4 na passport na agad un ipresent namin para sabay sabay? Un ticket kasi namin hiwahiwalay nun pinurchase. Pati okay na ba un 50,000 for at 3days in hongkong? Salamat po.=)
hi..thanks much.. very informative.. traveling next month to kuala lumpur, aside from the travel tax and 550, is there any other fees to pay in NAIA 4 ( via zest air) ?
how about exiting KUala lumpur airport, do i need to pay anything?
thanks..
Hi! I would like to ask if I needed to fill up the immigration card if my destination in Hong Kong would be likely just to wait for my next flight (Germany). If ever, What shall I put in my ‘Place in Hong Kong’? My flight is on Aug. 16, 2013 and I’m still naive on what to do as it is my first time to travel. I hope to receive an answer from you. By the way, you are such a helpful person and I am proud of you as your fellowman :) cheers!
No you need not fill up any card in any airport that you travel through unless you are checking out your luggages and checking in a different airline
Greetings…..
i need your advice .my girlfriend and me are planning to meet in Bangkok on 2nd week of August.
i will join her from London and she will travel from Philippines (Manila).we will stay 7 days in Bangkok
the travel agent told her that she should not tell her that she is going there to meet her Boyfriend otherwise she will be in trouble
its her very 1st travel to abroad. as the requirement of tourist visa for a Filipino for Thailand are below
1)return ticket
2) hotel reservation proof
3) show money at least 10000 Thai Baht
she will be carrying with her all of the required things.
A travel agent told us that she should carry 2000 Thai for per day.So her stay is of 7 days so she will carry 500$ with her
she will carry her job certificate with her
she have few friends who work in a hotel in Thailand
please tell me are these all things are enough to let her clear from immigration or let me know if she need more things to carry with her
it would be great if someone can share his/her recent experience for a tourist visa for thailand
Waiting for your kind reply
best regards
Sikandar
hi. additional tip lang. if you are working for a government office at magtatravel ka abroad, hahanapan ka ng travel order / authority to travel sa immigration.
Woot! Thanks for sharing this, Mariya!
Hi! I’m working as a resident doctor in a government institution. Hahanapan ako ng travel order or authority to travel? It’s my first to travel and I’m going to Seoul. Thank you!
Hi.i just need some help..i am a filipina..i was offloaded two times already in naia because i dont have poea clearance kc nakita nila na nagwork ako ng macau but resigned na ako so wala ako mapapakita sa kanila na clearance kc hnd na ako working..but anyway now i manage our family business..my brother,his fiancee and i are planning to go in hong kong for 3days only and we have now a plane ticket round trip and hotel accomodation..i also have our business permit and bank cert to prove that i have money to have a good life here in philippines..im just afraid kc may record na ako sa knila na two times na ako na offload..baka maoffload na naman ako ulit..but this time i have the requirements as a tourist..my question is,enough na po ba requirements ko para makalusot sa immigration or my kulang pa?at kung meron man plz tell me..napagastos na naman kc ako at my brother also..please reply..thank you
Nkalipad ka po?
First tym po nmin mag ina mag travel abroad dis coming dec.22 to jan.4 papuntang brunei don po nagwork husband ko.. meron n po kmi invitation galing sa company ng husband ko. Ask ko lng kung ok n po un at xa rin ung nag pa booking samin. Then ask ko pede ko baipakita ung oec ng husband ko para may discount kmi pgbbyad ng travel tax or terminal fee ba yon. Ano p po kelangan nmin excepts cnbi ko.
Tanung ko lang po punta kami phuket Thailand this coming wed 3 kmi family holiday for 7days 1st tym kasi namin and ung baby ko 1 yr old long my invitation kami at my packet money do naba ko dapat kabahan pag dating sa immigration sana po my makasagot skin salamat pro
Hello!
Quick question. I read that in some cases they require you to show a copy of the credit card used to book the airline tickets. I booked a ticket to Japan using my friend’s card, but she’s not coming to the trip with me. Would this be a problem?
Many thanks for your help.
Hi i hope u can help me since u traveled to japan did the phil immigration asked for an authenticated copy of invitation letter coming from your guarantor? please reply i hope u can help me my trip is on dec. 2014 please anyone can help me?
A photocopy/scanned copy of the credit card you used is enough. They won’t keep the copy, don’t worry. They’ll just check and then give it back to you. :)
Amazing! Your post is very detailed and helpful for a first-timer like me. Thank you very much for this! Cheers! :)
No problem, Pammy! Glad it’s useful! :D
Thank you, Yoshke for another informative article. We’ll be travelling to SG (first time! yay!) this week and your site is such a blessing. God bless and more power! :)
hi there,
I would like to know how much money you need to have in your wallet kapag paalis ka na going to japan? First time traveler outside PH. I am planning to bring Y30,000 $200 and P10K. Is that a safe amount?
Hi A. Depends on how long your trip is gonna be :)
Hello,
Thanks for the info. I’m going to SG, should I have my pocket money exchanged to USD or SG dollars? Thanks!
Hi Anika! Answer is here: https://www.thepoortraveler.net/2013/03/philippines-first-timer-international-flight-travel-guide-abroad/
Hello! Stumbled on your blog today and I would like to share something.
In your list of valid IDs to present, perhaps you can add the employee ID? On my first trip outside the country the immigration officer at NAIA asked for my employee ID. I didn’t bring it with me because I didn’t want to risk losing it in another country. It became a bit of a problem since the officer was really looking for proof of my employment. My guess is that she wants proof that I will go to Singapore as a tourist only and not to find work illegally. I offered to give my calling card, which has the company logo. Fortunately, she accepted the calling card and allowed me to proceed.
Since then I’ve always brought my employee ID with me when traveling, kahit local destinations lang. Maybe other first-time travelers can learn from my experience. :)
Hi Yael! Added Company ID to this post. :)
Really they ask for IDs?? I travel naman even alone Pero never naman ako tinatanong those questions. Is it relevant to your travel??
hi Ms. Cecil. siguro po depende sa officer na nakakatapat. meron kasi simple questions lang tinatanong. meron naman sobrang intense. as for me, grabe yung questions. luckily hindi ako naoffload.
Good day.I just want to ask about this agony of mine.Im planning to go to Hong Kong for 4 day vacation on December 2014.By that time I will be unemployed.But I have my roundtrip ticket already ,enough fund for my trip and hotel reservation. will the embassy allow me to go on board?.
Thank you.Im hoping for your response.
Hi Eden, by the time you travel to HK, you won’t have any company ID with you. Be sure though to bring an ITR with you to show that you have earned enough to support yourself for a leisure tour.
I’m a freelancer and it was my first time to travel abroad last month. SInce I don’t have a company ID with me, the IO asked me a lot of questions like: “Ano tinapos mo? Saan ka nag-aral? Patingin ng school ID? May government IDs ka ba? Magkano kinikita mo?, etc…”
The key really is to be confident and to show the IO that you have money to support yourself. In my case,I have my ITR with me so the IO immediately saw my earnings. After I answered (with confidence) all of her questions, I was through.
Hi. I’m also a freelancer. I work as a freelance tutor. I don’t have a company ID and ITR since my earnings fall to the minimum wage line. But I have worked before as a teacher and have enough savings. All I can show them is my joint account with my mother and my personal savings account. I can also show them my tutorial schedule with the signature of my clients together with my return ticket and hotel reservations. I guess it will help also if i show them that I have traveled to India before (with my parents). Will this be enough?
Thanks so much for this, Sir!
Sobrang helpful nito saken. I’ll be traveling to Cambodia solo for the first time.
Glad i found this article. :)
Just want to ask po kung saan pwede magpapalit/money changer ng peso to US Dollar? First time ko kasi, sa bank ilang days pa bago ma grant ung dollars. Thanks po.
Hello Sir! I find your site very helpful specially for first timer like me. I want to ask if you have a domestic version of this article? Because I don’t know what to do in the airport for domestic flight. Hoping for your kind respond. Thank you.
Hi, I plan to travel to sg with my singaporean bf, u think the io will still offload me? I got company id and Coec. Pls I need advice.. my flight is next month.. and also is it questionable if my flight ticket back to manila is different airline ticket from my manila – sg ticket?
Hello asked ko lang if natuloy ka sa sg?ok naman ba mga io?
just secure an invitation letter. ganun din kasi ginawa ko. pero i heard marami nao-offload parin. nagprint din ako ng pictures ng IC Card ng singaporean boyfriend ko and other IDs. prinepare ko lahat ng possible na hahanapin nila. napapunta pa ako sa secondary inspection. nung napatunayan ko naman na kaya ko suportahan sarili ko and hindi ako mag tTNT, nakaalis ako. wag lang masyado kabahan and wag maghawak ng phone habang kausap sila. pero kabadong kabado talaga ako nun. First Time ko pa magtravel :D
Hello please help me.susunduin aq ng Boyfriend ko na singaporian dito sa manila tapos isabay na nya aq sa singapore.ok pang ba ilagay q sa ticket ko 29 days aq mag stay dun.ano pa bang posibling itaning ng io saken.
Hello, I just want to ask. I am still a student, but I want to go on a vacation abroad, what do I need? thank you.
Hi po..i find your blog very relevant kasi first timer din po ako to go out of the country..I will be leaving for HongKong para magspend po ng christmas at new year sa tita ko na ng.invite sa akin doon.. I have ba rin po yung necessary things like my roundtrip ticket invitation letter from my tita plus letter done by HongKong embassy na my red ribbon..nagwoworrie lang po ako kailangan ko po ba magdala ng malaking pera para ipakita sa immigration?. Then po do i need a copy of my Aunts ID with me upon departure? Tnx po.
Hello! I’ll be doing the same thing this July, I’ll be staying for a week with my Aunt in HK and I would have just graduated by then. Any tips? :)) Thank youuuu
Just wanna share. I visited Macau/HK alone last jan27 until feb5. It was my first time to travel abroad. Luckily, the IO was very approachable and I was able to answer his questions honestly. What I brought with me were: passport, certs of employment and leave, invitation letter coming from my brother who is working in macau and Php 15, 000.00 pocket money.
what did they asked you.. thanks a lot..will be travelling also to macau this coming march…
Hi
Im going to Malaysia on March for 1 month i have my return ticket but i will be staying at my friends house ..complete nmna ung docs ko.. Including letter of invittion..Possible ba ako madenied since almost a month ako magstay sa kanila?? Im employed i just want to spend my vacation in my friend who married a malaysian.. Pls answer thanks
Hi, I would be travelling next week to Vietnam and Thailand. Does the IO get suspicious if you’re travelling to more than one country? Thanks!
No Po as long as you have a return ticket tithe Philippines you won’t have a problem
hi, i got my working visa in Thailand, just wondering if i can visit Singapore first for a couple of days [3-5 days] and do i need to show the immigration officer all my working documents in thailand?
Hello.. what if I do not have a company ID? Would they still let me through?
I work full time online and I do not have any company IDs.
Also.. do they need to see a return ticket? — because I’m planning on going to multiple countries and travel for 3 months time.
Any tips for this? Thanks!
PS It’s my first time traveling abroad.
Hello Eralce! We have the same situation, I also work online and don’t have any company ID and ITR to present to IOs. Plus, it’ll be my first time to travel.
Have you gotten any information or tips about this?
Hi! I would like to ask some opinion and advice. This is our first time to travel HK. so,, I just want to ask,” Is it true that the PASSPORT, E-TICKET, BCERTIFICATE, and SCHOOL ID of my child are needed to travel Hong Kong.? We have already a voucher and e-tickets from agency that we applied. Is this e-tickets that they give us is sufficient without Airplane tickets?Is there anything to bring/show to the airport? and how much money do I need to bring for pocket money to travel in 3 days in Hong Kong?
Are red ribboned documents required?
Hello! Your post is really informative. Now that I have read it, I am a little bit nervous about the Company ID. You see, it will be my very first time to travel out of the country to Thailand in August. I am a homebased online tutor and I don’t have an ITR. Is there any other way to prove my financial capability and to show them that I’ll definitely come back after my trip is over?
hi. we are in the same situation. i just want to ask how did it go? successful ba?
Hi! Your post is so informative. Thank you.
My best friend and I are booked to visit Thailand this month, first time travelers kami and fresh graduate so wala pa kaming work. But we have enough money to support our travel, what should we do?
Pag galing ka over seas may available bang domestic plane ticket sa terminal 3??? I nean chance passenger?
Hello po
Hello im going to thailand next week my friend he envite to visit do i need invations from him?.. coz i will stay in herre condo please help me…
Hi po i have a question regarding to my upcoming trip to sg. It is my first time travelling and i don’t have work po. My bf give me this trip for vacation alone. Ask ko lang po ano po yung posible question for me? Ok lang ba kahit wala ako work?thanks po. Natatakot ako ma offload :-(
Hmm most likely mapupunta ka sa gilid for interrogation kasi first time and ur travelling alone. Ganun kasi ako nung first time ko. Student ako so nagpresent Lang ako ng patunay na enrolled ako at the moment Tsaka tinanong nila ako sino nagsponsor ng trip ko, magkano dala ko, may credit card ba ako on hand, Saan ako mag sstay Tsaka kung ano mga gagawin ko. Kailangan mo Lang mapatunayan na babalik ka and Hindi mag tatrabaho or magtnt dun. Tsaka wag ka maglalabas ng phone gaano Pag kausap sila. Act normal wag kabahan. Dress properly para di mapagisipan ng masama :)
hi angeline
Greetings…..
i need your advice .my girlfriend and me are planning to meet in Bangkok on 2nd week of August.
i will join her from London and she will travel from Philippines (Manila).we will stay 7 days in Bangkok
the travel agent told her that she should not tell her that she is going there to meet her Boyfriend otherwise she will be in trouble
its her very 1st travel to abroad. as the requirement of tourist visa for a Filipino for Thailand are below
1)return ticket
2) hotel reservation proof
3) show money at least 10000 Thai Baht
she will be carrying with her all of the required things.
A travel agent told us that she should carry 2000 Thai for per day.So her stay is of 7 days so she will carry 500$ with her
she will carry her job certificate with her
she have few friends who work in a hotel in Thailand
please tell me are these all things are enough to let her clear from immigration or let me know if she need more things to carry with her
it would be great if someone can share his/her recent experience for a tourist visa for thailand
Waiting for your kind reply
best regards
Sikandar
Hi. I’m planning to go to Thailand this November 2014 under a travel agency (Shadow Travels and Tours) with my good friend. This will be my second time going abroad, but before, I’m travelling alone with an invitation letter. This time I’m using a travel agency. Is there a chance that I’ll still get offloaded even though i’m traveling with a friend? And currently I’m just under contract on my job (job order) so I can’t secure a travel order from our company. What documents should I bring? Thank you.
Hi. I’m working as a private tutor and because of that I don’t have a company ID. What will I do? Same with my mother who is just doing “paluwagan” to make a living. What should we do in this case?
HI, Please help me. I am going to Singapore soon. It’s going to be my first trip to Singapore and my first trip as a tourist visitor abroad, but this is not my first time to travel. I worked as performing artist last year in Japan and I signed another contract going back to Japan. But I am still waiting for my visa which means I am not really going to look for work there but just to take pictures of their beautiful spots and hopefully to witness events. Now, I only have my passport, round trip ticket to Singapore (5 days stay), atm, hotel reservation, money, and a pen. My question is, will they allow me to get on board even though I am unemployed this time? I got my little piggery and I lend money. what kind of proof they need from me if my job this time doesn’t have any certification?
Hello .. Good evening po.. Me and my boyfriend have a plan to travel Manila to bangkok thailand.. Im a Filipina and my boyfriend live in Vienna, Austria. He is coming here again in the Philippines by this coming December and in the 1st week of January 2016 we fly together to Bangkok Thailand. My question was. How can i pass the board to exit manila to thailand. This is my 1st time to travel abroad? What would be i needed? What are the requirements do i needed? I dont have work so i dont have company i d. And im not a student anymore so i dont have i.d.too… Thats all!!!! Thank you so much for reading my long story and much questions? Thank you very very much. God bless
Truly yours,
Marian Sheryl
This is helpful but ang comment ko lang, andaming fee!
haayst…
Hello. May itatanong po sana ako. Magta-travel po kasi kami ng husband ko sa SG for our second honeymoon. I don’t have work yet but i am a professional teacher. My husband is an ofw. Meron po kaming roundtrip ticket, hotel reservation even yong ticket sa universal studio, one of our destinations when we get there. I’m a bit nervous because it’s my first time to travel abroad. Meron pa po ba kaming dapat dalhin na ibang documents aside sa marriage contract kasi yong sa passpost ko is maiden name ko pa ang nakalagay. I am soliciting your advice on this matter. And anything you can advice for our upcoming trip is highly appreciated. Thank you and more power!
[…] sites that has helped us a lot in our preparations: https://www.thepoortraveler.net/2011/07/flight-naia-terminal-3-singapore-trip/ http://thehautemess.com/16-tips-for-traveling-abroad-for-the-first-time/ […]
Hello, I will be traveling to Singapore this July 12 . I’m coming with my mom , cousins , aunts and 2 nieces . Parents of my 2 nieces wouldn’t be coming . We have Dswd clearance already, and affidavit letter . I’m just worried if these are enough For immigration to pass my nieces , and is there any additional requirements when we reach Singapore immigration (in case you brought your nephews there ) ? I really wish you could help me . I don’t wanna ruin our vacation :(
Hello! I need some advice. Hope you can help me. I’m here at Dubai. And my boyfriend, my daughter’s dad is planning to go here pero hindi kami married. They said na cross country po. Saang bansa siya pwedeng pumunta? Yung hindi siya mahihirapan sa immigration. Yung mura lang po sana. At anong mga documents ang kailangan niyang dalhin para sa immigration sa Pilipinas at Immigration sa bansang dadaanan niya papunta dito sa Dubai? Need some advice po. THANK YOU
Following your tips made my first immigration experience done smoothly. Thank you so much. :-)
Hi!
I would like to ask if it is really necessary to present a company id? Well i’ve been to many places abroad but during that time im still employed. I just resigned at my work just few months ago and i already surrender the id. I only have with me is old college id, voters id and credit cards.
How was it with the immigration officer? Were you able to leave the country?
Hi Xhai and Ros, as a freelancer I used to travel a lot without a company ID. I just tell them what my work is. Usually, di naman na nila hinihingi after ko iexplain, but one time I had to show a certificate of employment from my clients to prove I’m employed.
If hindi ka employed kasi in between jobs, just explain that to the officer. Dito magiging useful ung travel history mo talaga.
Wow! Thank you for this! I will be traveling to the US for a training and I have no idea what to do. First time to travel internationally. Well, first time to travel (period).
Thank you for this!
hi sir i booked online using my managers credit card ,then i paid her cash do you think the immigration officer will quetion that?
hi
I just want to ask . 19 years old pa kasi ako think I would be travel by myself . tanong kulang kadalasan bang pinayagan ang ganitong Edad ??
Hello sir,, I Don’t have ITR but I have COE. I’m afraid that IO might ask for my ITR and I will not be able to provide it since I’ll be going to HK on November.
Hi. Thanks for the guide.
I have just one concern. Do immigration officers really ask for CASH or show money? I am not planning to bring much cash as I will be using my VISA and MasterCard credit / debit cards when I get there. I’m going to HK for 3 days, how much cash will I NEED to show?
Hi, Thank you for providing us the information, very helpful. I have one question. Me and my husband are planning to go to Japan this May, we are going to apply as a tourist.. and we are going to stay in our friends house.. Is that safe? I hope to hear from you soon..
If you’re going to apply as a tourist, have a hotel reservation. If you’re staying at a friend’s house, declare that you’re visiting a friend. :)
Hi ask lang po…pupunta po kasi ako ng thailand this coming february po.for 20 days.to meet my boyfriend there…may ticket na po ako roundtrip and hotel are already book.. siya po ang nag book lahat saken…pag dating po ba sa immigration itatanong po ba kung sino nag book ng ticket po?
Na print ko na rin po yung ticket tsaka hotel booking po.
Or ano pa po ba kailangan kung epresent ?
2months nalang po kasi flight ko na.first time ko po to ever..
Waiting for reply po…
Hi Mirasol, yung usual first questions ay, anong gagawin mo dun, sino ang kasama mo, and ano work mo dito. Whether or not may iba pang additional questions, often nakasalalay sa sagot mo dyan sa mga yan.
May bearing din ang travel history. So if it’s your first time to travel, marami silang questions most likely. More info here: http://www.thepoortraveler.net/2013/03/philippines-first-timer-international-flight-travel-guide-abroad/
hello po I booked roundtrip tickets for 2 po on Oct this year to SG po. 9 days po kami and we’re planning po kasi na we will stay in SG for 4 days and 2 nights in Malaysia and overnight in Indonesia. I have queries po since this is our first time to travel internartional do I need to book in advance for our accomodation in Malaysia and Indonesia para ma present ko po ito sa immigration? How much po need na cash during this trip po? I need your help po.. thank you
It’s always best practice to book accommodations in advance.
You might also want to read this post: http://www.thepoortraveler.net/2013/03/philippines-first-timer-international-flight-travel-guide-abroad/
Hi po first time ko din umalis from mnl to hk via cebu pacific ok lng po n na ung invitation letter and hostel na resibo is scan and email
Yes, okay lang yun.
Kung sponsored po kaya yung trip ng amo ng kaibigan ko sa hk ok lng kaya un honestly im un employed po kc kaso sponsored ng kaibagan ko yung trip and ang nkalagay sa invitation kc yung amo nya ang lumalabas na nag sponsor
Medyo questionable po kasi na yung amo ng friend mo yung nag-iinvite kasi it gives the impression na magtatrabaho kayo doon.
Hi Sir,
Does PH travel tax apply if I’m going to book a one-way flight from abroad to Manila?
scenario: I book a free flight (MNL – BKK) using getgo points. Then they asked to pay 881 pesos (terminal fee)… Upon checking the itinerary there’s no amount indicated. No PH Travel tax – 1,620
Now: I booked (BKK – MNL) , itinerary include Passenger Service Charge – TH = THB 700
My friend says that the 700 baht is my travel tax , There’s no need to pay 1,620 going to BKK.
I already called the cebu pacific regarding this they said that I still need to pay 1,620.
Thanks.
correction:
Does PH travel tax apply if I’m going to book a one-way flight to abroad from Manila?
From Manila to abroad? Yep, you will need to still pay P1620.
Hi ask ko lang, pupunta po kasi ako this july sa hongkong for 4 nights and 5 days. I have some queries since this is my first time to travel abroad and I don’t want to be offloaded by the Immigration.
Here are my queries:
1. Tinatanong po ba ng IO if may susundo sa hkg airport upon arrival doon .
2. Do I have to present the credit card of my friend which is used for booking tickets.
3. Will the IO aks kung bakit 1 night lang resevation sa hotel even if I will be staying in hongkong for 4 nights and 5 days.
Waiting for your reply.
Thanks
1. Tinatanong po ba ng IO if may susundo sa hkg airport upon arrival doon.
—– Minsan, tinatanong.
2. Do I have to present the credit card of my friend which is used for booking tickets.
—– Depende po yan sa policy ng airline kung saan ka nagbook. Best to contact the airline.
3. Will the IO aks kung bakit 1 night lang resevation sa hotel even if I will be staying in hongkong for 4 nights and 5 days.
—— If hingin sayo ang proof of accommodation, yes, malamang magtatanong yun kung bakit 1 night lang.
what if wala po susundo upon arival sa HK airport? would that be a problem?
Hindi po
Hello, I will be traveling to HK this July 22 for 4N5D and it’s my first time to travel abroad. I want to know if okay lang po na mag-book po ako ng hotel for just one day even if 4N5D ako sa HK. Will I not be questioned sa IO.
Thanks.
Hi Mia! Bakit po 1 day lang if 4N5D ang trip?
The following day po kasi ng mag day tour ako sa macau then pagbalik po ulit ng HK sa sa apartment na po ng tita ng officemate ko ate tutuloy as transient for the rest of my stay sa HK.
Explain that if you’re asked. Best if you also have an invitation letter from the tita of your officemate.
If hindi po ako makakuha ng invitation letter sa tita ng officemate ko. Would be enough that I can provide her address and contact number?
If hindi po ako mabigyan ng invitation letter ng titan g officemate k. Would it be okay if kinun ko nalang po yung address niya sa HK at contact number? Thanks.
Normally okay lang un. Mas safe lang talaga kung merong letter kasi baka biglang hingin.
hi,,,,, anong papers kailangan sa naia terminal 3 pabalik ako ng dubai,, dumating ako sa pinas for vacation one month now babalik nako ng dubai,,,, my oec nako, my renew visa nako and passfort, hawak ko din ang labor contract ko at company certificate ko
Ill be flying to Singapore this week and its my first time flying , okay naman na mga papers . ill be staying for 4 days and 3 nights . Is it okay that ill be bring like ube jams ? in my check in baggage as requested by my friend in singapore .
Hi! Di ako sure. I think okay lang kasi processed naman, basta properly packed.
Hello PO my flight is on JUNE 15,2018 next Friday from manila to Sydney. ask ko Lang po if Tama po ang pagkaintindi ko sa procedures… So una po mag fifill up Muna ng card kukunin SA counter tas mag checheck in na po ? Then, ibibigay ung passport and itinerary at ung no fill up na form tapos magbabayad po NG travel tax and terminal fee ? And then proceed na PO SA immigration para SA stamped NG passport then dadaan na PO SA pray for metal detecting. And then proceed na PO SA departure area.?
So ask ko Lang po if need PO NG show money SA Immigration although kasama ko Naman PO baby ko na 1 yr old and sponsored PO ako SA LAHAT NG fiancee ko when go down to Sydney ? Kasi po 5k Lang budget ko to pay the travel tax and terminal fee.
Thank you !
Hi Michelle, we have a more updated post here: https://www.thepoortraveler.net/2013/03/philippines-first-timer-international-flight-travel-guide-abroad/
But to answer your question, now it’s best to pay the travel tax first, then check-in, then fill out the departure card, then go to Immigration.
Hi Sir ! Tatanong ko lng po sana pwd po ba mag travel na graduate student palng.,? Yung purpose ng travel is reward sa self namin kasi graduate nkmi at yung travel nmn galing sa savings namin. Me and my friends kasi planning to travel malaysia,vietnam and singapore. Nag aalinlangan po kc kmi bka kailangan pag mg trvel my trabaho na. Yung mga nabasa ko po kc pg sa imiggration na hinahanapn ng company id. Pwd po kaya kmi mag travel? Sana po matulungan nyu kmi, thank you po
Hi Sir! just want to ask lang po first time traveler if ano po procedure ng hong kong airport to manila? meron pa din po ba immigration? Thank you so much been searching pero wala po kasi ako makita na step by step ng depature from hongkong the arrival in PH.
Hi Shey, similar din. Sa terminal, hanapin mo lang ung check in counter mo, tapos check in ka. Then after that, may immigration and security check din. :)
Sir paano po pag Goverment employee po? Anong Ipapakita na ID? At Ano Po hahanapin ng Immigration officer pag Govertment employee po
ID + travel authority.
Tanong ko Lang po Sir Kung ano po hahanapin ng immigration officer pag government employee po ako?
ID + travel authority.
Good am. Its my first time to travel abroad po. As Tourist
Pero na hold po ako sa immagration
May binigay po requirment yung cinsulate sa akin. Pag na complet ko ba yun. Hindi papaliparin na po vah nila ako?
Need po kc nang invitation later from my sponsor. Pag na bigay ko po bah yung hinihingi nla
Ma kakalipaD na po bah ako ?
Hi,we will be going to bangkok this oct . And we are 4 my inlaws (senior )and my son .we are all firstimers to travel abroad and we ere staying there for 4d3nights how much money do we bring converted to baht?thank you
Hi Jane, Thailand has a policy that every traveler must have at least 10,000 baht (or equivalent in other currencies) upon entry. More info here: https://www.thepoortraveler.net/2017/07/bangkok-travel-guide/
First time to travel abroad as tourist. Ask ko lang sir kasi unemployed ako pero sponsor ko yung uncle ko sa dubai then may pinadala sya saking affidavit present ko daw sa immigration. Since unemployed ako makoquestion ba ako sa immigration?
Pag unemployed, malaki talaga chance na maquestion so be confident with your answers and have supporting documents.
hi, first time to travel Australlia. I have all the requirements (visa, ticket other supporting docs) then the invitation letter says spend family time and celebrate my grandma’s birthday there………. and ako ung companion nya sa pag alis kaso ayaw nman nya umalis help.thankss Godbless.
Get another invitation letter.
hello. can I bring meds for common illnesses –like biogesic, diatabs, advil etc?
2nd question – high pa rin ba ang possibility ma-offload pag government employees (with authority to travel)?
thanks.
Hi Elle,
Yep, okay lang ung biogesic, diatabs, advil. I always bring them when I travel too.
No idea dun sa 2nd question though. :(
Hi po, I have a question my husband is working there in malaysia but for short term, and he want me to go there with my son which is under 2 yrs old. I am a housewife, my husband will be the one who will book our ticket online and we will be staying in his hotel for about 4 weeks . Is it fine to just tell the IO that we will be there for vacation ?. Or we will just tell to visit my husband?. Do we need to present a iterinary , and do we need to present an invitation letter?. Next week napo yong flight :( sana po mabigyan niyo ako nang advice:) thanks
Hi Joan, best to tell the truth that you will be visiting your husband. Hindi rin kasi believable ang 4 weeks na vacation in 1 place lang.
Di ko alam ano lahat mga dapat dalhin pero dala ka na rin ng proof that your husband lives there.
Please note na visa-free lang ang Malaysia if yung stay ay 30 days or shorter. If longer, need na ng visa.
Strict po ba ang immigration when you travel 7days in Thailand how is immigration check if you have any pending case…
Hi Marryanne, di ko alam about sa ganyang case. :(
Hi, first time po ako magtravel sa uae,ppntahan ko po ung asawa ko sya po ang sponsor ko at husbannd hisa po ako, anu ano po b mga tatanungin sakin sa immigration? Thanx
Pabasa na lang po nito: https://www.thepoortraveler.net/2013/03/philippines-first-timer-international-flight-travel-guide-abroad/
Sir..gud day..ask lng po if allowed to hand-carry baggage ang Backpack & Camera bag?
Yep, pwede.
yung weight limit, depende sa airline. May airline na yung 7kg ay combined na nung backpack and camera bag. May airline na hiwalay pa ang count sa camera bag.
Sir..ask po is need pa po kuhanan ng Travel Clearance Cert. for Minor ung anak ko, di po kc sya nk surname sakin…pero naka acknowledge po sa Birth Cert. nya.
Hi Ace, ask nyo na lang po directly yung DSWD Field Office na may sakop sa area nyo.
Ito po yung list of field offices: https://www.thepoortraveler.net/2014/04/dswd-travel-clearance-minors-application-requirements-frequently-asked-questions/#2_Find_the_nearest_DSWD_Field_Office
Hello. I will be going to Macau this August. I will go there to celebrate my birthday. My boyfriend is actually working there and is staying at his cousins’ apartment. Is it also safe for me to use the address of his cousin?
hi,tanong lang po i have flight going to peru and my two stop ako sa taiwan at amsterdam at yong airplane na sasakyan ko iisa lang siya manila to taiwan dutch and taiwan to amsterdam dutch din at amsterdam to peru dutch airline din.lalabas po ba ako ng airplane while waiting sa next flight.thank you
Hi Shanshan, best to contact your airline directly kasi depende po yan sa specific flights.
Credit card – Some airlines require a copy of the credit card used when the tickets are booked online. You might also need it as a safety net in case you run short of cash. Some hotels also ask for credit card for deposit.
Hi regarding this one, is really necessary? It was my cousin’s CC from abroad ang ginamit for ticket booking. Do I have to bring a photocopy of it? Baka kasi di niya ipa photocopy due to privacy.
Hi Paolo,
It depends on the airline po. Best to call the airline and ask about their credit card policy when checking in.
Klngan po b tlga mauna magcheck in bago pumunta sa immigration booth? Pno kung after mgcheckin tas inoofload kme ng immigration ng interview , pno mbabawi ung baggage?
Yes po, nauuna po talaga ung check-in.
May byahi po ba ngayong October 10 2020 10am
Naka pag pa book na ako pero gusto kong malaman kong may flyt nga ba talaga.
Is it okay to bring external hard drives that contain downloaded torrent movies to Germany? Would they check it at the airports?
sometimes you need to educate the immigration officer too. i ve travelling abroad for the 10 years as my work require it. my passport already full just in 2 years of travelling. one time an immigration officer stop us and queationes us and even holding ua bringing ro their office. very rediculous as it was our fisrt time being held.
Hello po,wanted to ask what to do,im dual citizen and my daughter is not we r going back to her father country,on june 29.what probably the immigration will ask aside from passport?do they ask my daugter swabtest?she is only 4.
Hard to say po without any more information. It depends on a lot of factors like which country you’re going, age of your daughter, etc. You may contact din po BI directly.
Hello po, i wanted to ask for an advice or guide.I Will travel thailand by september to meet my boyfriend there what are the documents i need to bring especially in the immigration desk and its my first time travelling to aboard. All the expenses is sponsor by him.
What is the nationality of your boyfriend? Have you met in person before?
india, yes he keep coming every year here in the philippines , 10times he keep cominf here but due to pandemic 2years he didn’t come.
First and most important is proof na babalik kayo, so return ticket and baka tanungin kayo about your employment dito sa Pilipinas.
If matapat po kayo sa strict na IO, they might also ask for proof of relationship. Hindi po namin ganun ka-gamay ang rules sa ganyang situation na foreigner ang inviter kasi very tricky po ito sa eyes nila because of human trafficking concerns. But we explained that po a bit here: https://www.thepoortraveler.net/2014/03/offloaded-philippine-immigration-rules-requirements-airport/#Travelers_who_are_Accompanied_or_Sponsored_by_a_Foreigner
Good day I’m stress already pls response in my post I’ve been operated here land now I have medical clearance can travel and fit to work
My visa is work visa under partnership .so only one year is my visa so I didn’t know that there’s a required gcp or cfo?which when I register online don’t have any vacant slot already full slot by next week my flight is on Aug.7.pls help me don’t know what to do all been organized I have my ticket visa and passport and medical certificate.thank you .last year they didn’t ask me about the gcp when my visa is tourist even it also required .pls help get stress already.thank you